Exercise: A quick start to customizing in modular projects
This guide is a concise, hands-on introduction to customizing within a modular project setup.
You should still complete the standard customizing training before or alongside this guide.
While this guide enables quick, hands-on customizing in modular projects, you should still understand the theory of modularization (module boundaries, extension points, services, dependency management, and the transpile/merge model). A solid conceptual grasp is essential to make correct design decisions, avoid brittle overrides, manage module lifecycles, and keep your project maintainable.
After completing this exercise, you should be able to:
- Set up a modularized xRM project fork, link it to an SSP dev system, and deploy via Designer with automatic transpile/merge.
- Be able to understand how to extend an Entity via Extension Points.
- Be able to how to change a existing element (e.g., a field) in the Designer via modifications.
Create a modularized project in GitLab
For this exercise, create the project in your personal GitLab space. For customer projects, use the appropriate group/space.
For practice, fork the xRM project. Click the Fork button in the top-right. Optionally change the project name/slug. For Project URL, choose your own username.
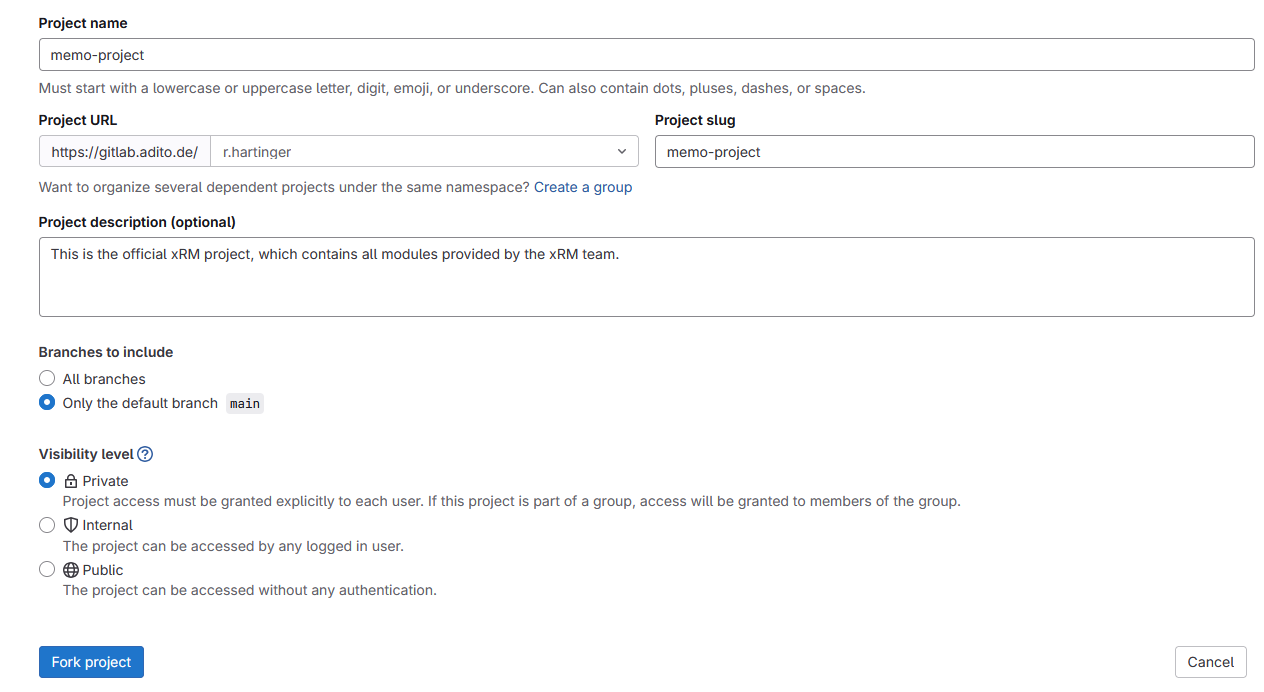
Figure: Forking the xRM project
Next, create a new dev SSP system from the forked project.
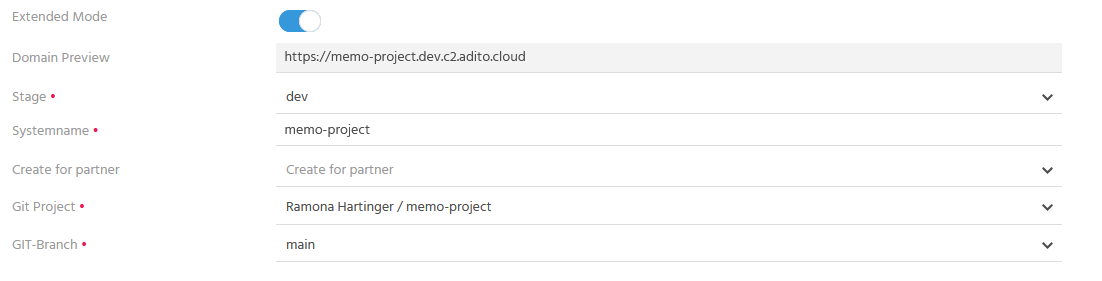
Figure: Creating a dev SSP system
Make sure to enable "Extended Mode" to be able to create a Dev system.
While the SSP system is starting, open the project in the Designer as usual.
Use "File → New Project". You can either select "Clone from Git Repository" or "Load cloud system". Both options work.
Run npm install to fetch all dependencies.
After cloning, right-click "system → default", then choose "Link to cloud system" to connect to your SSP system.
Customizing with a modularized project
The next sections introduce customizing in a modularized setup. If you're already comfortable with it, feel free to skip.
Add a new field
We'll add a new field to the Organisation_entity (module contact).
Open the entity in the Designer.
In the right-hand navigator you'll see existing fields.
Among them, you'll find an Extension Point.
Extension points are explicit "contracts" defined by a module author describing how an entity can be extended.
In this case, the author of the @aditsoftware/contact module provides an interface for adding a field.
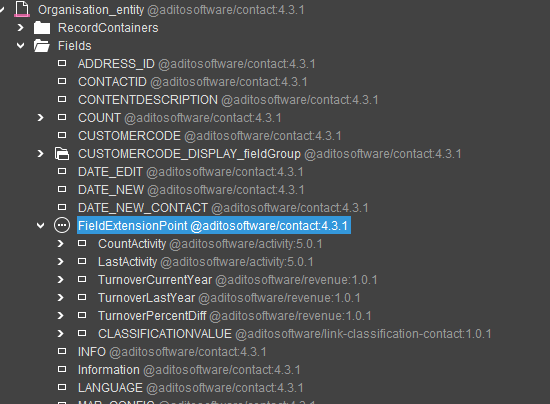
Figure: Organisation_entity fields and the extension point
Always use an existing extension point to add elements. If none exists, contact the module author to request an appropriate extension point.
To add a field, right-click the existing FieldExtensionPoint and select "Add implementation".
Create a new field named HelloWorld.
Add a title and the following valueProcess:
import { result } from "@aditosoftware/jdito-types";

result.string('Hello World');
Your field should look like this:
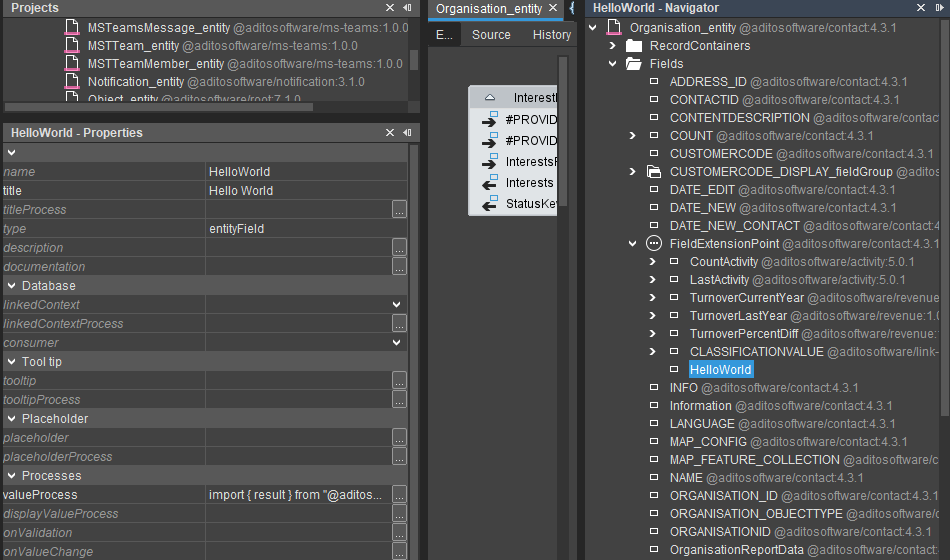
Figure: HelloWorld field in the ADITO Designer
To show the field in the client, add it to the OrganisationPreview_view in the "Info" view template at the end:
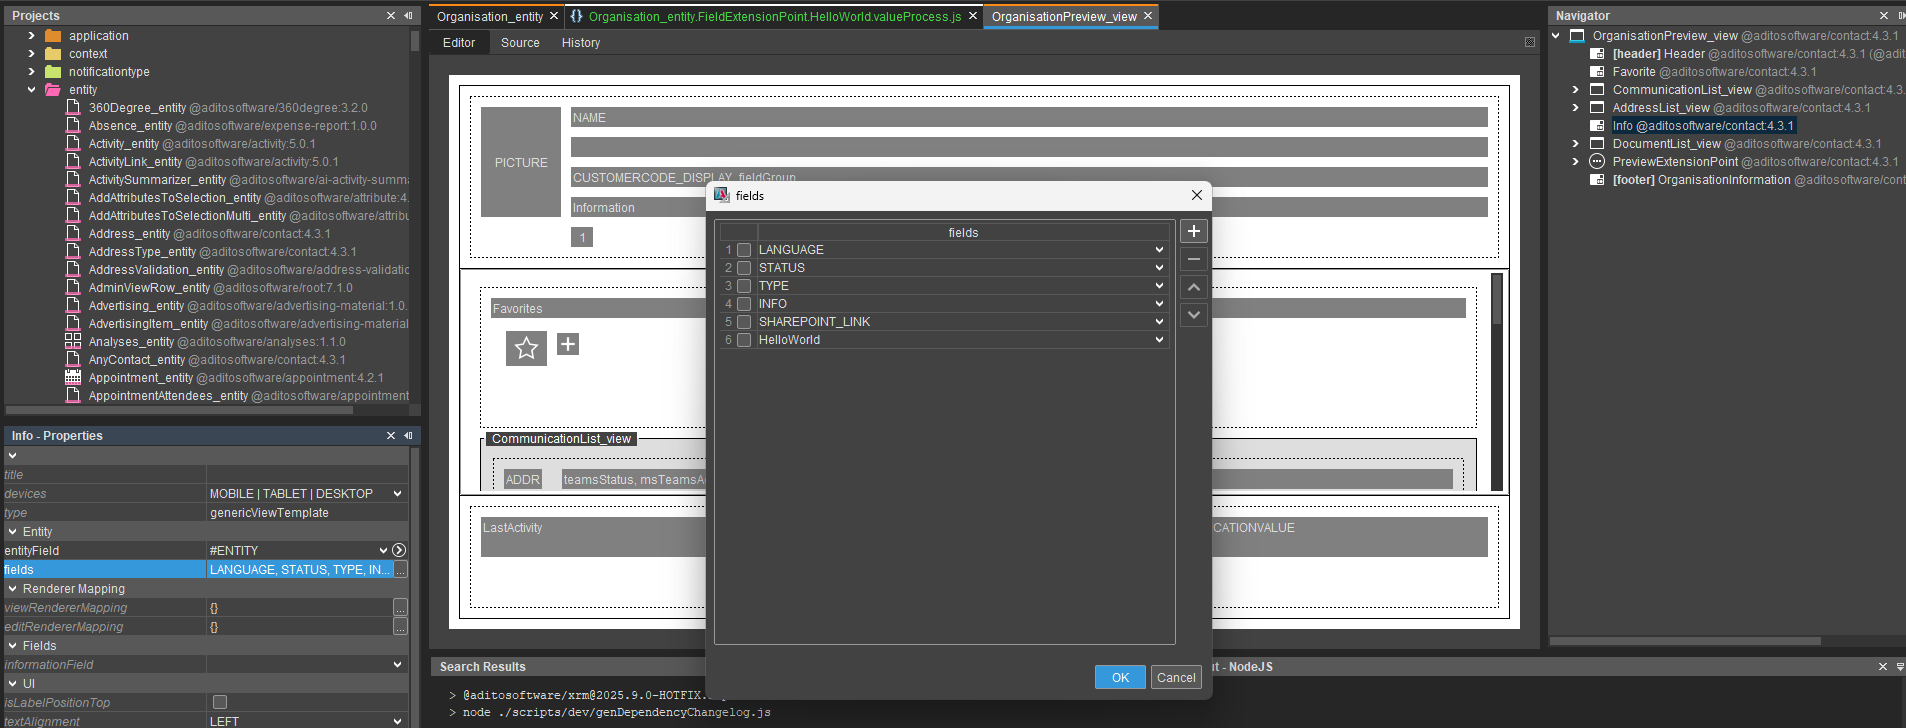
Figure: HelloWorld field added to an existing view template in the ADITO Designer
Now prepare to deploy the changes.
To deploy to SSP, first open tunnels. In the Designer, right-click "system → default → Open Tunnel". This opens tunnels just for the Designer application.
To open tunnels for other applications as well for the Designer at the same time, download the scripts from the SSP system under "Tunnel → SSH tunnel script for Windows" (or Linux/macOS as needed).
When tunnels are open, click "Deploy" in the menu bar.
In modularized projects, a Transpile runs before each deployment automatically.
It collects changes from all dependencies and merges them into the dist folder so all modules and your project changes are applied coherently.
After deployment, open the Company context and its preview. You should see the new field.
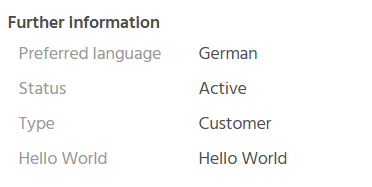
Figure: HelloWorld field in the preview of an Organisation
Create a Git commit in the Designer. Review the changes. Open the file in the Modification folder and try to understand it using the explanation.
Adjust the contentTitle
As an example, we'll override a process to change the content title. The approach is the same for any existing process in properties or under processes, provided it comes from a module.
Only override processes when really necessary. Prefer using Services where possible.
Open Organisation_entity (module contact) and locate contentTitleProcess.
You'll notice you can't edit it directly.
Use "Override Process" to replace it:
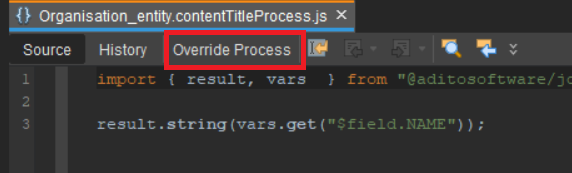
Figure: Override Process button in the ADITO Designer
Then adjust the process like this:
import { result, vars  } from "@aditosoftware/jdito-types";

result.string(vars.get("$field.HelloWorld"));
Use "Open Original Process" to view the original. Toggle between both to compare.
Deploy and open a Company in the client.
You should now see "Hello World" as the main view title.
Create a Git commit in the Designer. Review the changes. Check the Modification folder and map what you see to the explanation.
Adjust conditionProcess of a database RecordContainer using Services
Instead of fully overriding a process, use Services to extend it. A process can include a placeholder in source code that loads and invokes defined snippets (implementations) at that location. This lets you extend a process from a module without replacing it.
In Organisation_entity (module contact), the db Record Container's conditionProcess demonstrates this.
It uses modules.loadService to load a named service and invoke all of its implementations.
In this case, the entity exposes a service named organisationConditionProcess_service.
Find this service in your entity's navigator.
You'll see implementations provided by other modules:
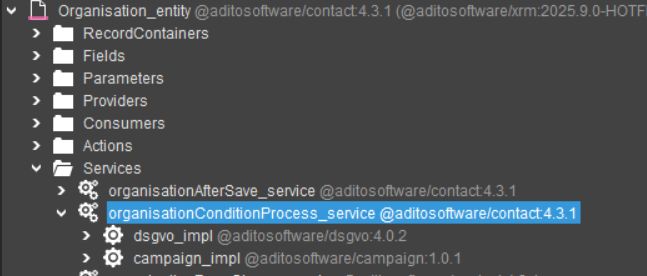
Figure: OrganisationConditionProcess service in the ADITO Designer
For example, there may be one from @aditosoftware/dsgvo and another from @aditosoftware/campaign.
Any module can contribute its own implementations.
Right-click and select "Add implementation".
Name it onlyCustomer_impl because we want the RecordContainer to return only customers.
Add the following implementation:
import { newSelect } from "SqlBuilder_lib";

let res = (pCond) => {
    pCond.and("ORGANISATION.KIND", "ORGCUTOMER");
}

//@ts-ignore
return res;
Deploy and check the Company Filter_view in the client. You should now only see records with Type "Customer".
You can inspect the merged conditionProcess in the project's dist folder (via your file explorer). Search for your process and locate your service and implementation within the transpiled output.
Create a Git commit in the Designer. Review the changes. Check the Modification folder and relate what you see to the explanation.
Change a property of an existing field (state)
Next, change a field property. Open the organization's NAME field and set its state to READONLY.

Figure: Change state of a field
This works as usual.
In the Git commit dialog you'll see a corresponding Modification.
All changes so far created at least one Modification. Unlike non‑modular projects, changes to module-owned objects are not edited in place; they're stored separately and applied during transpile. This reduces merge effort and ensures objects contain both the latest module updates (per version) and your project-specific changes.
Removing modules
The project initially includes all standard xRM modules. You can see them in package.json under dependencies.
For real projects, consider starting with only necessary modules to reduce maintenance overhead.
You can remove all modules containing ews in their names by deleting them from package.json.
To update node_modules and actually remove them, run npm clean-install.
You may need to restart the Designer to pick up the changes.
Then deploy. You will notice in the deploy dialog that a lot of elements are removed.

Figure: Global Menu before removing modules
If you look in the global menu, you notice that some elements are gone.

Figure: Global Menu after removing modules
Try removing more modules. Some modules depend on others, so not all can be added/removed in pure plug-and-play fashion.
Translating text
Translations continue to use LANGUAGE files. For each module that provides translations, there's one file per language. You can see them in the Designer under the language folder.
During transpile, these files are merged into a single file per language. Keys from your modularized project are appended last so you can override module translations.
To change an existing translation, right-click it and choose "Override Keys". A corresponding entry is created in the current LANGUAGE file's source, which you can then edit.
Try it: open ____LANGUAGE_en_activity and override a value.
It will be copied to _____LANGUAGE_en, where you can edit it.
Naming convention: <ModuleName>_Key is commonly used for translatable texts in modules (e.g., entity titles in properties).