Experimental — Standalone Transpile and Deploy (Transpile v2)
This plugin is not intended for use in production systems and must only be used in controlled test or development environments.
The Designer plugin "Experimental: Standalone Transpile and Deploy" provides native, standalone tools for transpile and deploy.
Benefits:
- Tools run outside the Designer integration and are less affected by the IDE's file system.
- Noticeably improved performance in typical scenarios.
Due to the early test phase, there is currently no comprehensive set of long-term experience values. Although the transpile process has been tested successfully against xRM and no quality issues were identified, functional gaps or edge cases cannot be fully ruled out at this stage.
All users of this plugin are explicitly requested to report any errors, inconsistencies, or unexpected behavior by creating a ticket. Feedback from these test runs is required to stabilize and further develop the tooling.
Configuration
After you have installed the plugin, you need to switch manually to the new tools.
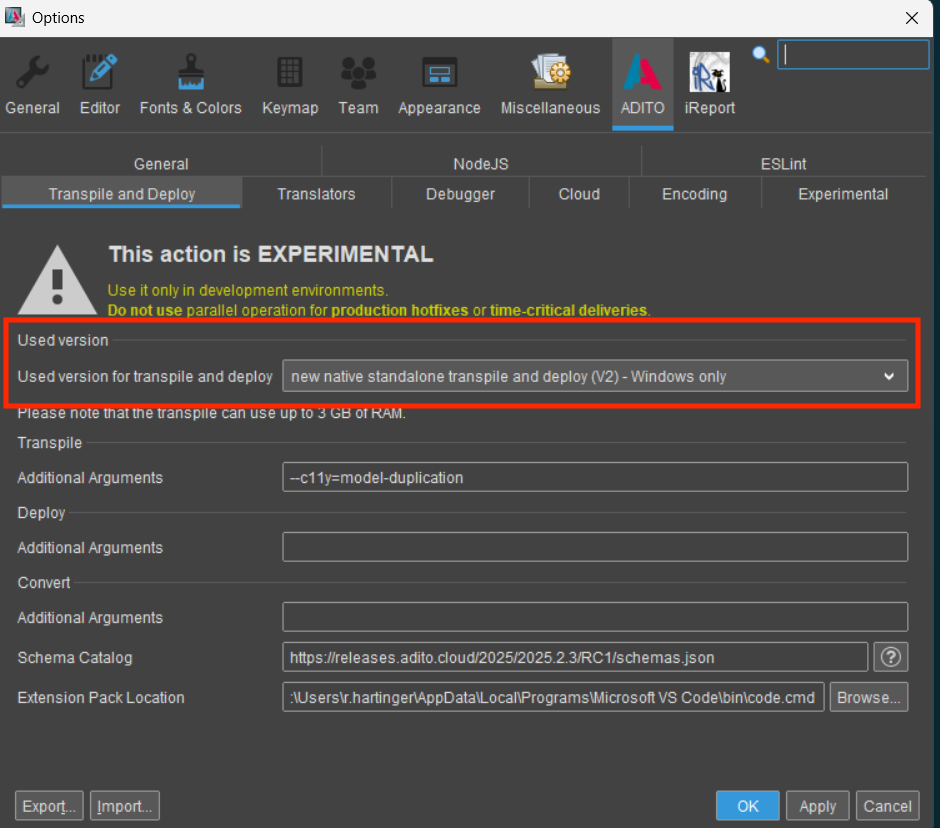
Figure: Option to switch to the new native tools (V2)
Additionally, you can specify additional arguments for both tools. For more logging output, you can add the following arguments:
-venables debug logs-vvenables debug and trace logs
If you encounter any error or inconsistency, please enable trace logging with the -vv parameter. Use the full log from the very verbose transpile run to submit a ticket.
Availability and current limitations
The current implementation of Transpile v2 is subject to several availability constraints and known limitations that should be considered when adopting it in customer projects.
The transpile process is currently supported on Windows systems only. While the full transpile mode is fully supported, partial transpile options triggered from the Designer will still execute a full transpile internally. On typical Windows test systems, a full transpile completes in approximately 35–40 seconds.
Functional Compatibility and Expected Differences
The new transpile process is designed to be functionally interchangeable with the existing transpile implementation. In principle, projects can be transpiled and deployed in the same way as before without requiring structural changes.
However, users should expect that the first deploy after switching to Transpile v2 may show a large number of differences compared to previous deploys. This behavior is intentional and expected.
These differences are the result of multiple bug fixes and normalization improvements that were not consistently applied in the legacy transpile process. Examples include, but are not limited to, the following aspects:
- Superfluous or semantically irrelevant empty lines are removed during transpilation.
- Whitespace handling has been stabilized so that spaces within processes are preserved consistently.
- Import handling has been improved so that duplicate imports are detected and removed already during the transpile step.
The resulting differences do not indicate functional regressions. They reflect a cleaner and more deterministic output generated by the new transpile implementation.
Conflicting modifications within the same module
In Transpile v2, conflicting modifications applied to the same source file within a single module are currently not treated as an error. If multiple modifications target the same element with competing values and all modifications are located within the same module, no exception is raised.
From a user perspective, this behavior is problematic, as it is not deterministic which value ultimately wins during the transpile process. This may lead to inconsistent results between local executions and CI pipeline runs.
In previous implementations, such conflicts typically resulted in a DiamondModification error. For Transpile v2, the same strict behavior is expected, regardless of whether the conflicting modifications originate from different modules or from the same module.
The desired behavior is as follows:
If conflicting modifications affect the same file within the same module, the transpile process must fail with an error.
If the diamond situation is resolved by a modification located higher in the module hierarchy, no error should be raised.
Until this behavior is implemented, projects with conflicting modifications inside a single module may produce non-deterministic results.
Project-level overrides of module content
Transpile v1 allowed project files to explicitly override files originating from modules by placing a duplicate file directly in the project. This behavior enabled users to fully replace module-provided data models with project-specific definitions.
In Transpile v2, this override mechanism is not yet fully implemented. As a result, duplicate files that exist both in a module and in the project may currently lead to warnings or unexpected behavior, even though such setups were previously valid.
The expected behavior is that project-level files always take precedence over module files, without producing warnings or errors. This applies in particular to data models, alias definitions, and language definitions.
The intended resolution rules are:
- Duplicate files are valid if one copy is located in the project.
- In case of duplicates, the project version must always win.
- The applyAllModifications flag in data models must be evaluated accordingly.
- Duplicate handling must be consistently applied to alias definitions and languages.
This limitation is especially relevant for projects that replace complete data models by copying them into the project. Until this behavior is fully supported, such scenarios may require staying on transpile v1
Deploy to SSP systems
Starting with version 1.1.1 of "Experimental: Standalone Transpile and Deploy" manual tunnel configuration via standalone scripts or Designer-specific hosts file adjustments is no longer required as part of the deployment workflow.
If tunnels are already open, the deployment process automatically resolves the corresponding SSP hostnames to their local tunnel IP addresses before executing the deploy. This ensures that database and system connections are routed through the active tunnel without requiring manual modification of the system hosts file.
The behavior is controlled via a dedicated option in the Transpile v2 settings.
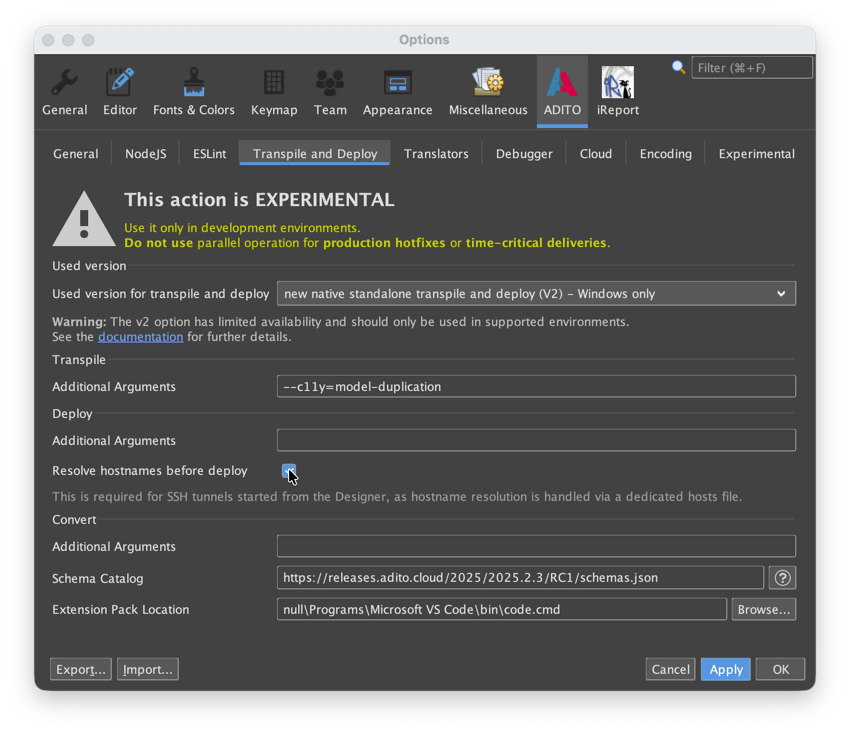
Figure: Option to enable hostname resolution via open tunnels
Transpile v2 does not open tunnels automatically.
An active tunnel must already exist. If no tunnel is open, hostname resolution will not be redirected.
Manual hosts file modifications are only required in legacy environments or when using older versions (< 1.1.1).
Legacy tunnel setup (versions < 1.1.1)
Option 1: Standalone Tunnel
When deploying to SSP systems that require tunnel access, tunnels must not be opened via the Designer. Instead, download the tunnel script from the SSP system under “Namespace → Tunnel → SSH-Tunnel-Script for Windows” and open the tunnels using this script before starting the deployment.
If tunnels are opened through the Designer, database access required for deployment will not be available.
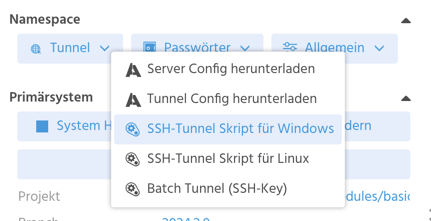
Figure: Download the tunnel script from the system
Option 2: Designer Tunnel
This option provides an alternative way to open tunnels using the Designer. It should only be used if Option 1 cannot be used or does not work in the current environment, as the Designer-based setup requires additional manual steps.
The Designer tunnels must be explicitly connected before they can be used outside the application.

Figure: Connecting tunnels in the Designer
After the tunnels are connected, the corresponding hosts file can be opened via the toolbar.

Figure: Opening hosts file via toolbar
The hosts view lists all currently opened tunnels. The first column shows the local tunnel IP address, and the second column shows the hostname of the remote system.

Figure: Hosts file with opened tunnels
To make the tunnel usable system-wide, the displayed entries must be added to the system’s default hosts file.
This is done by copying the entries from the Designer hosts view into the system hosts file.
On Windows, the system hosts file is located at C:\Windows\System32\drivers\etc\hosts.
On Linux, it is located at /etc/hosts.
Editing the system hosts file requires administrative privileges.
Open the system hosts file in a text editor with sufficient permissions and paste the entries from the Designer hosts view.
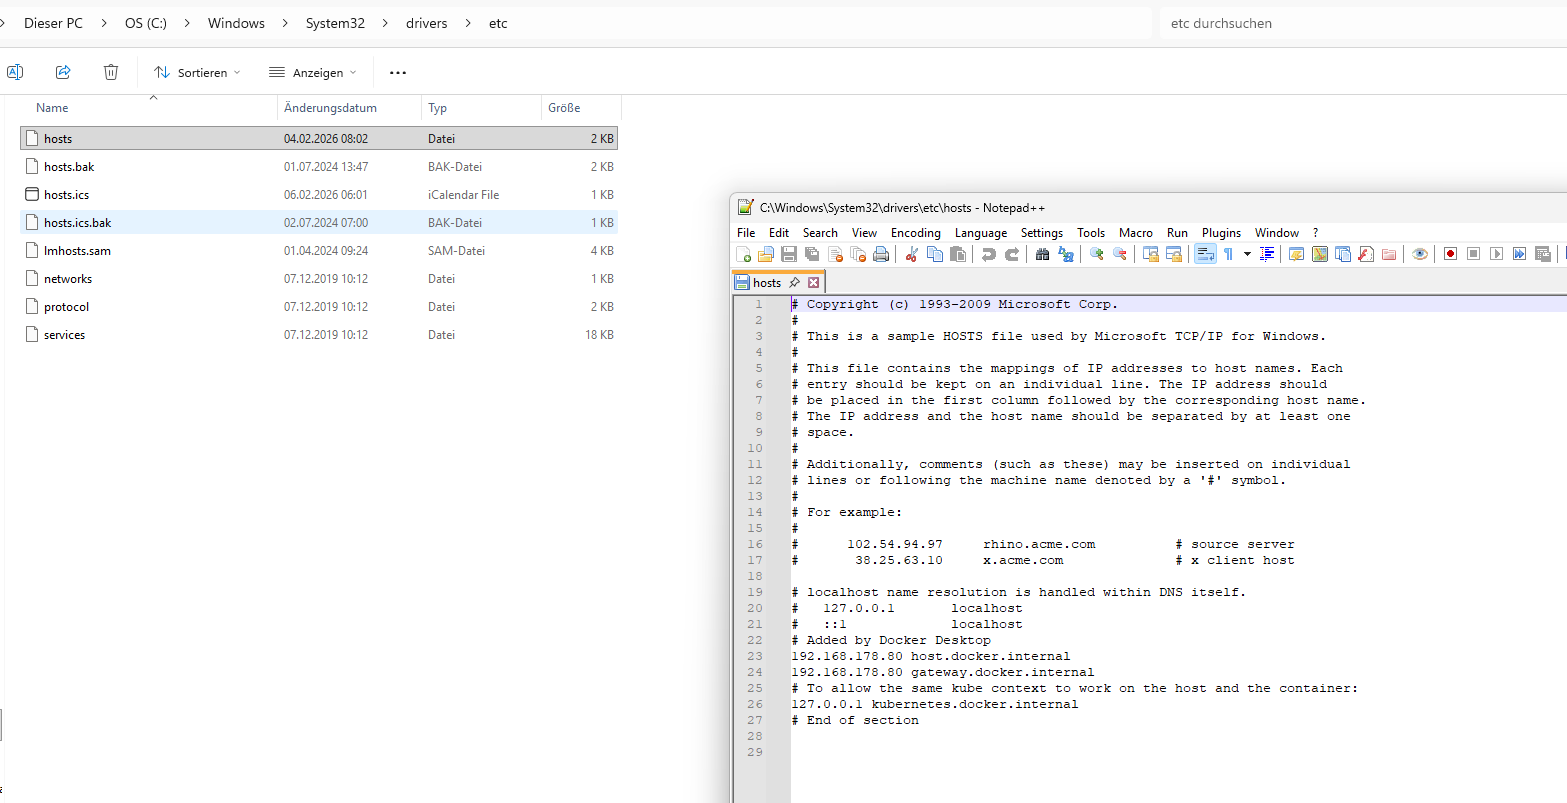
Figure: Hosts on Windows, including Explorer
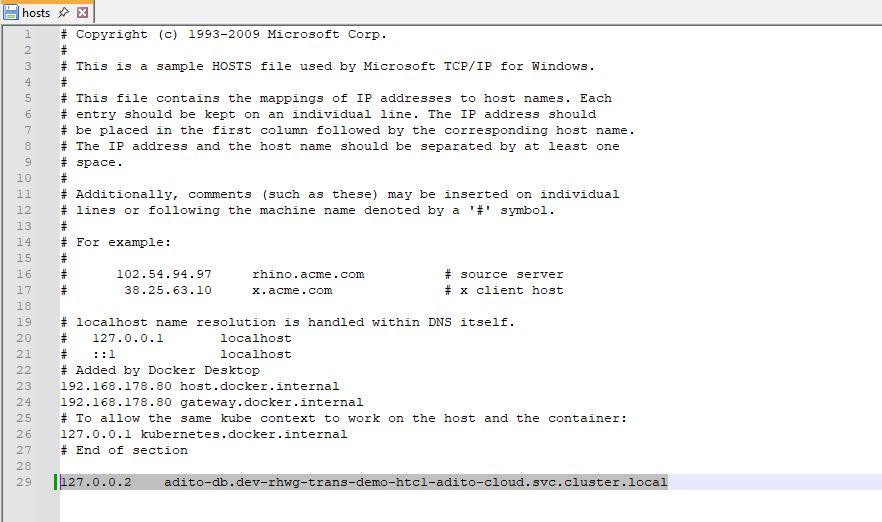
Figure: Hosts on Windows with our new entry
Remove the hosts entry after closing the tunnel to avoid unresolved hostnames later.