Experimental: Working in the Extension Pack
Parallel operation (AOD ↔ YAML / Extension Pack workflow) is experimental.
Expect breaking changes, incomplete functionality and workflow adjustments between versions. Use this feature only in development environments and commit your work before converting in either direction.
Do not use parallel operation for production hotfixes or time-critical deliveries.
This guide provides step-by-step instructions on how to use an existing AOD project within VS Code by converting it to YAML. It also covers how to edit YAML data models and convert them back to AOD. This process applies to both projects and modules.
This guide will use version 2025.2.3 and a Project located at C:\dev\projects\activity, but you are free to use any other version and project.
The Converter tool is provided as via the "Experimental: Transpile and Deploy" plugin.
Currently, this tool is available for Windows only.
Prerequisites
Before converting your project, ensure the following requirements are met.
Designer Version
Use Designer version 2025.2.x or higher. It is highly recommended to use the latest available stable version.
Designers below 2025.2 are not supported.
Schema Catalog
A JSON Schema acts as a formal contract that defines the structure and validation rules for your data, much like an XSD does for XML. Since YAML is a human-friendly superset of JSON, these schemas are used to validate your YAML files, enabling IDE features like autocomplete and error highlighting.
A Schema Catalog (the schemas.json file) is a central registry that organizes these individual schemas. It maps specific file patterns to the correct rules, ensuring your editor automatically knows how to validate different data models based on their file names.
The Schema Catalog is the one element that has a connection to the core version of your ADITO Designer. Its content will change depending on the core version you are using.
The Schema Catalog is directly tied to the core version of your ADITO Designer.
Setup of the Schema Catalog
Verify that the Schema Catalog with its schemas.json is available for your core version in the Version Management downloads section.
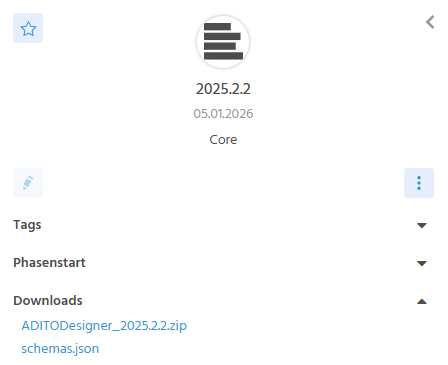
Figure: Downloads section in Version Management including the schemas.json file for the desired core version
If the schemas.json file is missing from your desired version, then you cannot use this version for the parallel operation.
For the Designer to use the correct Schema Catalog, you need to do the following:
- Click on
schemas.jsonfor your specific core version and copy the URL from your browser's address bar.
Structure of the URL:https://releases.adito.cloud/<majorVersion>/<versionNumber>/schemas.json - Configure this URL in the settings of the ADITO Designer.
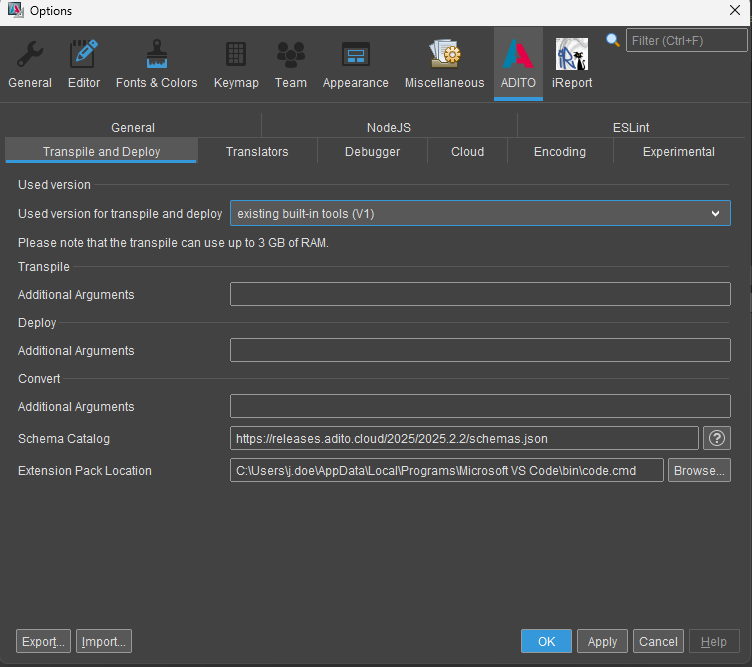
Figure: Schema Catalog URL setting in the ADITO Designer
Project State
Make sure your project is up to date before converting it.
- Open your project in the Designer.
- Run the Upgrade All Models action to ensure compatibility.
- Execute a Deploy to update your SSP system.
- Commit all local changes to your Version Control System to ensure a clean starting state.
Upgrade to Devtools Version 3
To benefit from improved IntelliSense and autocomplete features, ensure you are using Devtools version 3 or higher.
- Process Declarations: Use createTypes within your modules to generate the necessary declaration files for your processes.
- Workspace Configuration: Use createJsconfig in both your project and individual modules to generate an optimized
jsconfig.jsonfile.
Workflow: AOD to YAML
In the ADITO Designer, there are two ways to convert an AOD project to YAML
Open in Extension Pack
In the Designer, you can find the Open in Extension Pack action in the global toolbar, the project context menu or by pressing F7.
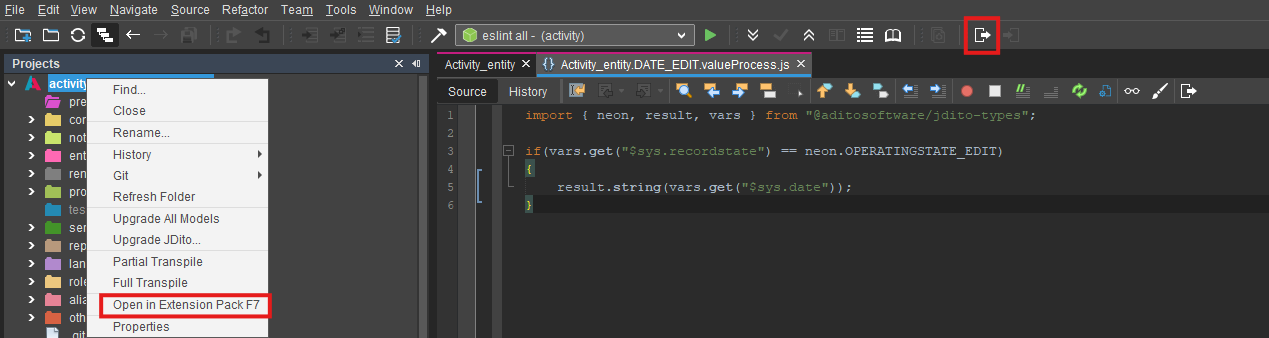
Figure: "Open in Extension Pack" Button and Context Menu
Result:
- Your project is transformed into a YAML structure located in a new folder suffix
-yaml(e.g.,activitybecomesactivity-yaml). - The YAML project is automatically opened in VS Code.
- Note: Dependencies are usually not converted. Run
npm installin the VS Code terminal to restore them.
Open Process in Extension Pack
You can also open individual JavaScript processes directly by pressing Ctrl+F7 or by clicking the corresponding button in the Designer's code editor.
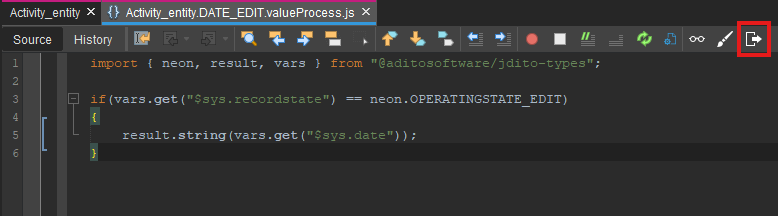
Figure: "Open Process in Extension Pack" button within the JavaScript editor
This action triggers a standard project conversion and then automatically opens the specific JavaScript process in VS Code.
This workflow enables faster editing of individual processes and provides a more seamless transition between the Designer and the YAML-based environment.
Post-Conversion Setup in VS Code
Once the conversion is complete and the target folder is open in VS Code, you must manually install the project dependencies.
The converter tool respects your .gitignore settings and does not transform or move ignored files and folders. Consequently, dependencies (such as the node_modules folder) are not included in the conversion.
To restore them, run npm install in VS Code.
Editing in VS Code
This section focuses on editing YAML and JavaScript files in Visual Studio Code.
While AOD files do not support Autocomplete in VS Code, they can still be edited manually.
Creating a New Process Data Model
This section describes how to create a new Process Data Model. In this guide, we will use the name MyDemo_Lib for our process.
Create the file structure
Create a folder named processes (if it doesn't exist). Create a subfolder for your process (e.g., MyDemo_Lib).
Create a file named MyDemo_Lib.process.yaml inside your folder. This will be the configuration file for your process. Those configurations done there are visible in the Property Sheet of AOD projects.
Create the file content
In your newly created file, initial errors may appear because required fields are missing.
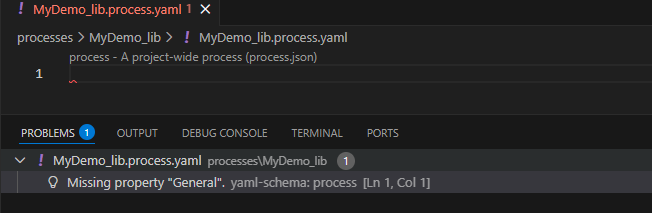
Figure: Empty Process Data Model with errors
We can easily add those required fields by using Autocomplete.
Press Ctrl+Space to trigger Autocomplete.
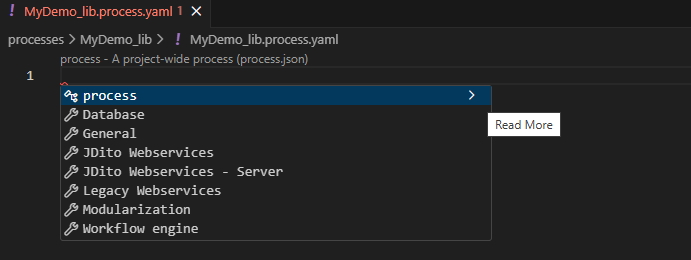
Figure: AutoCompletes with the "Read More" area collapsed
Click the "Read More" arrow on the top-most element to see detailed property descriptions and default values.
This setting will stay active until you click the arrow again.
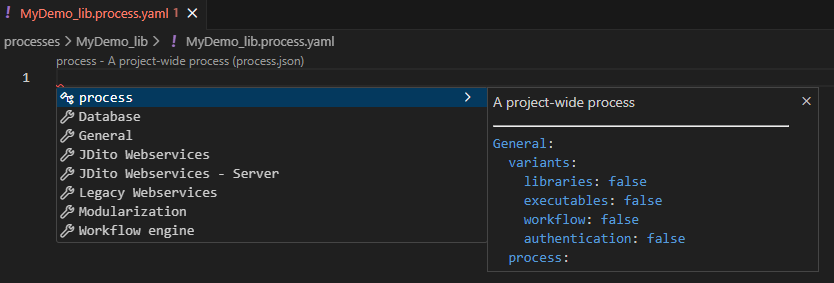
Figure: Read More area expanded
The top-most element in the AutoComplete list contains all required fields for your data model and is named like your data model type.
All elements below are groups in your data model that can be added later.
Press Enter or Tab to insert the suggested structure.
You will notice that the process is missing.
You can press Ctrl+Space to get a suggestion for the process property.
For now, you can just use ./process.js as value.

Figure: Process Data Model with necessary properties
Remember to set the variant of your process. Otherwise, your process will not be recognized by the web client.
Creating and Linking a JavaScript Process
Currently, the now created *.process.yaml file does not have a valid JavaScript process.
It just has a reference, that ./process.js is its process, but it does not exist yet.
The JavaScript process path is relative to the *.process.yaml file.
We need to manually create the process.js file in the same folder where our MyDemo_Lib.process.yaml file is located.
Now, we can add any JavaScript logic to our process.
Your project can now look like this:
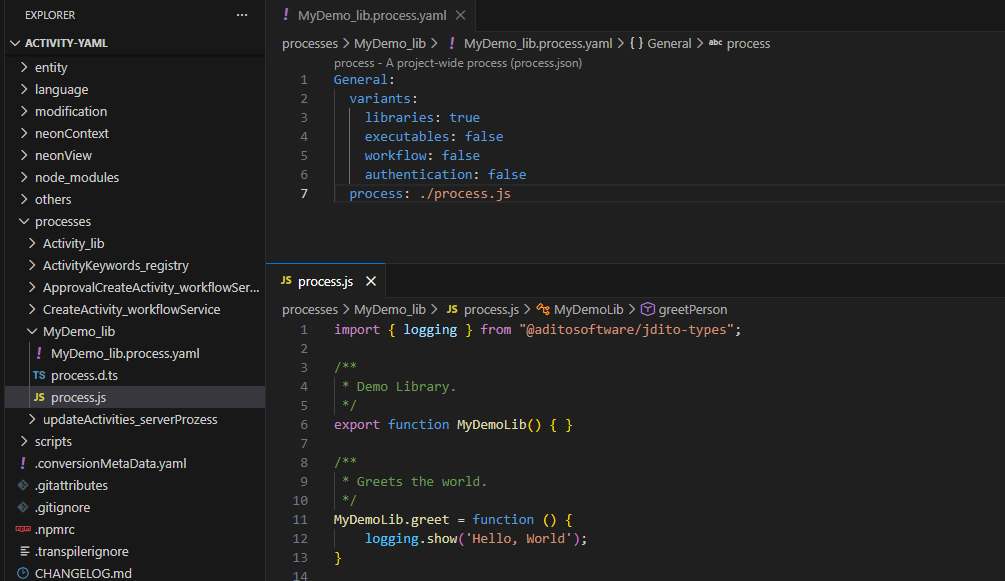
Figure: Process Data Model with JavaScript logic
You can also create declaration files for your new process at this point.
Using any Library in any existing process
You can use the MyDemo_Lib in any existing JavaScript process.
You can programm any JavaScript logic inside VS Code.
For instance, you can call the function MyDemoLib.greet in the function in the onDBInsert.js of the Activity_entity.
- Navigate to
entity\Activity_entity\recordcontainers\db\onDBInsert.js. - Insert the following code:
import { MyDemoLib } from "MyDemo_lib";

//...

MyDemoLib.greet();
Now you have integrated your library into any existing process.
To see your changes, you need to transfer the changes back to the AOD format.
Workflow: YAML To AOD: Transfer Extension Pack Changes
When you are finished editing in VS Code, you must transfer your changes back to the AOD format to use them in the Designer or to commit them.
Any existing files in the target AOD folder will be overwritten. It is crucial to commit your initial AOD project before converting back, allowing you to revert or diff changes if necessary.
In the Designer, click Transfer Extension Pack Changes in the global toolbar or the project context menu or press F8 to integrate your changes.
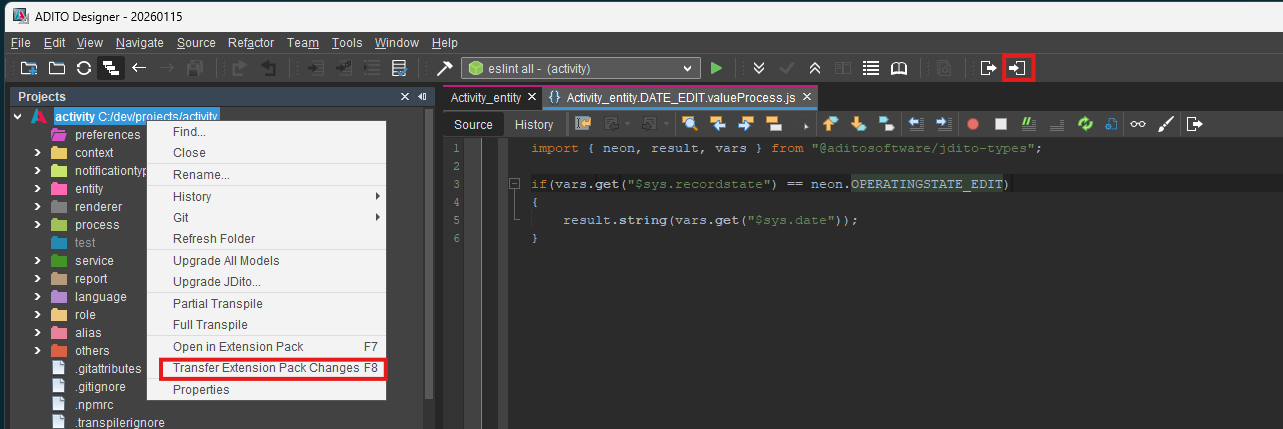
Figure: "Transfer Extension Pack Changes" Button and Context Menu
Once converted, you can validate your changes in the Designer and commit them using the standard Git dialog.
Metadata and Maintenance
Two specific files are generated during this workflow and should be managed as follows:
.conversionMetaData.yaml: Contains structural metadata. This file should be committed to the repository. Add it to your.transpilerignoreto prevent it from being transpiled..vscode/settings.json: Contains the workspace-specific schema URL. This file should be committed to ensure all developers use the correct version schema. You can also add additional workspace-specific settings here to share them across all developers.