Set Up ADITO Designer for an ADITO Cloud System
Purpose
This guide explains how to set up a Windows workstation for working with ADITO projects in ADITO Designer. It covers GitLab onboarding, access to the ADITO Self-Service Portal (SSP), installation and first start of ADITO Designer, loading an xRM project from a cloud system, establishing the required SSH tunnel using a passphrase-protected key via Pageant, and validating a first deploy.
Prerequisites
Before you start, ensure that all prerequisites in this section are met.
- You need a PC or notebook with an Intel® Core™ i7 (or comparable CPU), at least 16 GB of RAM, and a fast internet connection for both download and upload.
- You must use 64-bit Windows 10 or Windows 11. Installing ADITO Designer on macOS or Linux is generally possible due to the Java runtime (OpenJDK 13), but it is not supported. Participation in training is therefore Windows-only.
- You must have Google Chrome or Microsoft Edge available because Firefox does not work in this scenario. Ideally, set one of these browsers as your default browser.
- You must meet the requirements in Prerequisites for ADITO Designer.
- You need a TOTP-capable authenticator app for two-factor authentication (2FA), for example Bitwarden.
- You need the Designer version and the xRM project version intended for your cloud system.
- You need access to ADITO GitLab. ADITO provides an email link for initial password setup.
- You need an ADITO cloud system provided via SSP at
https://ssp.adito.cloud/. SSP uses the same credentials as ADITO GitLab. - You need credentials for the ADITO customer area and the ADITO Service Client (
https://service.adito.de/) only if you download ADITO Designer from those portals.
A passphrase is mandatory for private SSH keys according to ADITO security requirements. Because ADITO Designer cannot prompt for a passphrase, you must use Pageant to provide the passphrase-protected key during authentication.
1. Set up your ADITO GitLab account
This section prepares your GitLab identity and the authentication artifacts required by ADITO Designer and SSP.
1.1 Set your password
After ADITO has created your GitLab account, you receive an email with a link to set your password. Use the following steps to complete the initial setup.
- Open the email and click the password setup link.
- In the browser, enter a strong password and confirm it.
- Submit the form to complete the process.
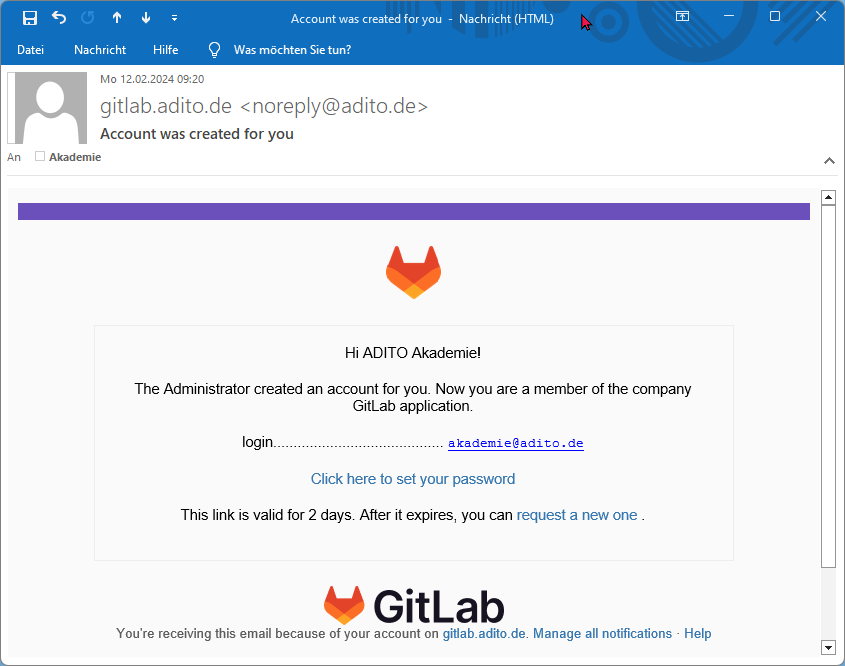 Figure: GitLab email with the initial password setup link.
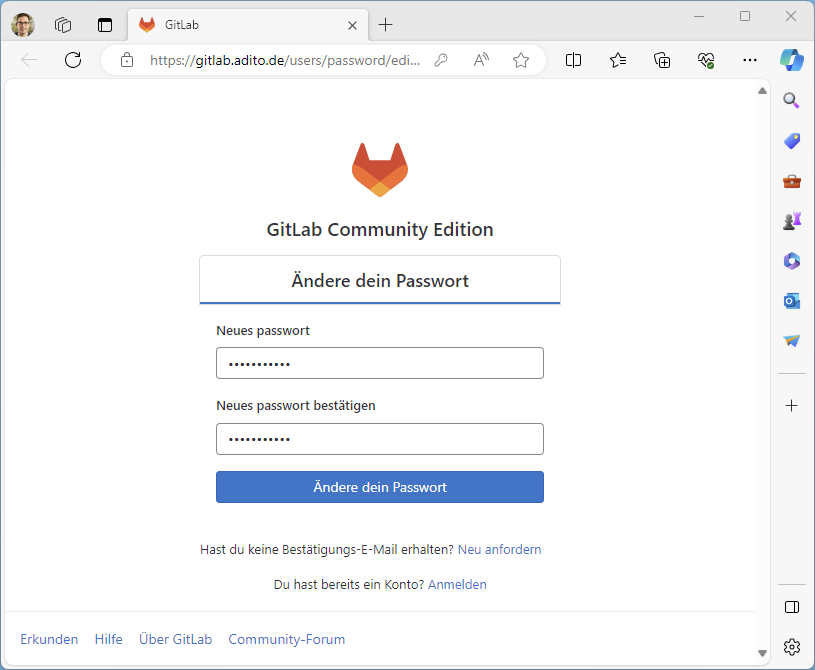 Figure: Setting the initial GitLab password in the browser.
1.2 Enable two-factor authentication (2FA)
GitLab requires TOTP-based two-factor authentication (2FA) on the first login. The setup consists of registering the secret in an authenticator app and confirming a one-time password.
- Sign in at
https://gitlab.adito.de/. GitLab opens the 2FA setup screen automatically. - In GitLab, display the QR code or the TOTP secret.
- In your authenticator app, add a new entry and scan the QR code or paste the secret.
- Use the current one-time password (OTP) from the authenticator to confirm setup in GitLab.
- Download or copy the recovery codes and store them securely.
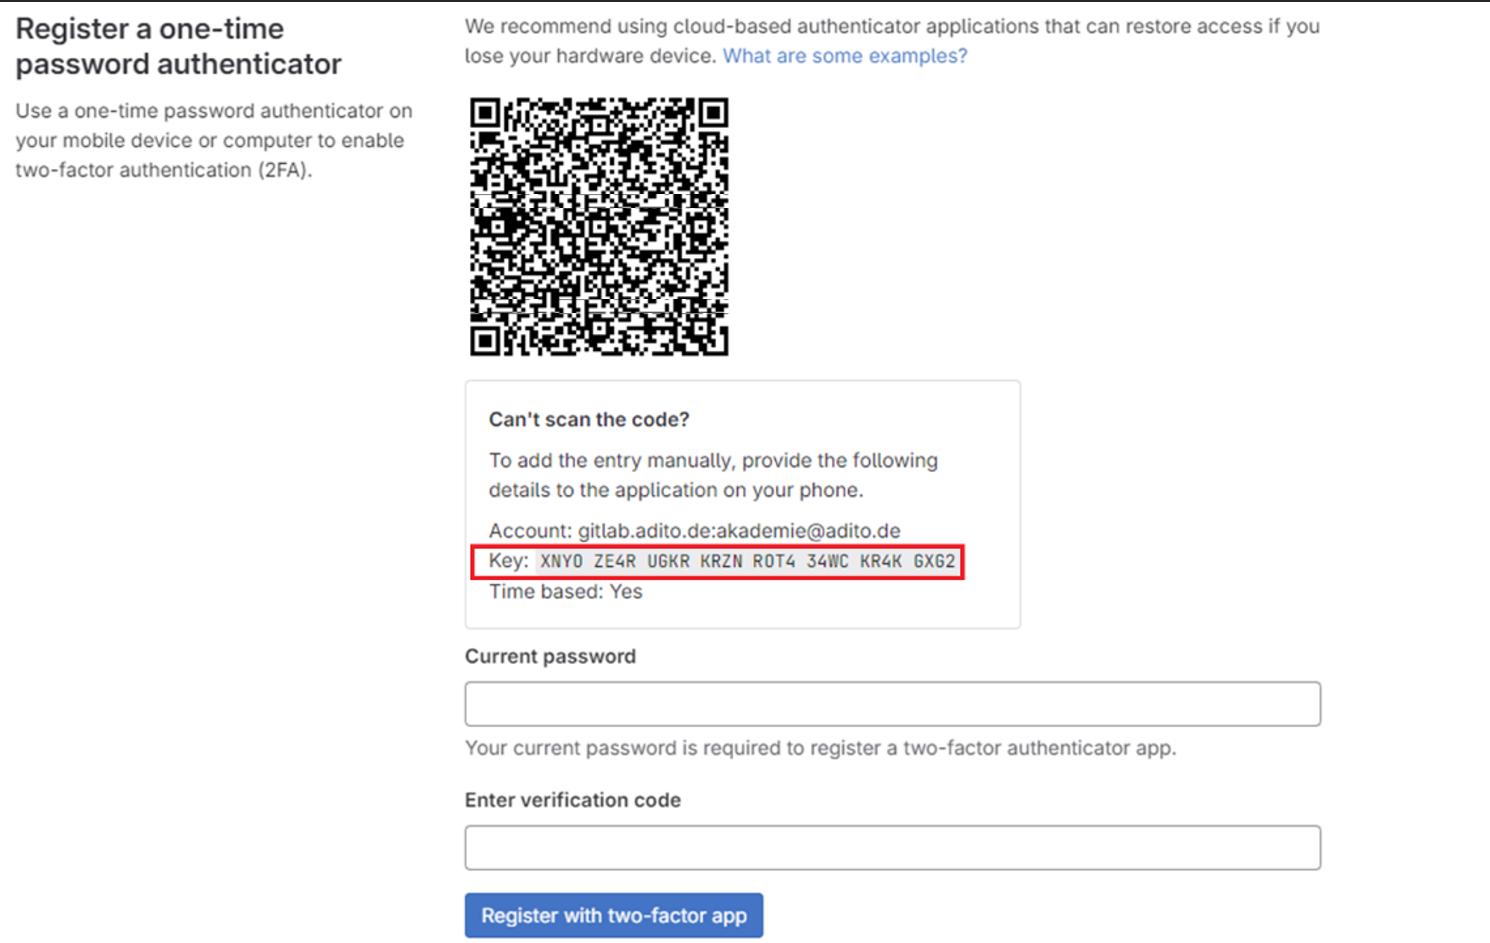 Figure: GitLab provides the TOTP secret during 2FA setup.
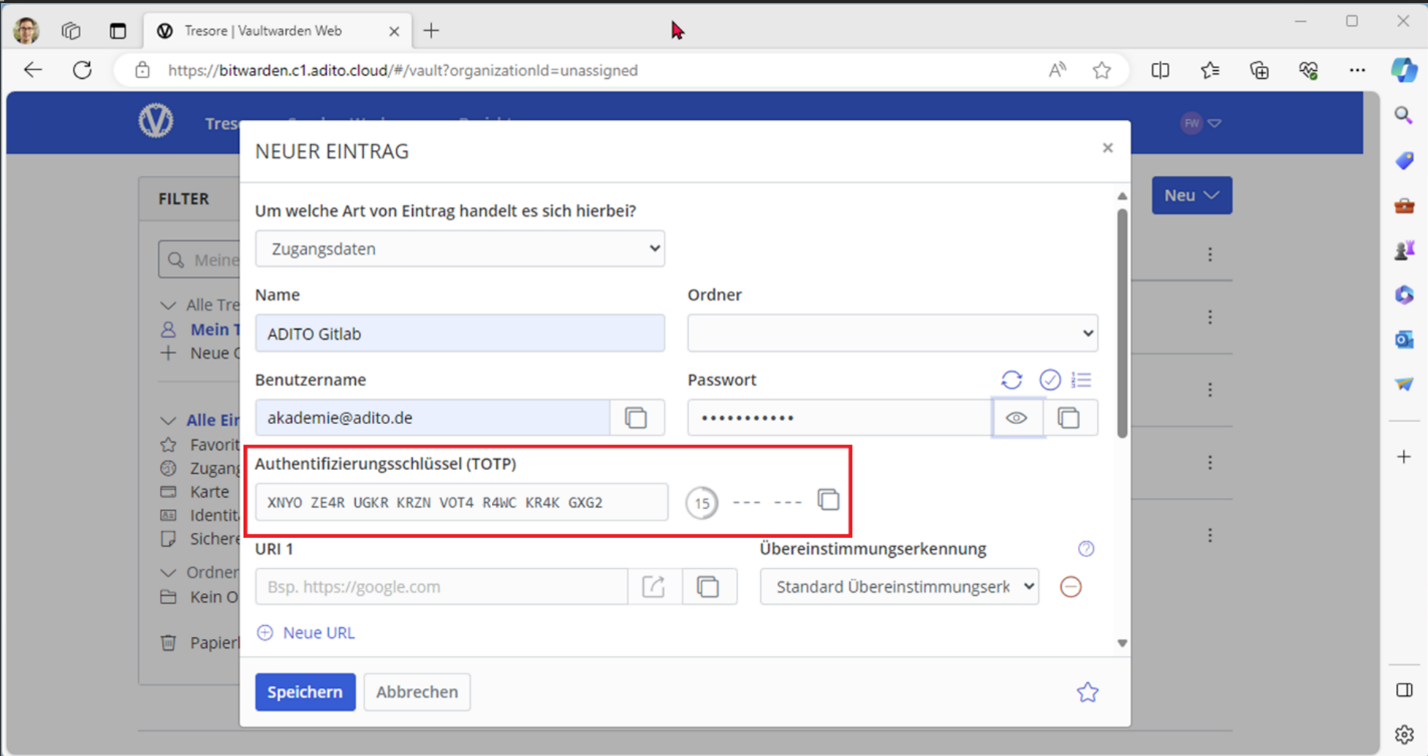 Figure: Adding the TOTP secret to an authenticator app (example).
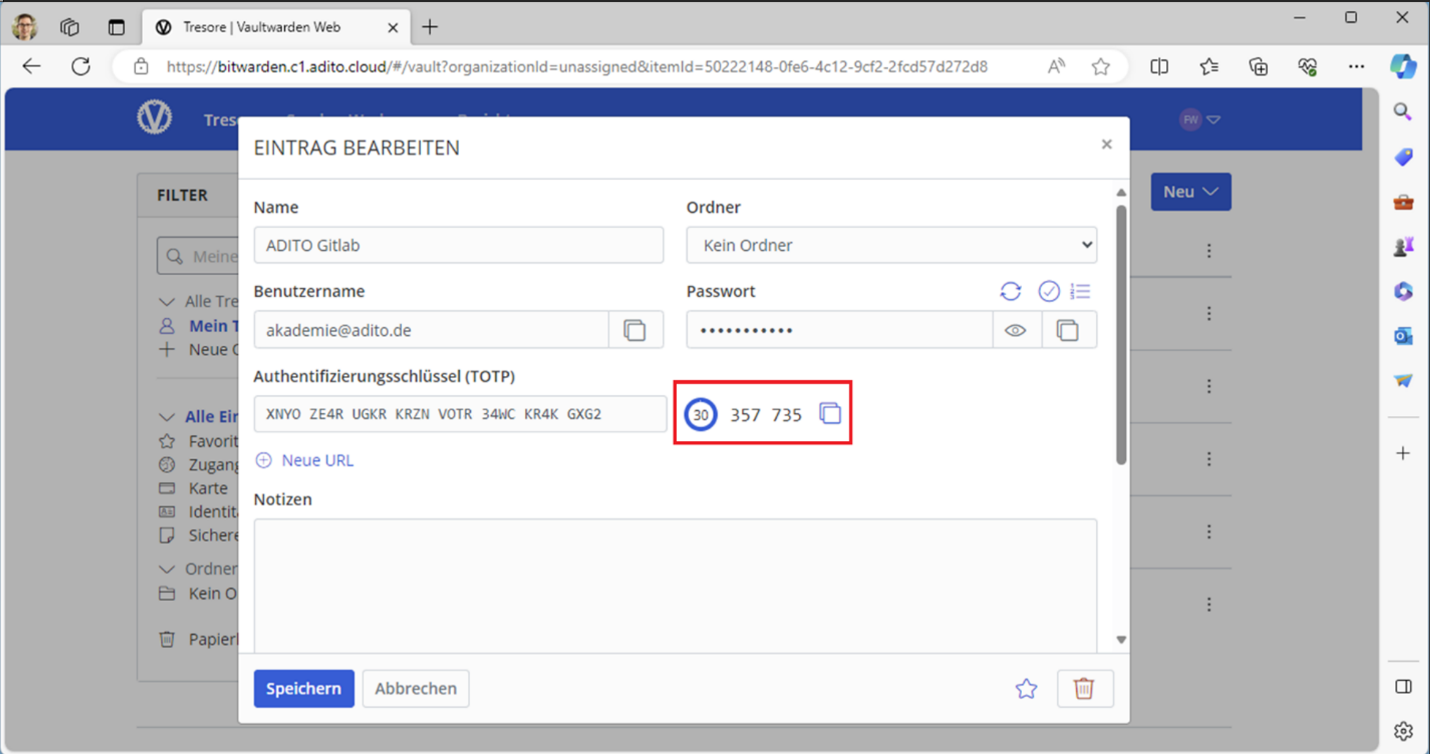 Figure: The authenticator generates a one-time password (OTP).
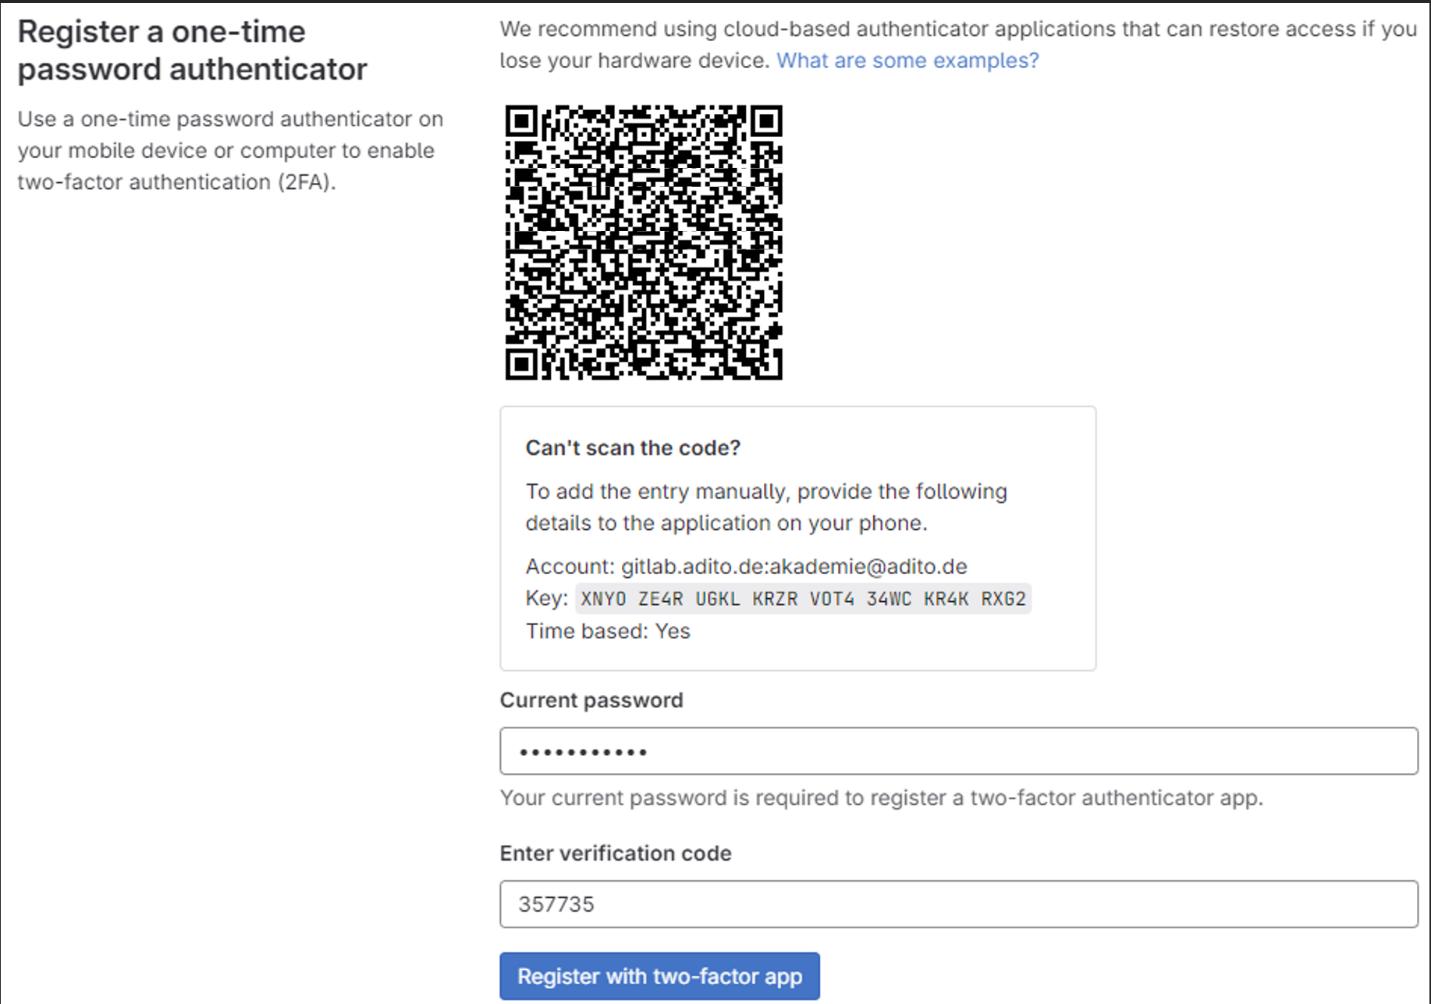 Figure: Completing the 2FA registration in GitLab.
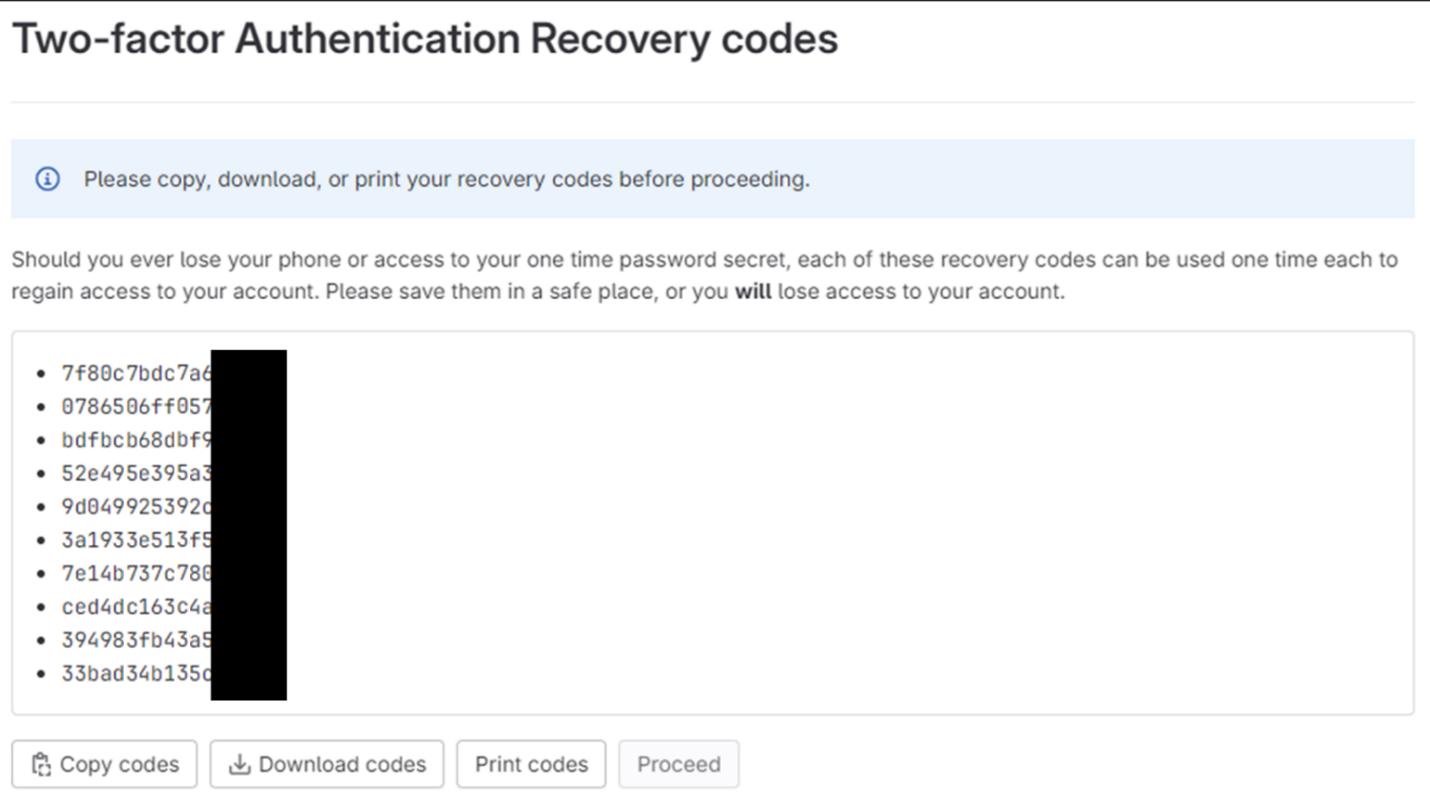 Figure: Recovery codes displayed after enabling 2FA.
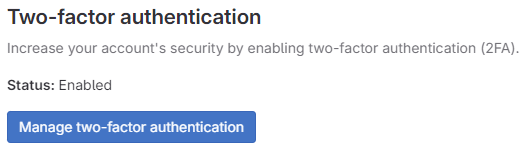 Figure: GitLab confirms that 2FA is enabled.
1.3 Create a Personal Access Token (PAT)
ADITO Designer uses a Personal Access Token (PAT) to access ADITO GitLab. You create the token once in GitLab and then paste it into ADITO Designer when loading a cloud system.
- Open
https://gitlab.adito.de/-/profile/personal_access_tokens. - Enter a meaningful token name, for example
ADITO Designer. - Leave the expiration date empty if permitted. If expiration is required, choose a date far in the future.
- Select the
apiscope and create the token. - Copy the token immediately and store it securely. GitLab does not show the full token again.
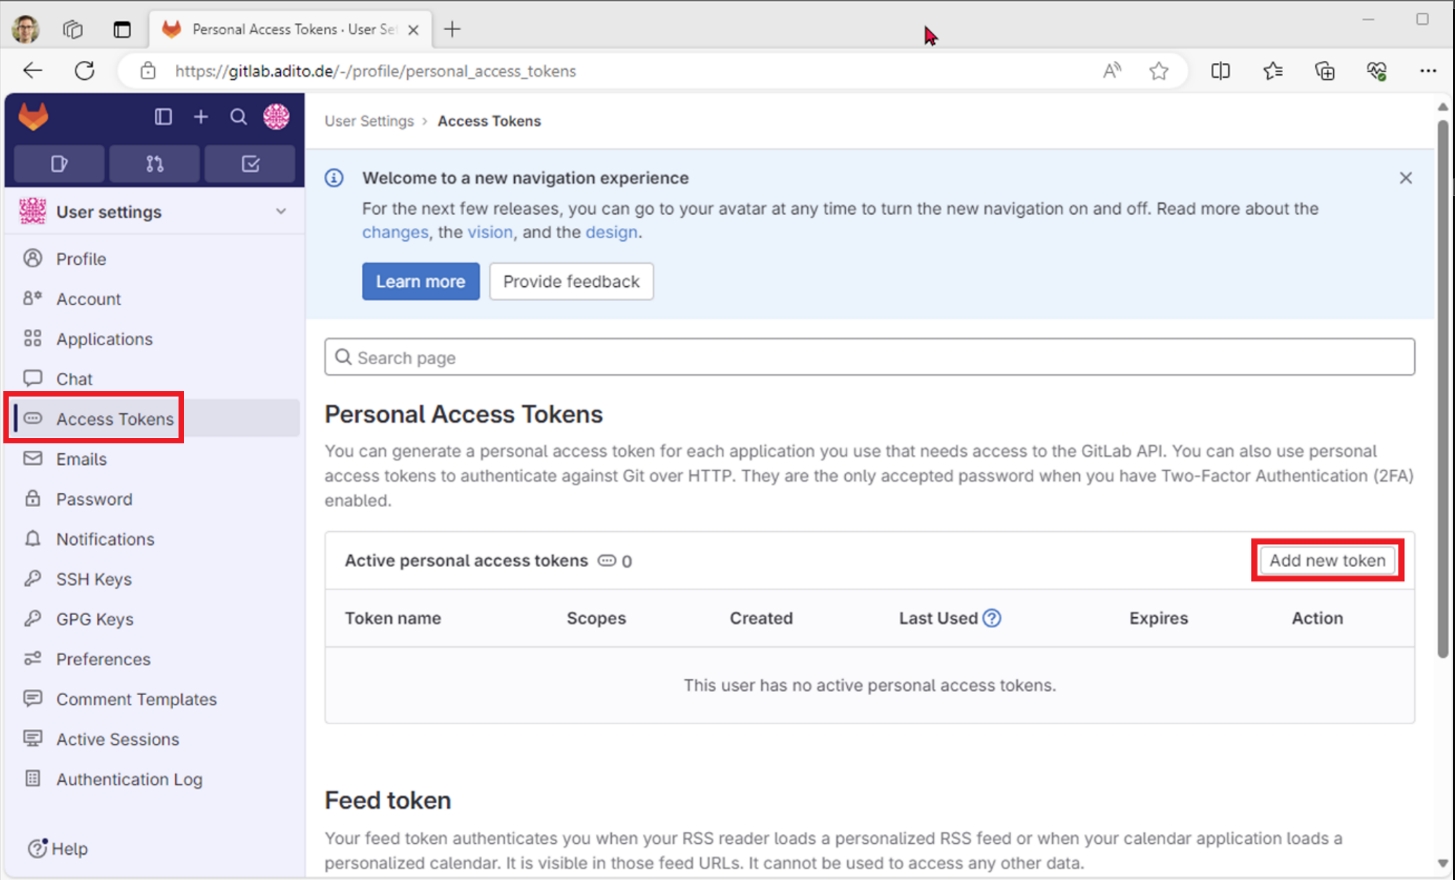 Figure: Access token management in GitLab.
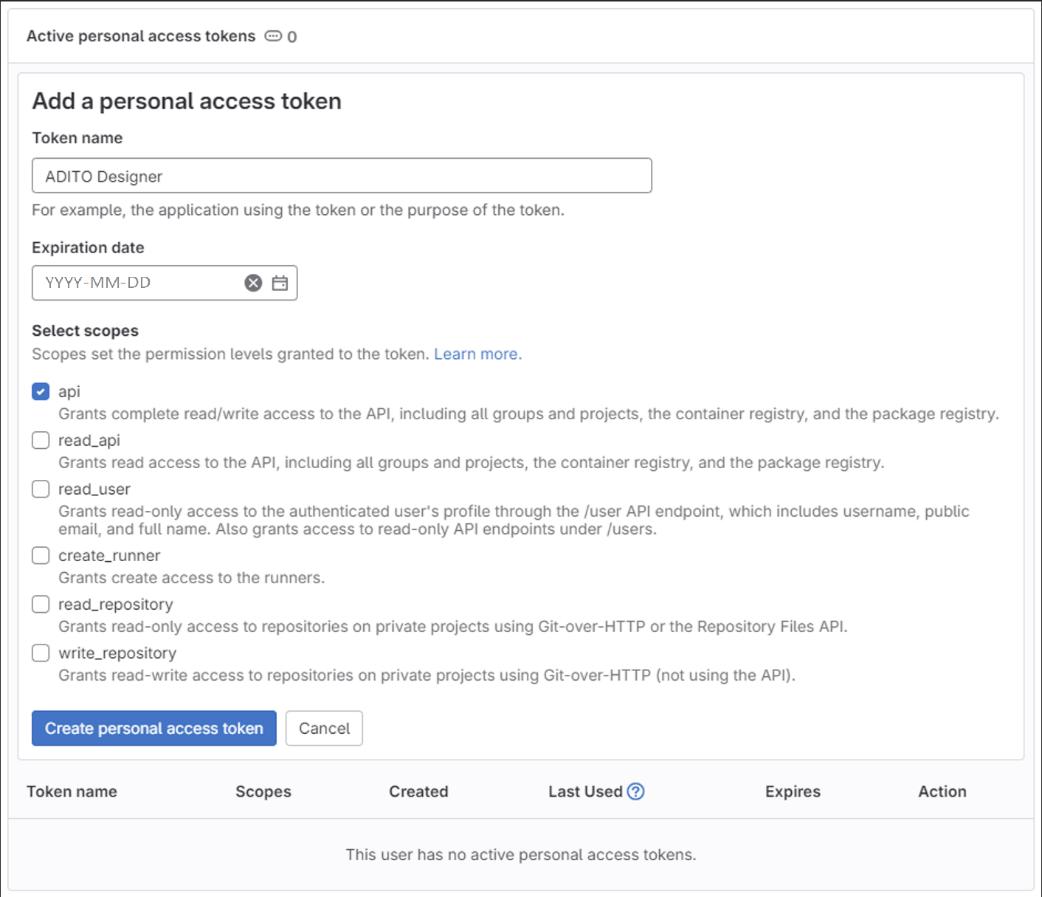 Figure: Creating a PAT with the
 api scope.
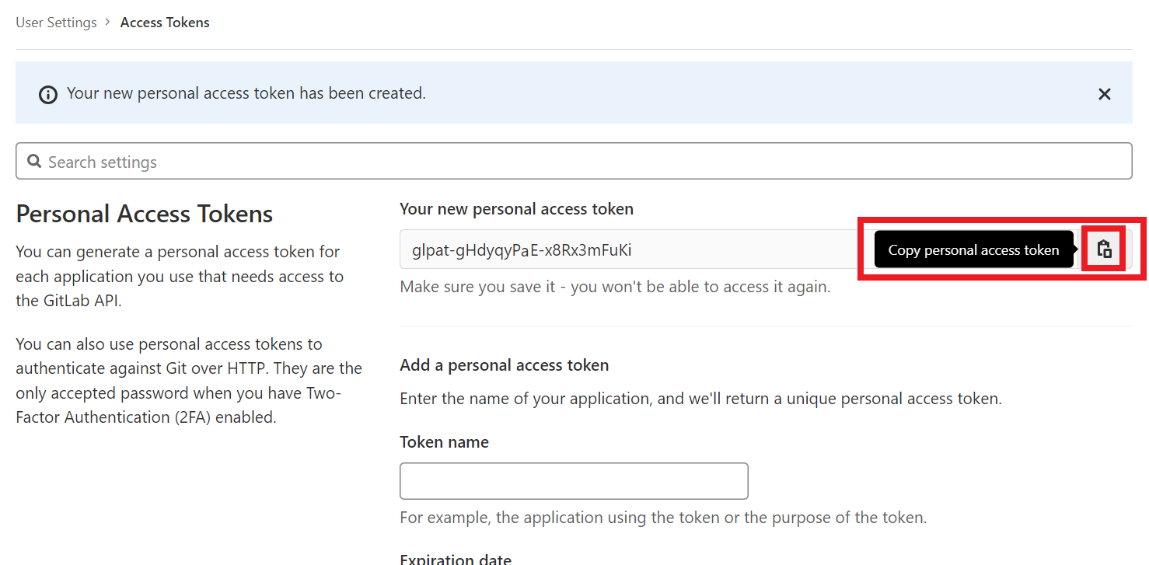 Figure: Copy the token immediately after creation.
1.4 Register an SSH key in GitLab
SSP authentication requires an SSH key pair. You register the public key in GitLab and use the private key later in Pageant and ADITO Designer.
A passphrase is mandatory for private SSH keys. Because ADITO Designer cannot prompt for a passphrase, use Pageant to provide the passphrase-protected key during authentication.
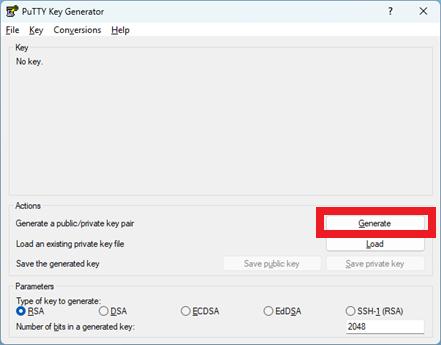
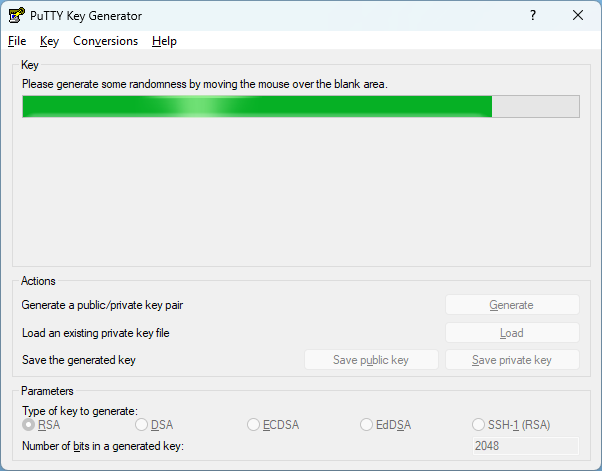
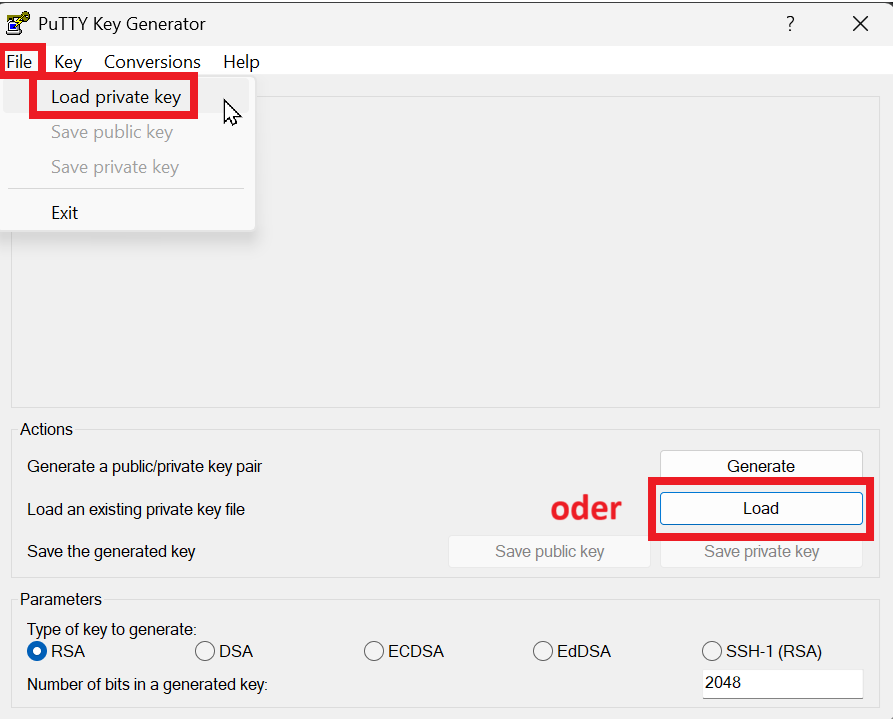
- Open PuTTYgen.
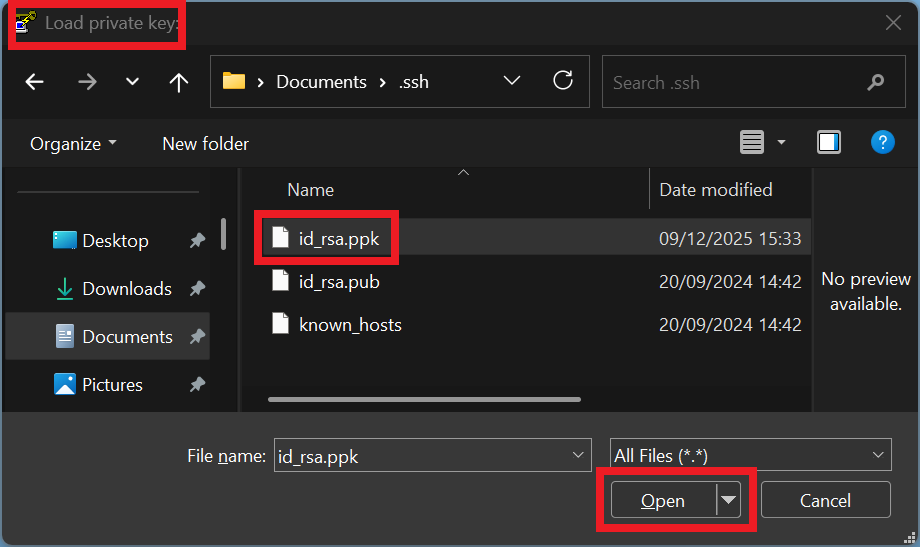
- If you already have a key, load it. Otherwise, create a new key as described in Appendix B.
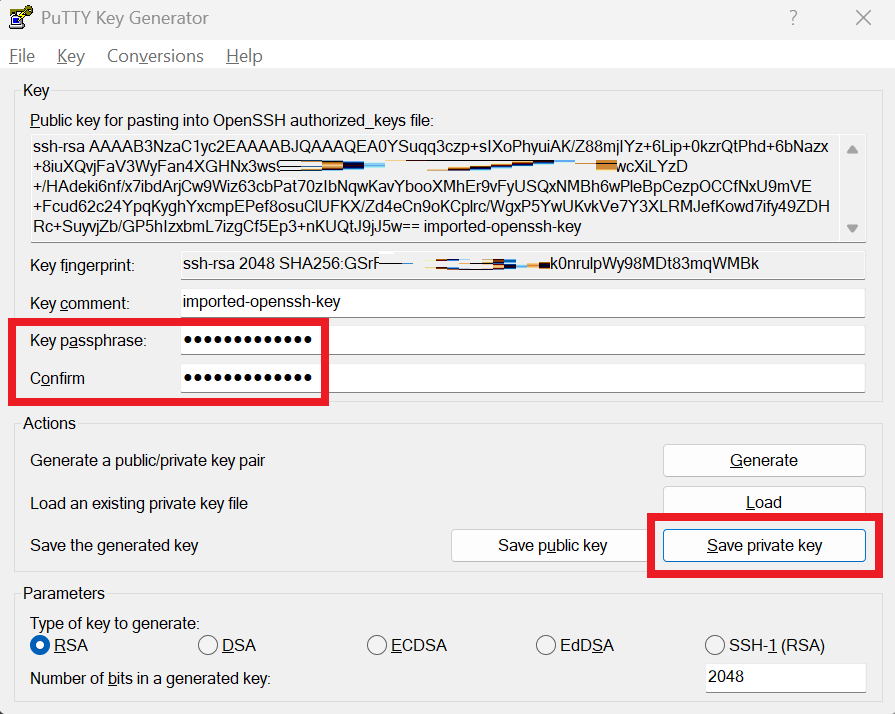
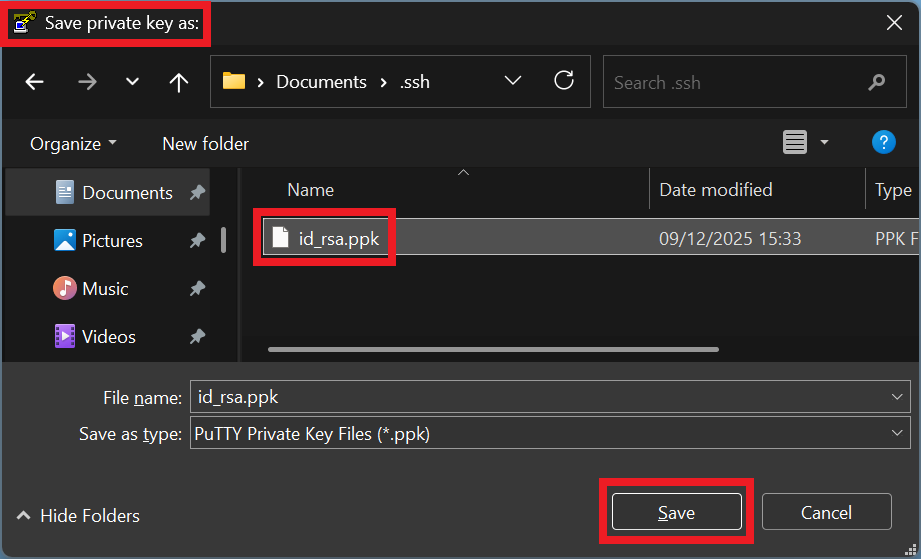
- Ensure the private key has a passphrase and save the private key (
.ppk). - Select and copy the complete public key text from PuTTYgen.
- In GitLab, open Preferences > SSH Keys, select Add new key, paste the public key, and save.
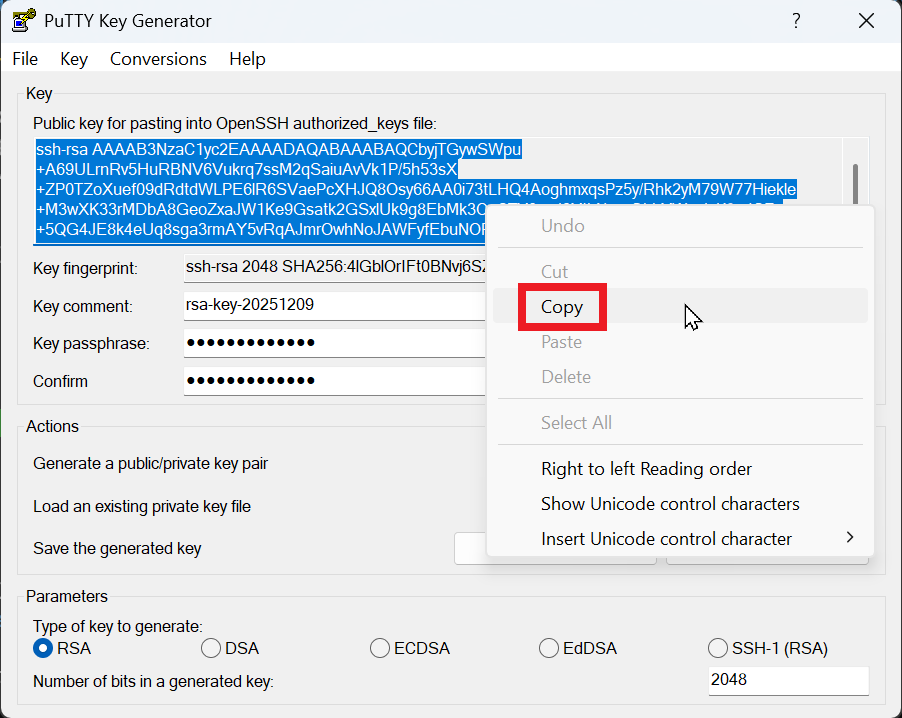 Figure: Copying the public key from PuTTYgen.
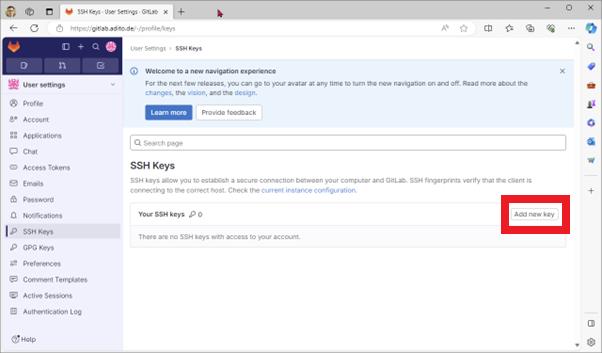 Figure: Opening the SSH key form in GitLab.
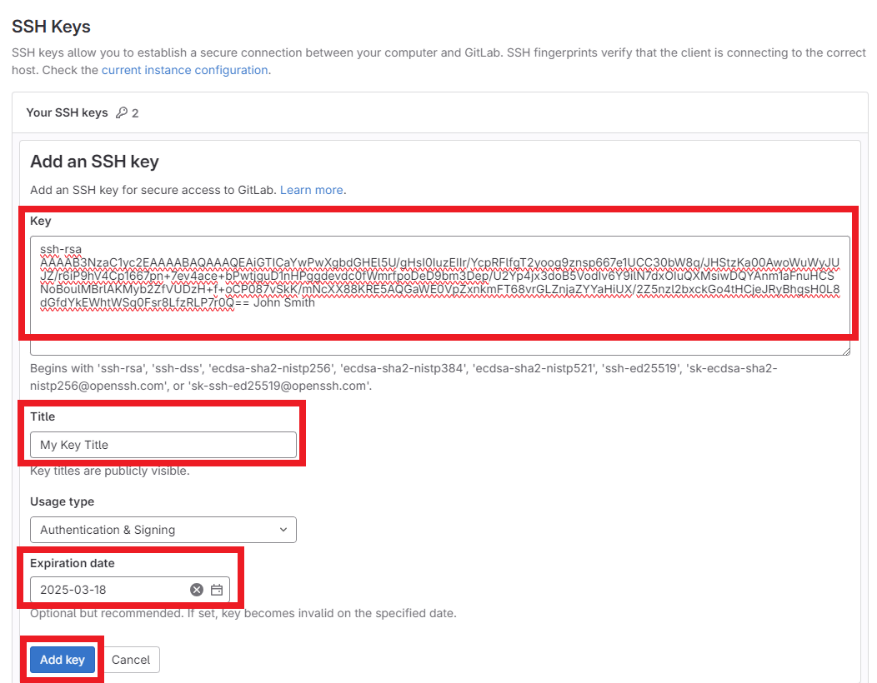 Figure: Pasting the public key into GitLab.
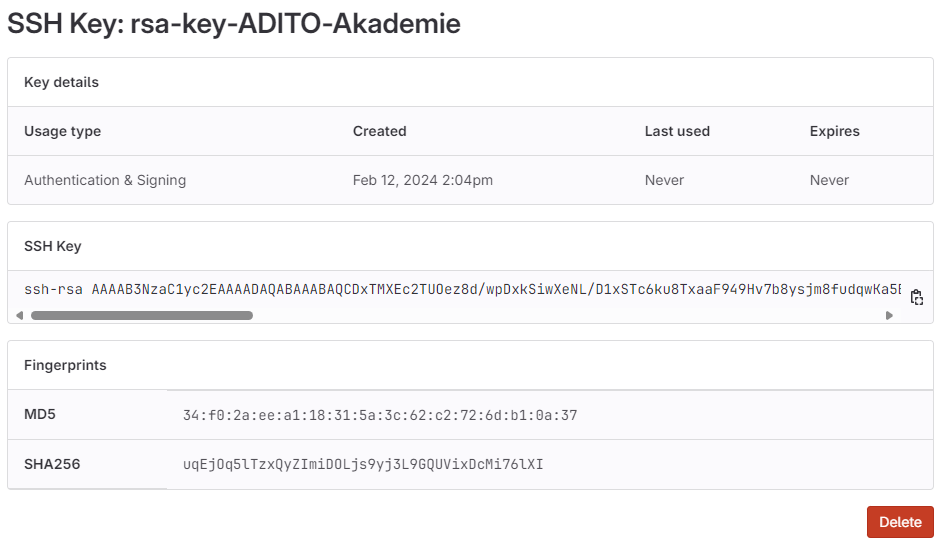 Figure: SSH key listed in GitLab after saving.
2. Use the ADITO Self-Service Portal (SSP)
SSP at https://ssp.adito.cloud/ is used to manage ADITO cloud systems. You use SSP to start your system, retrieve the admin password, and open the web client.
2.1 Sign in to SSP
- Open
https://ssp.adito.cloud/. - Sign in with your ADITO GitLab username and password.
- Confirm the login with the current OTP from your authenticator app.
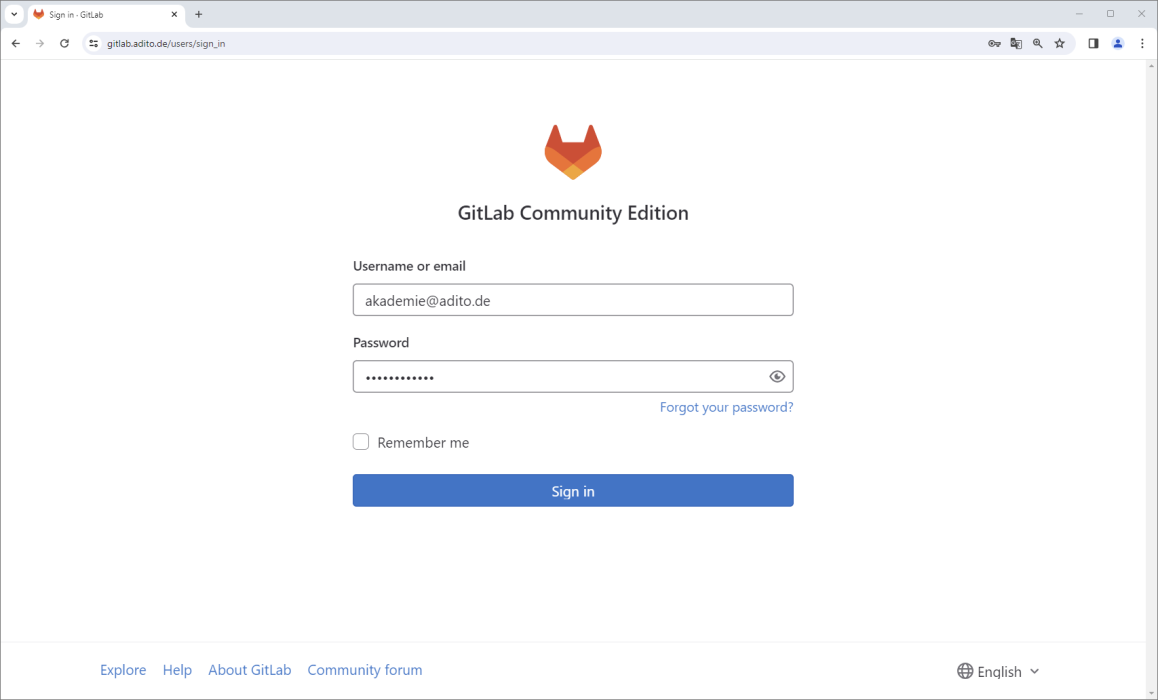
 Figure: SSP login and OTP verification.
2.2 Select and start the cloud system
- In the dashlet Meine Systeme, locate your assigned system.
- Select the checkbox next to the system to open the preview panel on the right.
- If the status is
Heruntergefahren, start the system usingSystem starten. - Wait about two minutes until the status shows
RUNNING. Refresh the browser if the status does not update automatically.
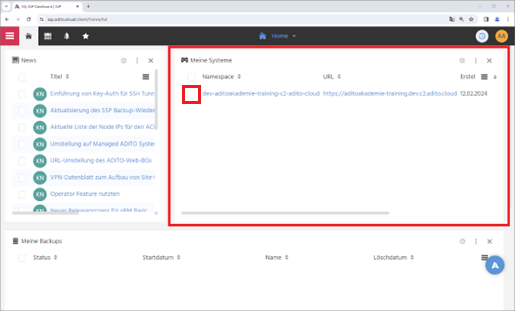
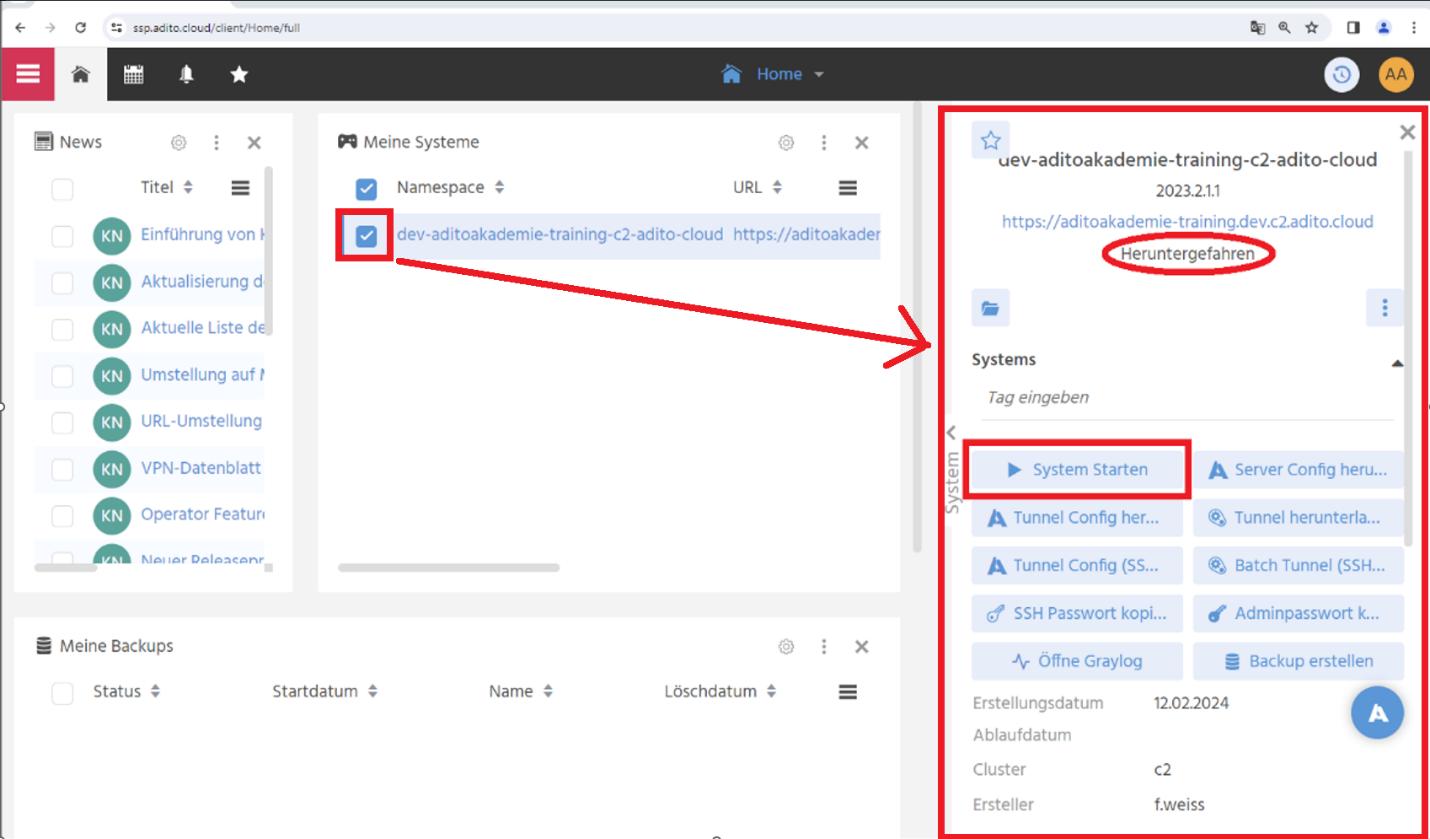 Figure: Assigned systems and the system preview panel in SSP.
2.3 Open the web client and sign in as admin
- In the system preview panel, click the
https://...link to open the web client. - In SSP, open
Passwörterand copy the admin password usingAdmin Passwort kopieren. - In the web client login screen, sign in as user
adminand paste the copied password. - After login, verify that the dashboard is displayed.
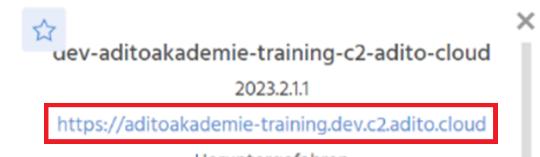 Figure: Opening the web client URL from SSP.
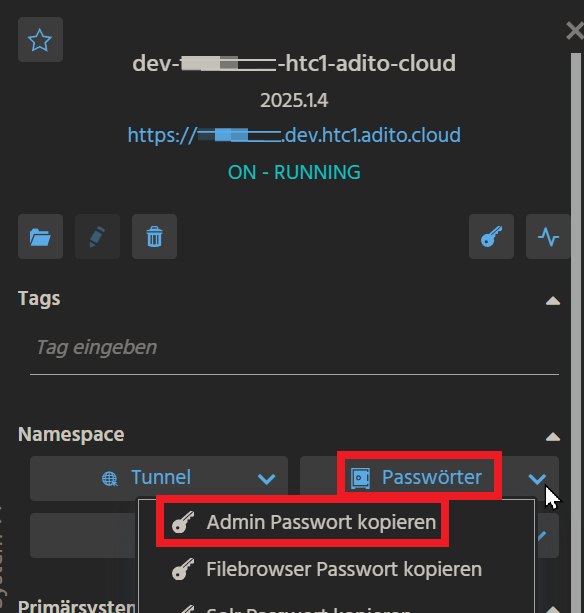 Figure: Copying the admin password from SSP.
 Figure: Pasting the admin password into the login form.
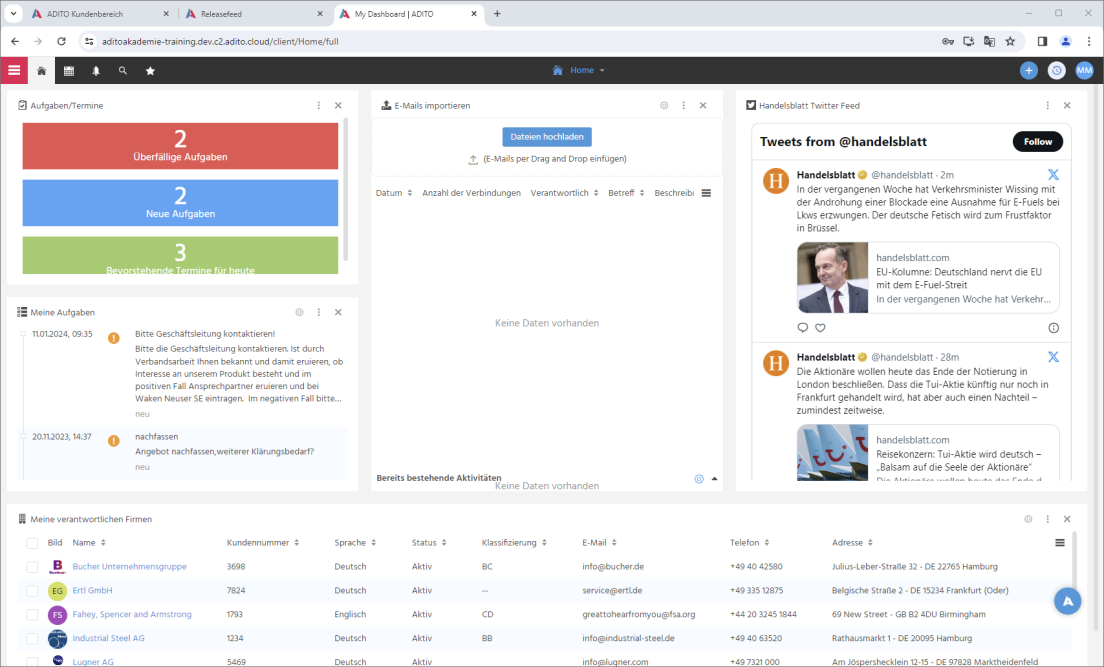 Figure: Web client dashboard after login.
3. Install and configure ADITO Designer
3.1 Download ADITO Designer (Versionsmanagement)
Request the correct ADITO Designer version from your ADITO contact. Download this version from the Versionsmanagement context in the ADITO Service Client or an internal ADITO system.
The source PDF also describes an alternative download via the ADITO customer login. This guide intentionally omits that path and focuses on downloading via Versionsmanagement.
Ensure that the ADITO Designer version matches the version of the cloud system created in SSP. The version numbers are not identical, so confirm both versions with your ADITO contact.
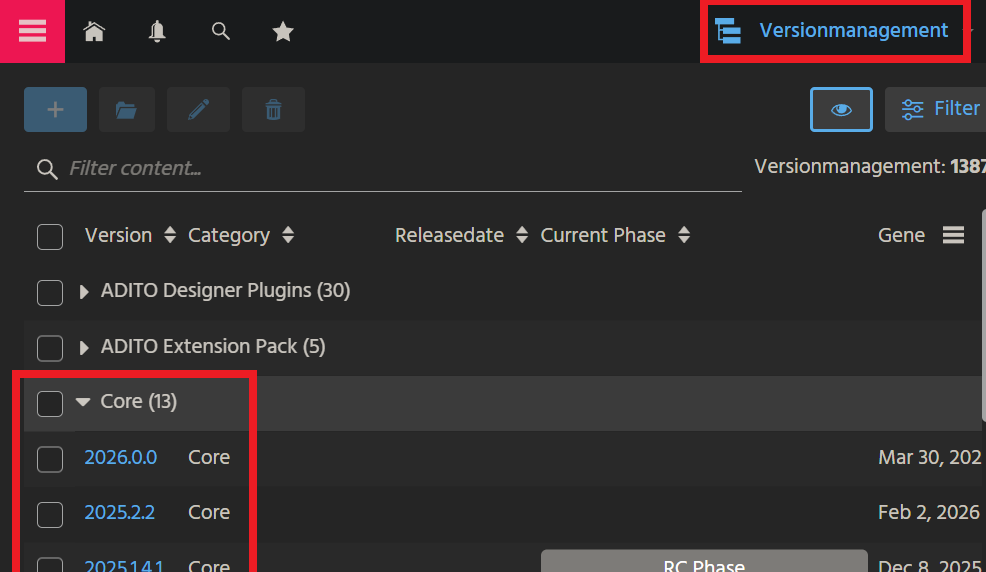
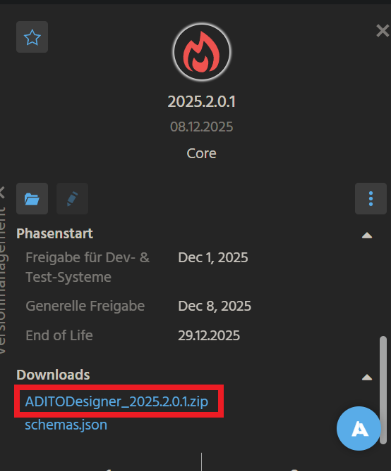 Figure: Downloading ADITO Designer via
 Versionsmanagement.
3.2 Extract and start ADITO Designer
Extract the ZIP archive (for example ADITODesigner_2024.0.0.zip) to a location of your choice. The ZIP archive does not include a parent folder, so create a target folder first. The folder name must not contain spaces.
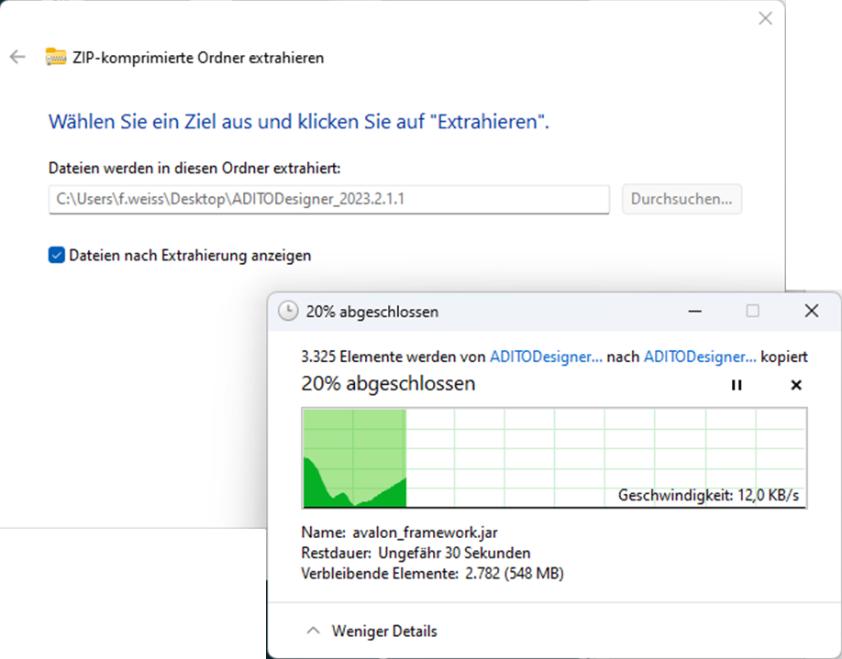 Figure: Extracting the ZIP into a dedicated folder.
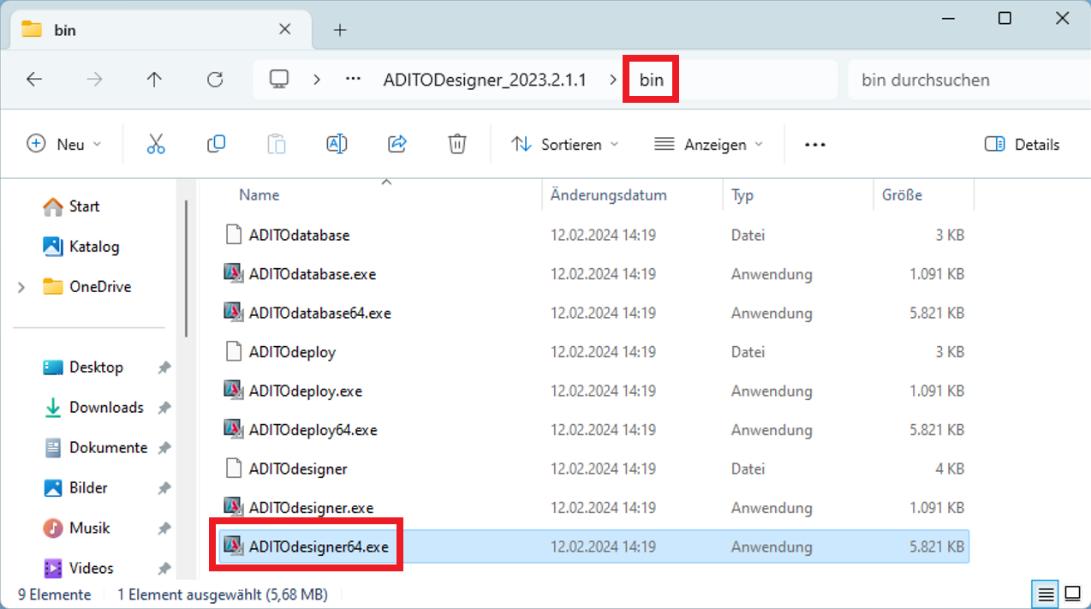 Figure: Starting
 ADITOdesigner64.exe from the bin folder.
On first start, ADITO Designer may take longer to initialize. Temporary files are stored under C:\Users\<USERNAME>\AppData\Roaming\.aditodesigner. If setup or runtime issues occur, delete the .aditodesigner directory and start again to reset the local state.
During the first start, required plugins are installed. Select Install all and proceed.
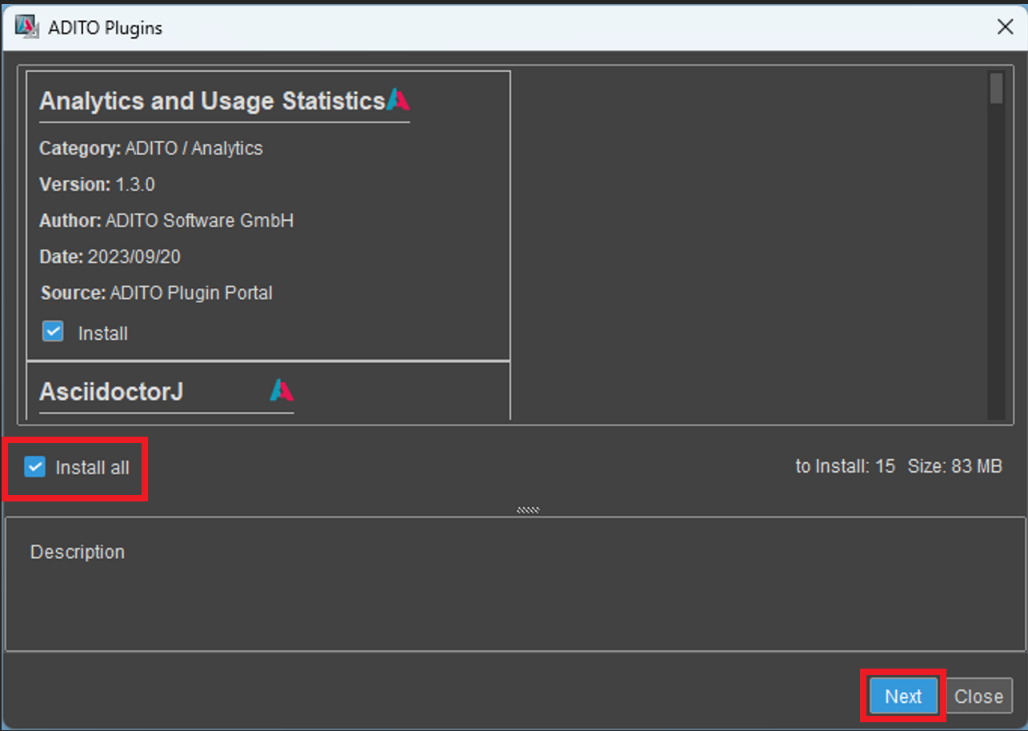 Figure: Installing plugins on first start.
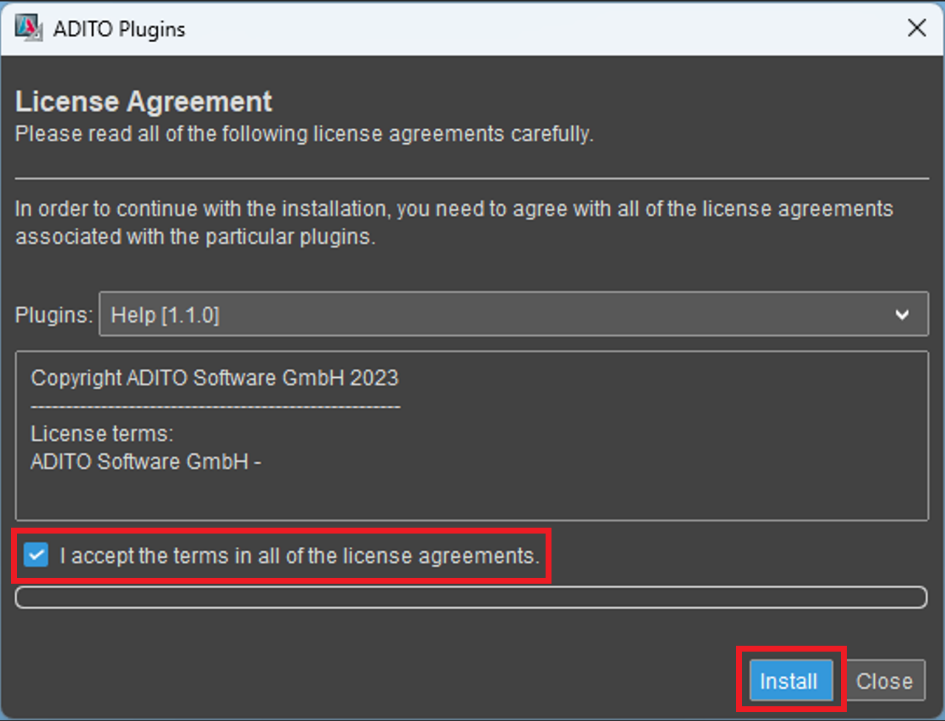 Figure: Accepting license terms.
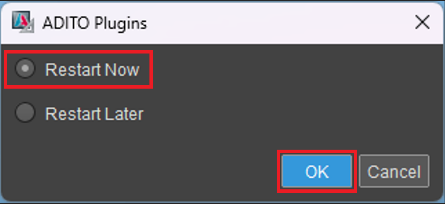 Figure: Restarting after plugin installation.
 Figure: ADITO Designer after restart.
4. Load the cloud project and install Node dependencies
4.1 Load the cloud system
You load the xRM project configuration from the cloud system into ADITO Designer using the load cloud system wizard. The wizard requires your GitLab Personal Access Token (PAT).
- In ADITO Designer, open
File > New Project. - Select
load cloud systemand continue withNext. - When you are asked for
Access Token, paste your GitLab PAT and confirm. - Select Refresh to load the list of available cloud systems.
- Select your target system and continue.
- Set the project name and location. Keep the default location under
Documents\\AditoProjectsunless you have a good reason to change it. - Select
Only Git ProjectasCheckout Mode. If the option is not available, the system is likely not adevstage system. - Select the matching
Branch/Tagand finish the wizard.

 Figure: Starting the “load cloud system” wizard.
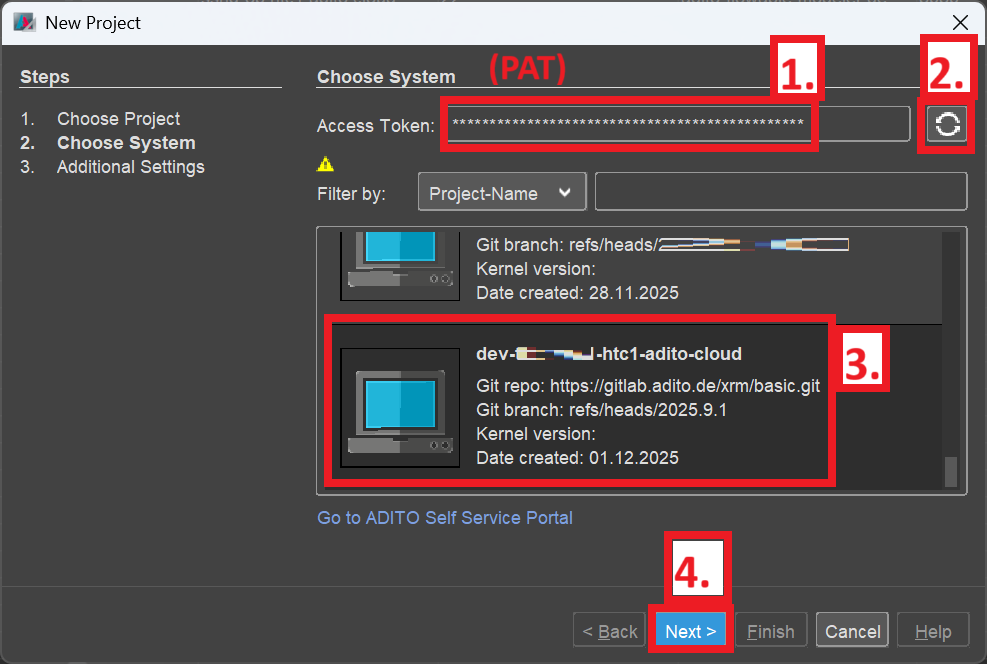 Figure: Available cloud systems for the current user.
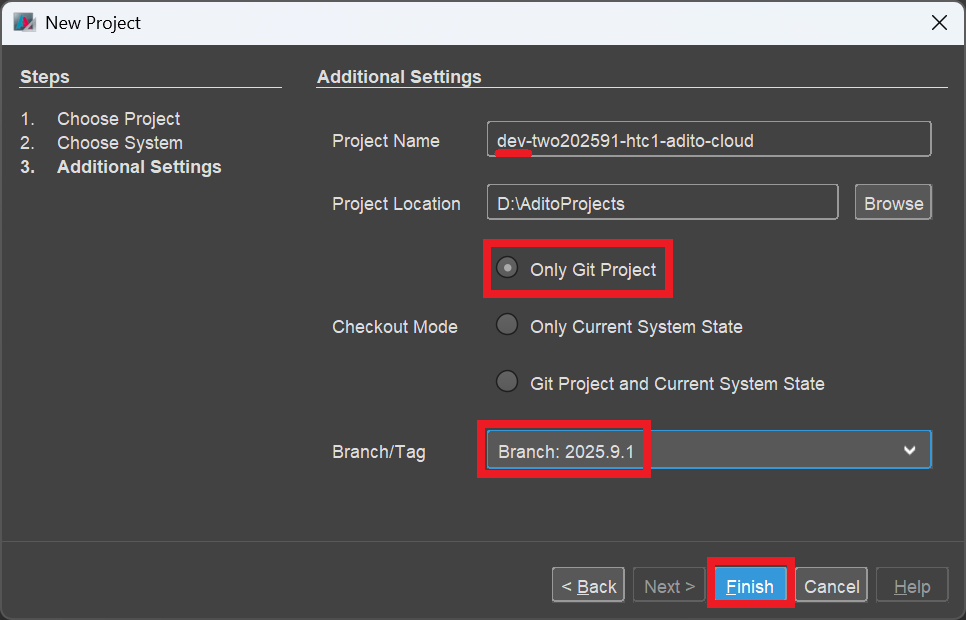 Figure: Project settings including checkout mode and branch/tag.
 Figure: Cloning and project import progress.
Technical background (not required for the setup): Only Git Project checks out the Git state. If you need changes that exist only in the system database, use Only Current System State or Git Project and Current System State depending on your scenario.
4.2 Run npm install
After the project has been cloned, locate package.json in the project tree and run NodeJS > npm install from the context menu. This is required for features such as modularization, code formatting, and auto-completion. Warnings in the log can usually be ignored.
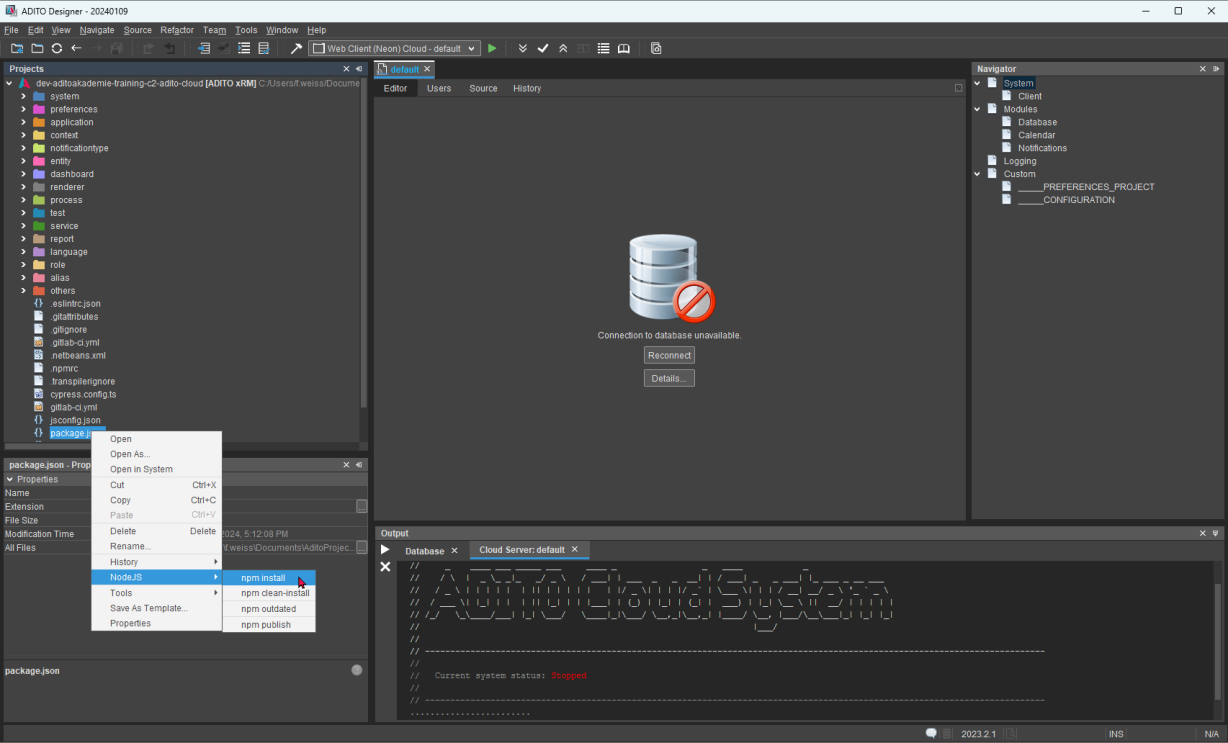 Figure: Running
 npm install from the context menu.
5. Connect ADITO Designer to the cloud system
Expand system in the project tree. The active system is typically named default. In some Designer versions, you might be prompted for the private SSH key location and/or GitLab credentials. If you are prompted for GitLab credentials, enter the PAT (not your GitLab password).
Ensure Pageant is running and has your passphrase-protected private key loaded.
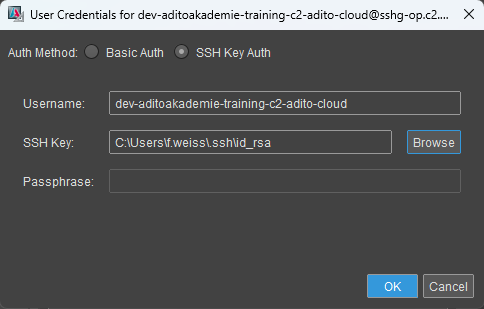 Figure: Example credential prompts.
5.1 Open the database tunnel
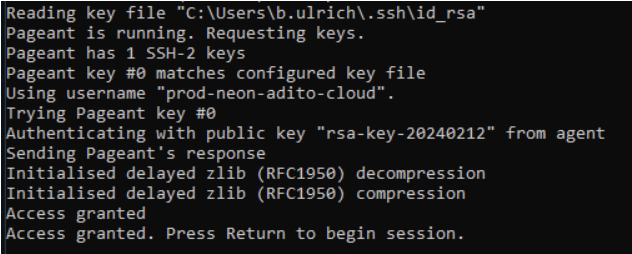
To access the system database, you must establish the database SSH tunnel from ADITO Designer. The tunnel uses your SSH key and therefore depends on Pageant if your key is protected with a passphrase.
- Start Pageant and add your passphrase-protected private key (
.ppk). Keep Pageant running in the background. - In ADITO Designer, expand
systemin the project tree. - Select
default. In the properties panel, click the edit icon next totunnelConfigPathto opentunnelconfig.xml. - In the tunnel list, locate the database tunnel. It contains
adito-db.dev-<Cloud_System_Name>-c2-adito-cloud.svc.cluster-localin the target server address. - Right-click the database tunnel and select
Connect. - If prompted with
SSH Fingerprint unknown, confirm it withYes. - Wait until the tunnel icon turns green.
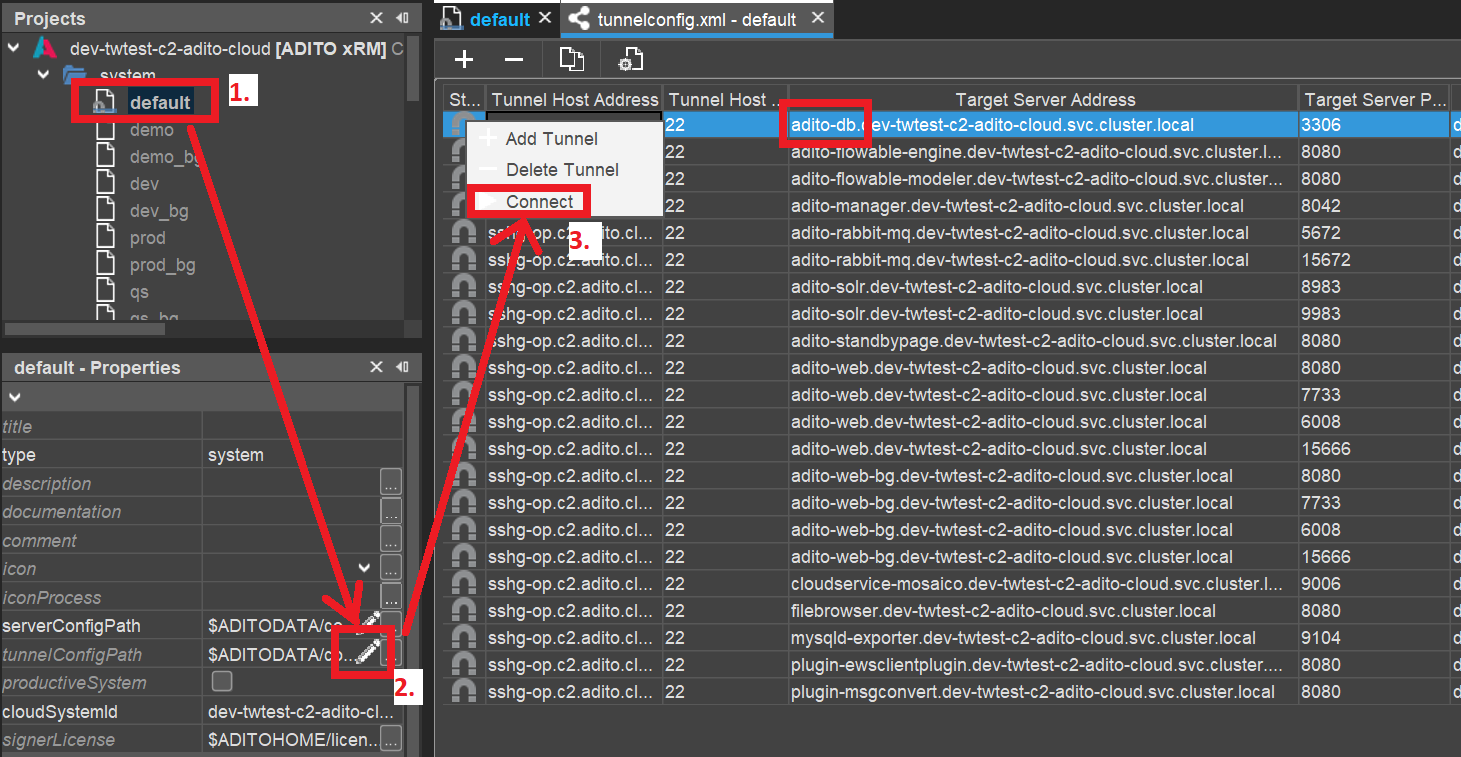 Figure: Connecting the database tunnel in
 tunnelconfig.xml.
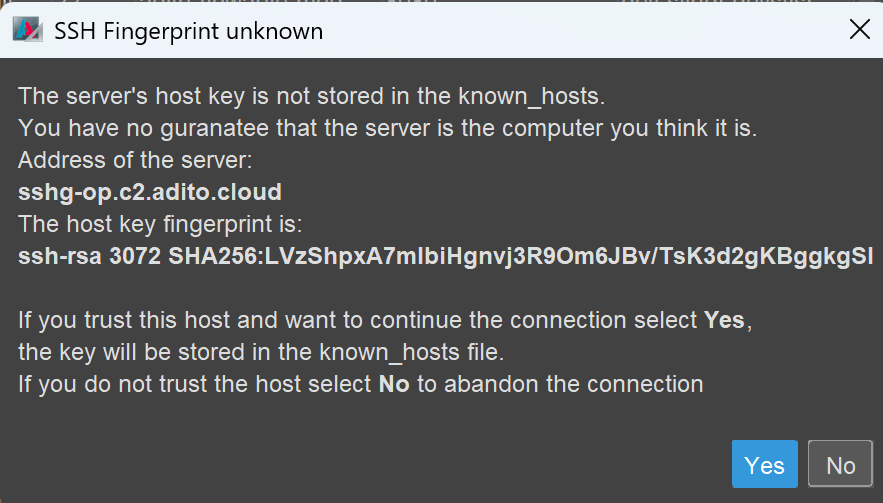 Figure: Confirming an unknown SSH fingerprint.
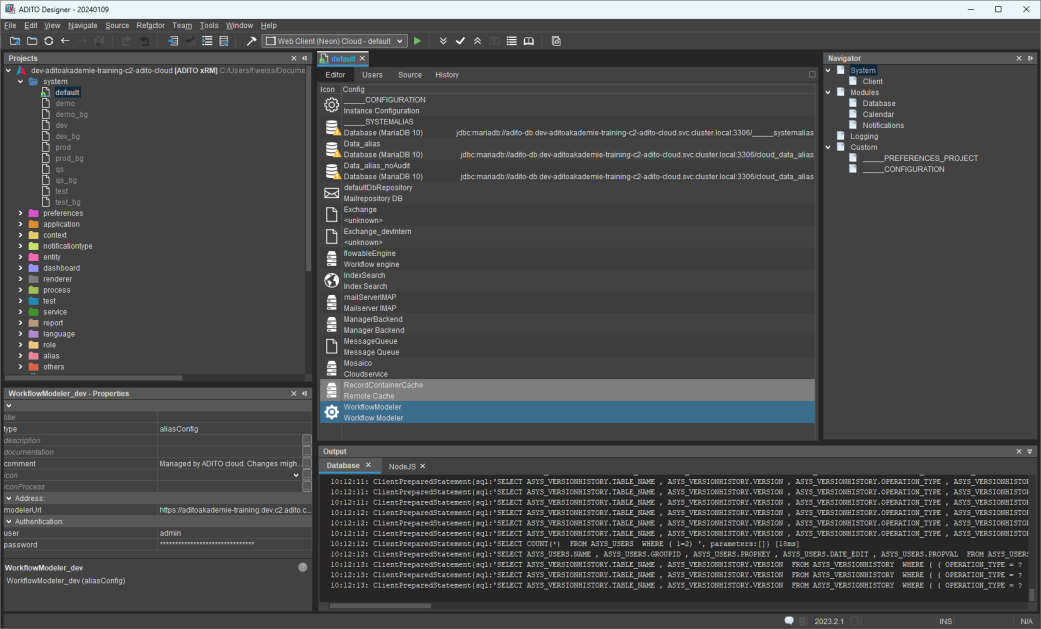 Figure: Reconnecting system components.
It can take up to about 30 minutes until a newly registered public key becomes active. During this synchronization period, a connection attempt typically turns the tunnel icon yellow and then back to gray. Retry later in that case.
The icon next to default can remain yellow because it only turns green when all tunnels are connected. For training scenarios, the database tunnel alone is sufficient.
6. Verify deploy
Changes you make in ADITO Designer become visible in the client only after a deploy. Deploy writes your changes into the system database in the cloud, in particular into the ASYS_SYSTEM table.
By default, ADITO Designer performs a transpile before each deploy. This is required for modularized projects, but typically not for training projects. To reduce deploy time in training, remove the transpile line from package.json as described in the training instructions, and save the file.
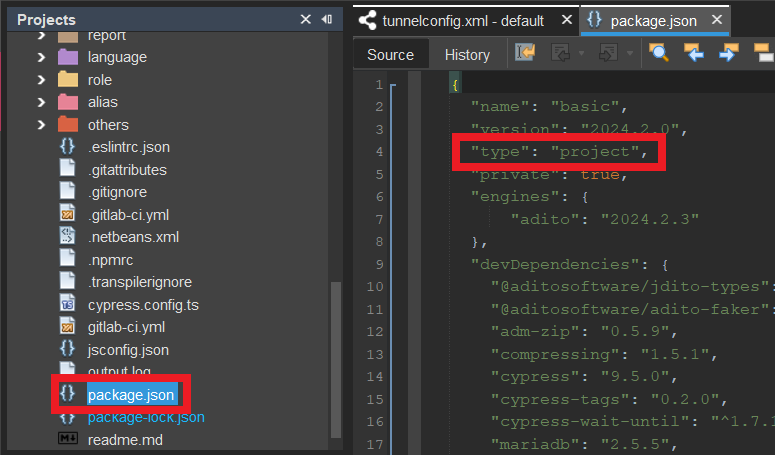 Figure: Removing the transpile line in
 package.json.
Make a small test change, for example by updating the title property of Activity_entity. Then run deploy using Deploy Project or Ctrl+F8 and confirm with OK. The first deploy can take several minutes and may show a long list of differences. Keep all items selected for the first deploy.
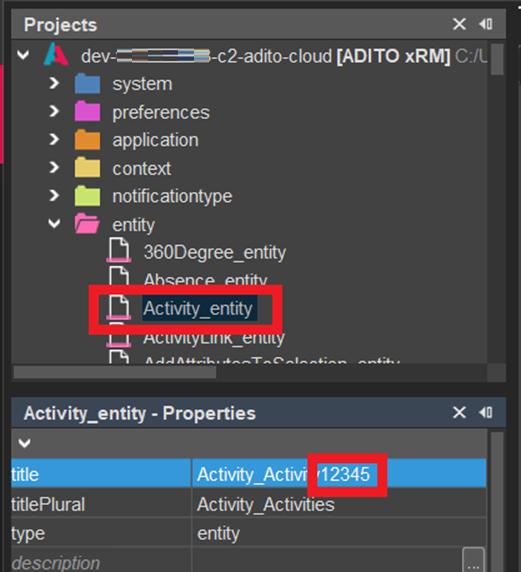 Figure: Example change before deploy.
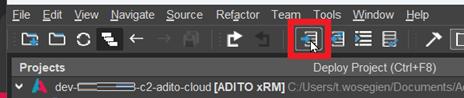
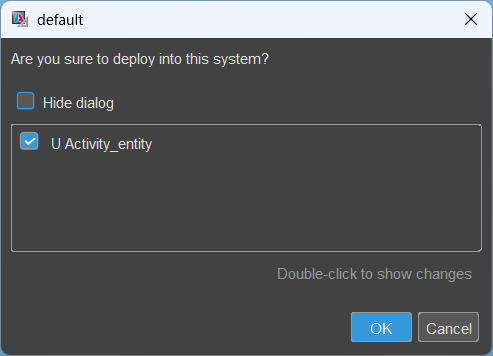 Figure: Running deploy and confirming the deploy dialog.
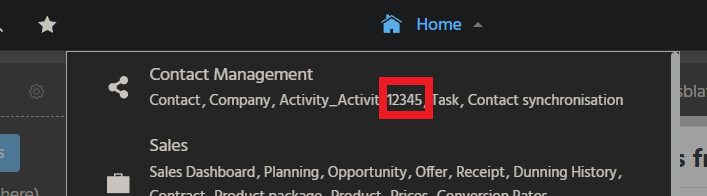 Figure: Verifying the change in the client after re-login.
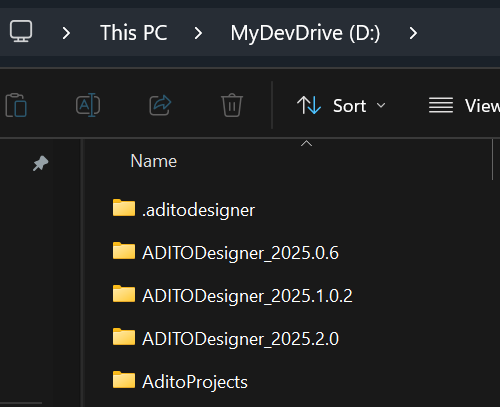
7. Optional: Use a Dev Drive on Windows 11
On Windows 11, you can improve ADITO Designer performance (for example for transpile operations) by using a Dev Drive.
- Create and mount the Dev Drive, and keep its drive letter stable to avoid later path changes.
- Move the ADITO Designer installation folder (the extracted ZIP directory) to the Dev Drive.
- Move your ADITO project folder (for example Documents\AditoProjects) to the Dev Drive.
- Move the ADITO Designer working directory .aditodesigner (default under C:\Users<USERNAME>\AppData\Roaming.aditodesigner) to the Dev Drive.
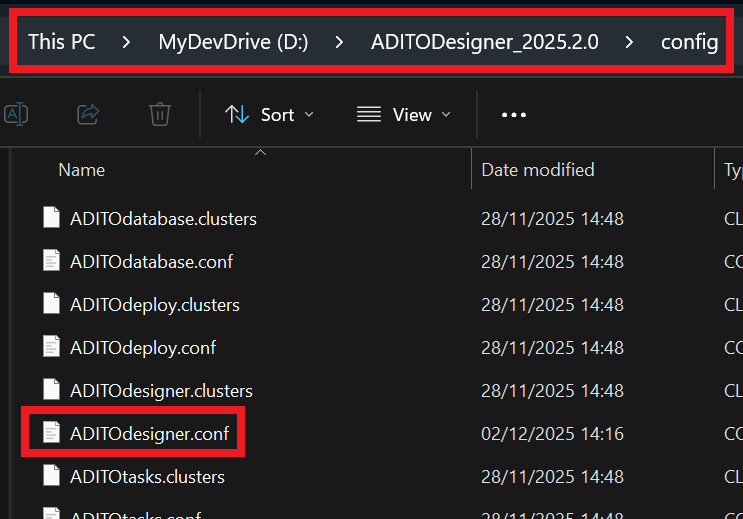
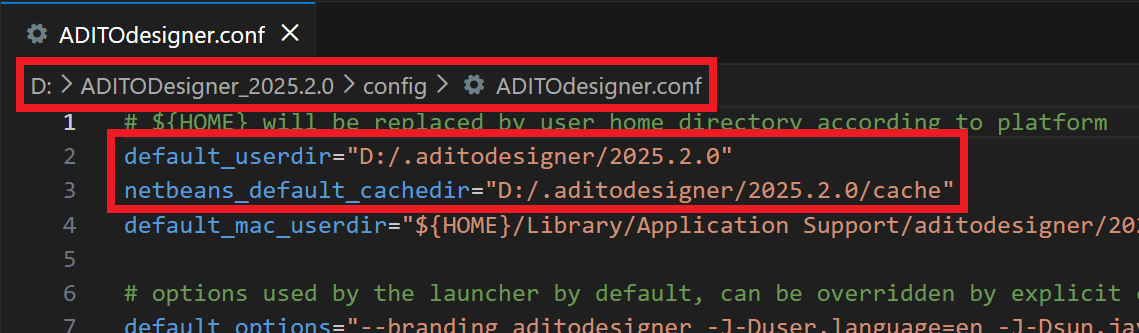
- Update the .aditodesigner path in ADITOdesigner.conf (in the Designer config folder) so it points to the new Dev Drive location.
- Start ADITO Designer and verify that it uses the working directory from the Dev Drive and that project operations work as expected.
Decide according to your security policies whether the Dev Drive should be scanned by antivirus software. Excluding the Dev Drive can improve performance but increases the risk of a successful malware attack.
Example Dev Drive setup and configuration reference:
Appendix A: Configure Pageant
Pageant enables the use of passphrase-protected private keys with ADITO Designer. It avoids repeated passphrase prompts and is required because ADITO Designer cannot request the passphrase interactively. If you installed PuTTY/PuTTYgen as a package, Pageant is typically included. Otherwise, install it separately.
- Install Pageant as part of the PuTTY package (recommended) or as a standalone tool, and ensure it is available on the workstation.
- Start Pageant so it runs in the background and appears as an icon in the Windows task tray.
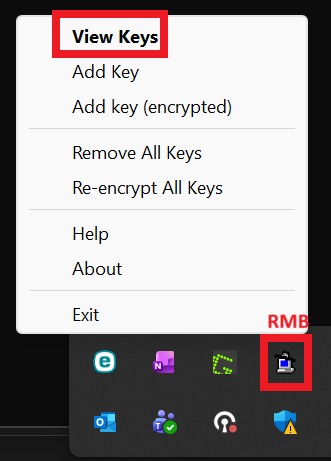
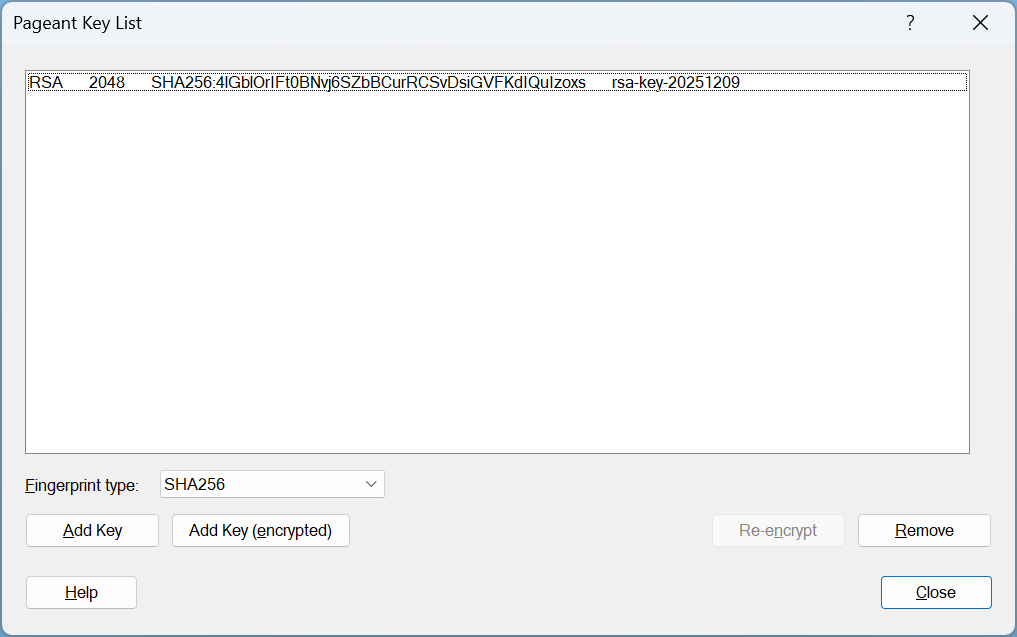
- Open the Pageant menu from the tray icon and select the option to view keys (for example View Keys).
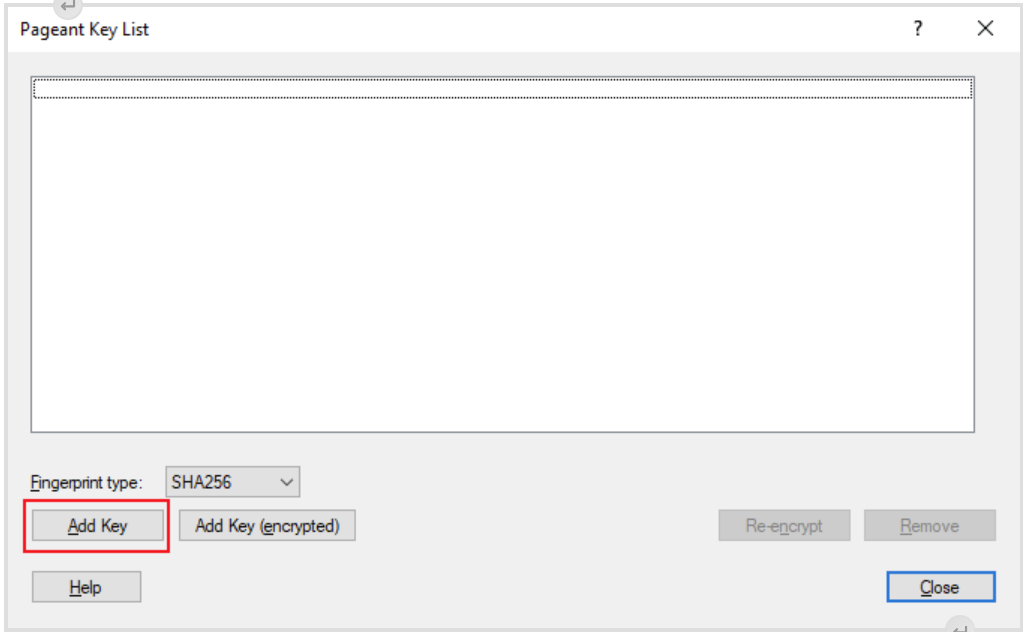
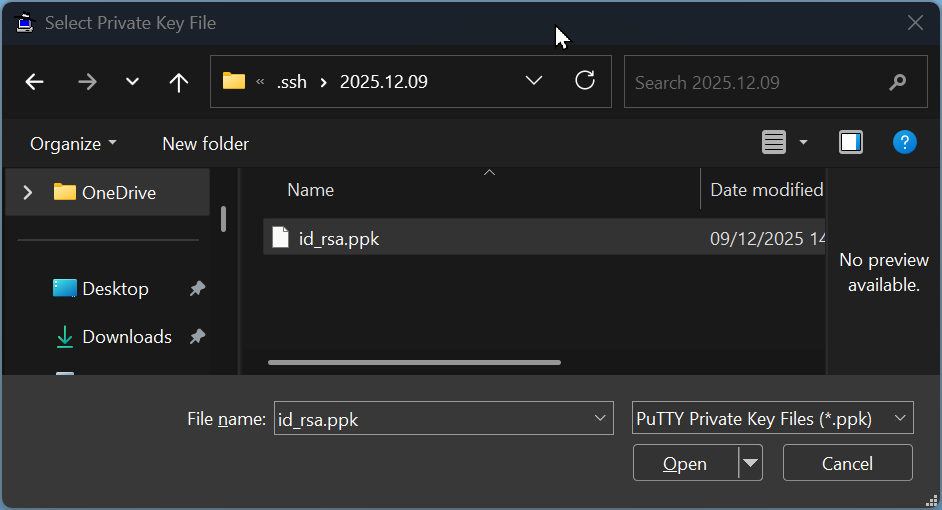
- Add your private key by selecting Add Key and choosing your passphrase-protected .ppk file.
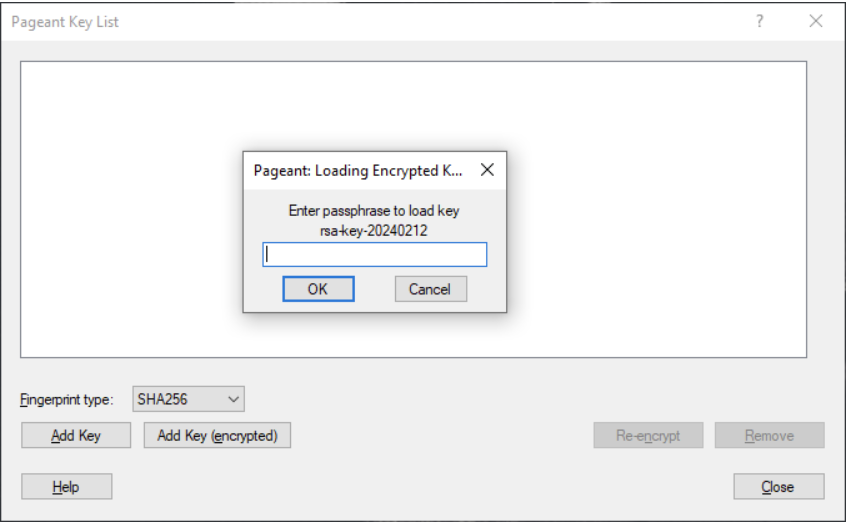
- Enter the passphrase when Pageant prompts you, and confirm that the key appears in the key list.
- Keep Pageant running while you work in ADITO Designer, because ADITO Designer relies on Pageant to access the decrypted key material.
- If authentication fails later, verify that Pageant is still running and that the key is still loaded; if not, add the key again.
- If you reboot the workstation, repeat the steps to start Pageant and load the key, unless you have implemented an approved auto-start mechanism.
Adding the SSH private key to Pageant and keeping Pageant running:
Appendix B: Create an SSH key or add a passphrase
- If you do not yet have an SSH key, create one with PuTTYgen.
- Store the key files under C:\Users<USERNAME>.ssh.
- Save the private key as id_rsa.ppk and assign a passphrase.
- Save the public key as id_rsa.pub.
- If you already have a private key without a passphrase, load it in PuTTYgen.
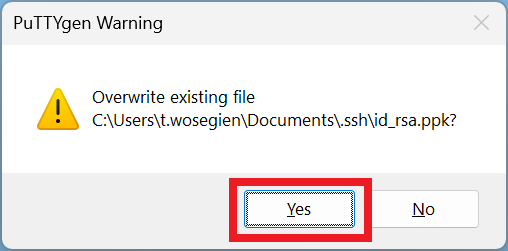
- Set and confirm a passphrase.
- Save the private key again and overwrite the original file.
- Keep the public key registered in GitLab; it remains valid and does not need to be replaced.
Creating an SSH key and adding a passphrase in PuTTYgen:
Appendix C: Create a cloud system in SSP
- If you have permission to create cloud systems, sign in to SSP with your Git credentials.
- Open the System context.
- Click the plus button to create a new system.
- Configure the system settings.
- Request the correct Branch/Tag from your ADITO contact and apply it during configuration.
- Save the system.
- Wait about 15 minutes until provisioning is completed.
- Open the system URL.
- Sign in with the admin password as described earlier in this guide.

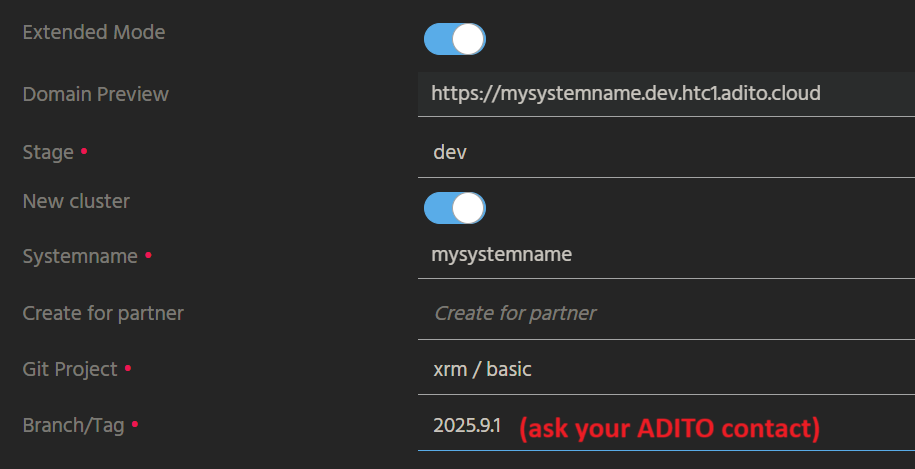 Figure: Creating a new cloud system in SSP.
Appendix D: Troubleshooting
If npm install fails, verify that your project path and project name do not contain special characters and that you have write and delete permissions for the selected location. Delete the folder referenced in the error message and retry npm install. If the issue persists, run load cloud system again and choose a location where you have the required permissions.
If tunnels do not open due to ports already in use or firewall restrictions, ensure that you meet the network and proxy requirements described in Voraussetzungen_Betrieb_ADITO_Designer.pdf.
If the plugin installation dialog does not appear on first start, verify that internet access is available and that the ADITO plugin server is reachable. Also ensure that the proxy settings match the prerequisites document.