Custom Language Files
This document describes the process for maintaining and extending language files in ADITO-based customer projects. It is intended for release managers and project teams who need to manage multilingual content reliably across environments.
1. Prerequisites
- (optional) Access to a translation service like Google Translate for initial value generation
- API key configured in the Options menu of the ADITO Designer
- Connection to a project database with current content, required for attributes and keyword extraction
- Maintenance of
LANGUAGE_EXTRAfile with a relevant statement definition for data-based key generation
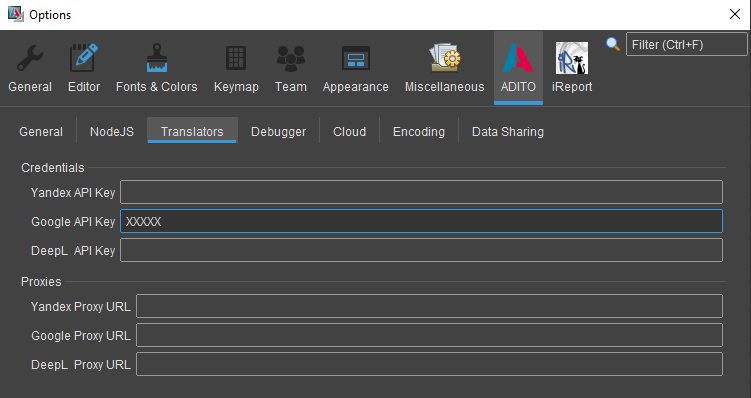
Figure: Translator settings in ADITO Designer options
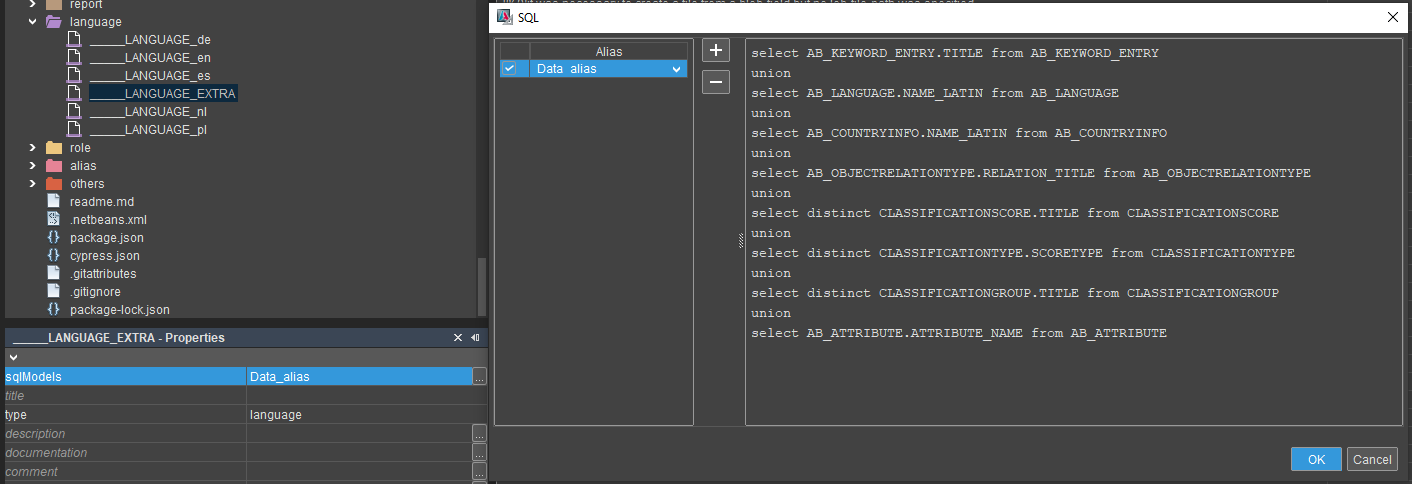
Figure: Example configuration for LANGUAGE_EXTRA and SQL mapping
2. Process Overview
This section outlines the steps to create or update language files in ADITO projects. The process is divided into two main scenarios: creating a new language file for a previously unsupported language, and updating existing language files.
2.1 Clean up and enrich the base language file
- Run
Extract Keysto include any missing keys from the database (e.g. properties, keywords) - Run
Find Unused Keysto identify and remove obsolete keys
Result:
The base language file now contains all currently used keys; outdated entries are removed.
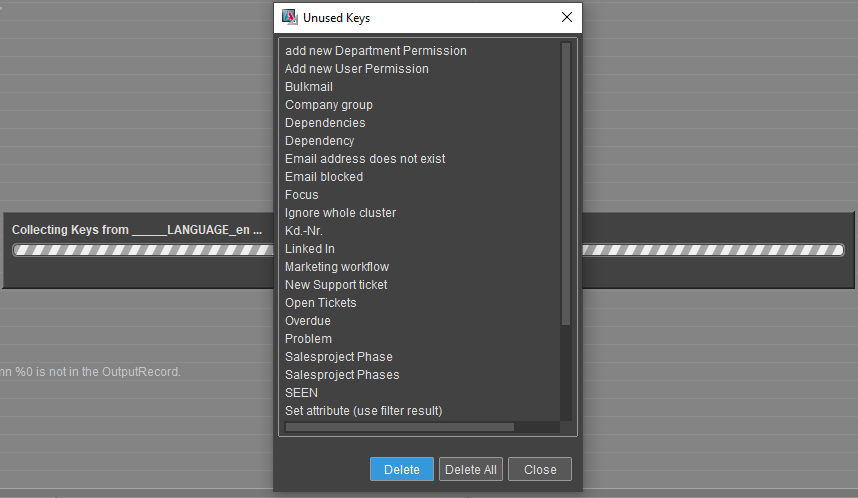
Figure: Unused key cleanup dialog
2.2 Fill missing values in the base language file
- Sort entries by “Value” to identify keys without assigned texts
- Use
Generate missing Values based on Keysto auto-fill entries - Optionally, translate or revise technical keys manually
Result:
Each key in the base file has an initial value, which will be used for automated translation.
2.3 (Only for new languages) Create a new language file
- In the Language section, select
Newand choose the desired language - Use only top-level language codes (e.g.
de,fr) by default - If needed, add region-specific variants like
de_ATorfr_CAmanually for country-specific localization
Result:
A new language file is created containing all relevant keys, but with empty values.
2.4 (Only for new languages) Copy and translate values
- Use
Copy Values from another Language File... - Choose the base language (e.g.
LANGUAGE_en) - Enable
Translate values afterwardsto initiate automatic translation

Figure: Copy values with translation flag enabled
- In the subsequent translation dialog, verify language detection
- No manual changes needed unless specific behavior is required

Figure: Automatic translation using Google Translate integration
Result:
The new language file is populated with translated values.
2.5 Complete missing translations in existing language files
- Sort entries by “Value” to find untranslated keys
- Use
Copy Values from another Language File... - Enable
Copy only selectedandTranslate values afterwards

Figure: Copy values with copy only selected and translation flag enabled
- Enable
Translate only selectedandOverride existing values

Figure: Automatic translation using Google Translate integration
Result:
Previously missing entries are translated and added.
Repeat this step for each existing language file individually
2.6 Review and validation
- Check whether all values have been translated
- Look for untranslated entries or values still in the base language
- Optional: Review content with a native speaker and adjust misleading translations
2.7 Finalization and deployment
- Merge the updated language files into the target project branch
- Deploy with the release or include in the customization package
3. Notes
- This process uses machine translation for initial value generation. Manual review is recommended for production systems.
- Language-specific formats (e.g. date, currency, terminology) must be validated as part of UI/UX testing.