Alias Definition
In some parts of an ADITO project (e.g., in the RecordFieldMapping of a Database RecordContainer), the database is not accessed directly, but via the so-called "Alias Definition".
The Alias Definition, also called "Database structure of the project", is, in principle, a kind of copy of the database structure, augmented with additional features, i.e., you can optionally assign additional properties to a table or to a column (properties, which cannot be assigned in the database itself, e.g. a title or a documentation).
In the "Projects" window, under "alias", double-click on "Data_alias", in order to open the Alias Definition in the "Navigator" window.
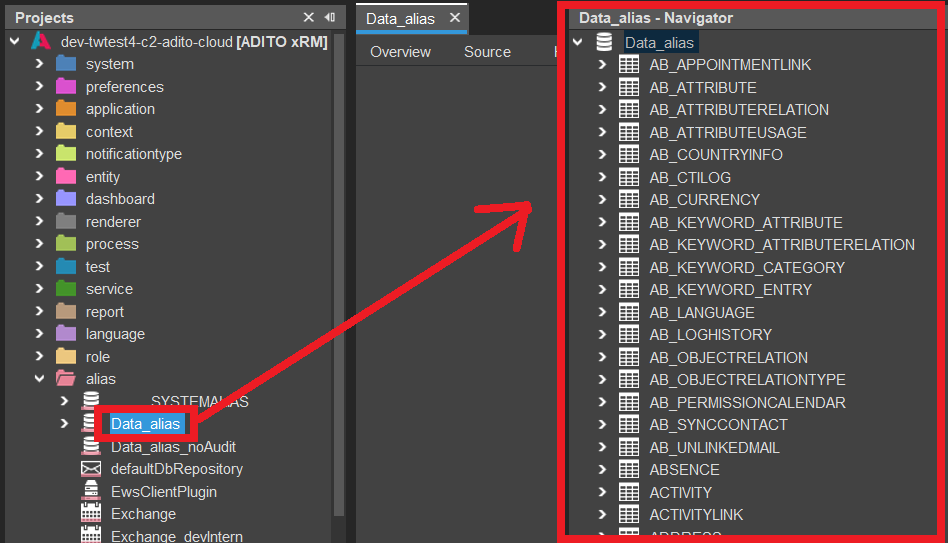
The Alias Definition does not contain any data, but only database structure (e.g., tables, columns, datatypes, constraints, indices, etc.)
Updating the Alias Definition
Whenever you have modified the structure of the database (e.g., you added a table), you need to update the Alias Definition, in order to make the changes available in the ADITO project:
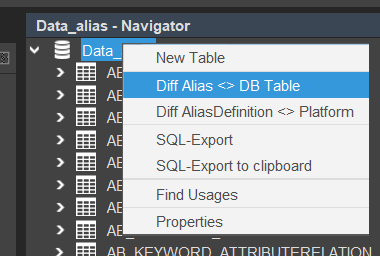
Open the Alias Definition in the "Navigator" window (see above), right-click on "Data_alias" and select "Diff Alias <> DB Table":
In the following dialog, select your project and your database alias (e.g., "default"), and then "OK". Now, ADITO compares the database structure with the Alias Definition. This can take some time.
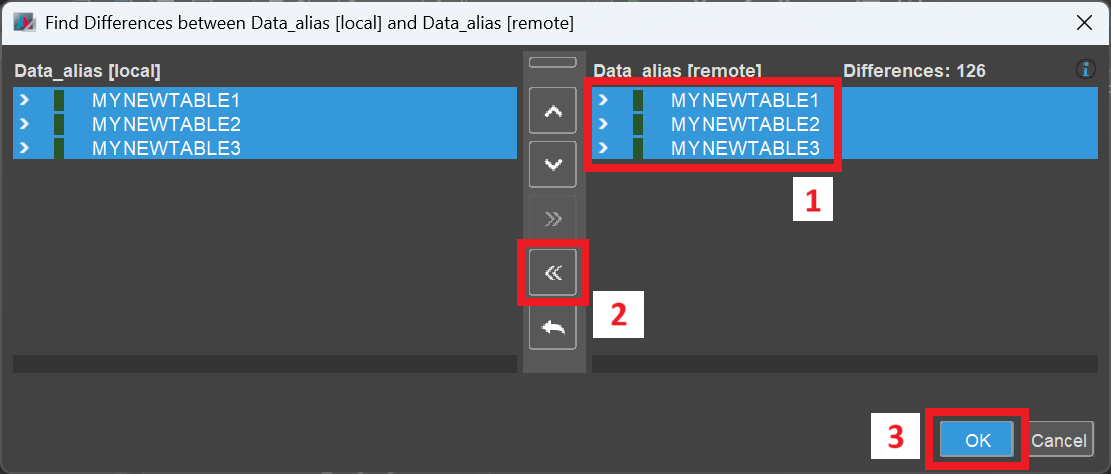
Then, a larger dialog will open, showing all differences between the database structure ("Data_alias [remote]", right part) and the Alias Definition ("Data_alias [local]", left part).
If you hover with the mouse pointer over the little "i" icon in the upper right corner of this dialog, a legend will pop up, explaining the meaning of the colors of the little bars shown in front of each table name.
As (for example) adding tables has made the database's structure "newer" than the Alias Definition, we need to perform an update from "remote" (= database; right part) to "local" (= Alias Definition; left part): Mark all added/changed tables shown on the right (click on them subsequently, holding the CTRL key). Click on the button showing 2 arrows pointing to the left (<<), followed by "OK".
The update process might take some time. After it is finished, look at the "Navigator" window: The new tables and their columns have been added to the Alias Definition.
If you want to create or modify your database structure without using Liquibase, you can always choose between both ways:
- Either you start with the database editor (system > default > Data_alias > ADITO), create your tables and columns and then update the Alias Definition via "Diff Alias <> DB Table" from "remote" to "local".
- Or you do it the other way round: You first create your tables and columns in the Alias Definition: Double-click on alias > Data_alias and then choose "Create Table" from the context menu when right-clicking on "Data_alias" in the Navigator window. Then, right-click on the new table and choose "New Column". Afterwards, click on the new column and edit its properties according to your specification. Finally, update the database via "Diff Alias <> DB Table" from "local" to "remote".
In both cases, it might be useful to auto-generate Liquibase files afterwards, because then, e.g., you can reset your database via the Liquibase-related function "Drop all & Update..." (see above). Please refer to chapter "Create Liquibase files automatically" of the Designer Manual