Adding Logs
Introduction
Several of the ADITO xRM project's Contexts have a tab named "Logs" available in their MainView. This kind of logging is not directly related to changes of EntityField values, but to changes of the content of the corresponding database columns (i.e., it is not available for calculated EntityFields that are not mapped to database columns).
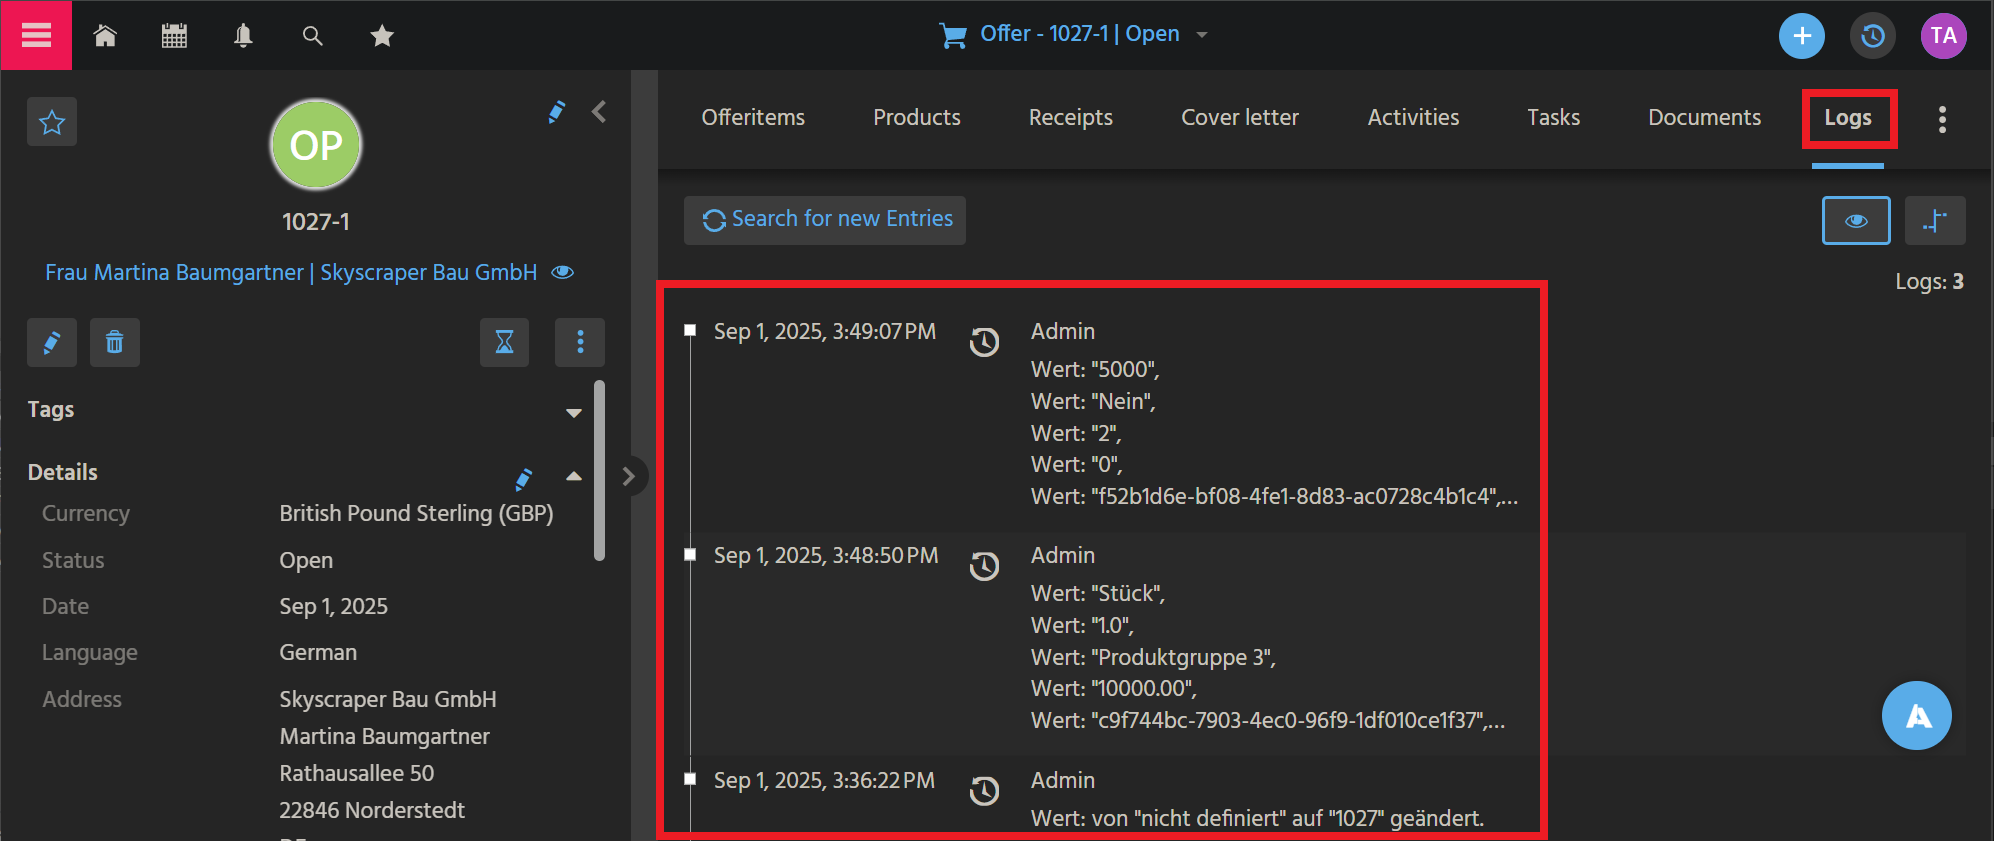
Example of a "Logs" tab, in OfferMain_view
Step by step instructions
These are the steps to add a similar Logs tab to the MainView of another Context:
-
Prerequisites:
- The corresponding Entity must have the "standard" EntityFields DATE_EDIT, DATE_NEW, USER_EDIT and USER_NEW.
- Logging must be generally enabled for the ADITO system, via setting property
databaseAuditEnabledto "true". You can find this property, if (in the "Projects" window) you double-click on system > <system name> and then double-click on "____CONFIGURATION". Then, in the "Navigator" window, navigate to Modules > Database: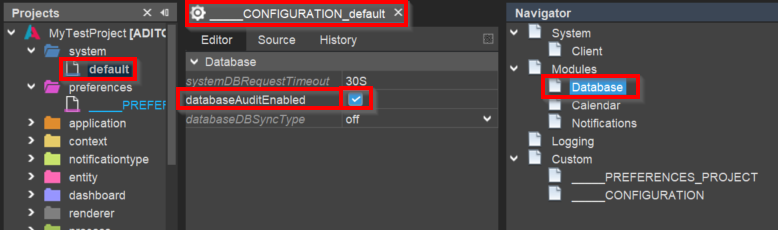
- Logging must be generally enabled for the project, via setting property
databaseAuditAliasto "____SYSTEMALIAS". You can find this property, if (in the "Projects" window) you open node "preferences" and double-click on ____PREFERENCES_PROJECT. Then, in the "Navigator" window, navigate to Modules > Database.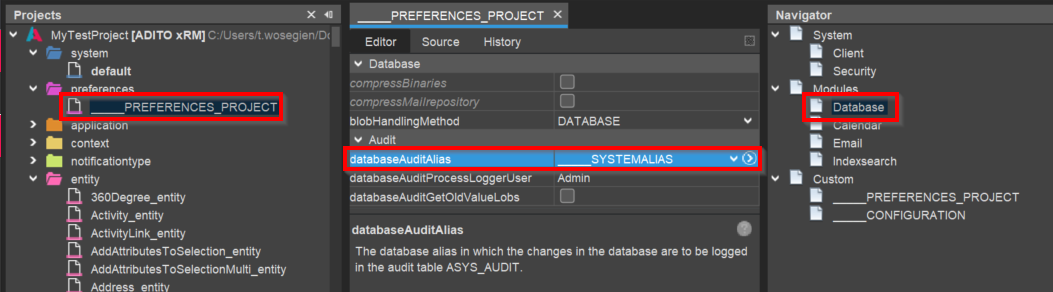
- Logging must be enabled for the respective database table(s), by setting its property
auditModeto BLOB (in the Alias Definition):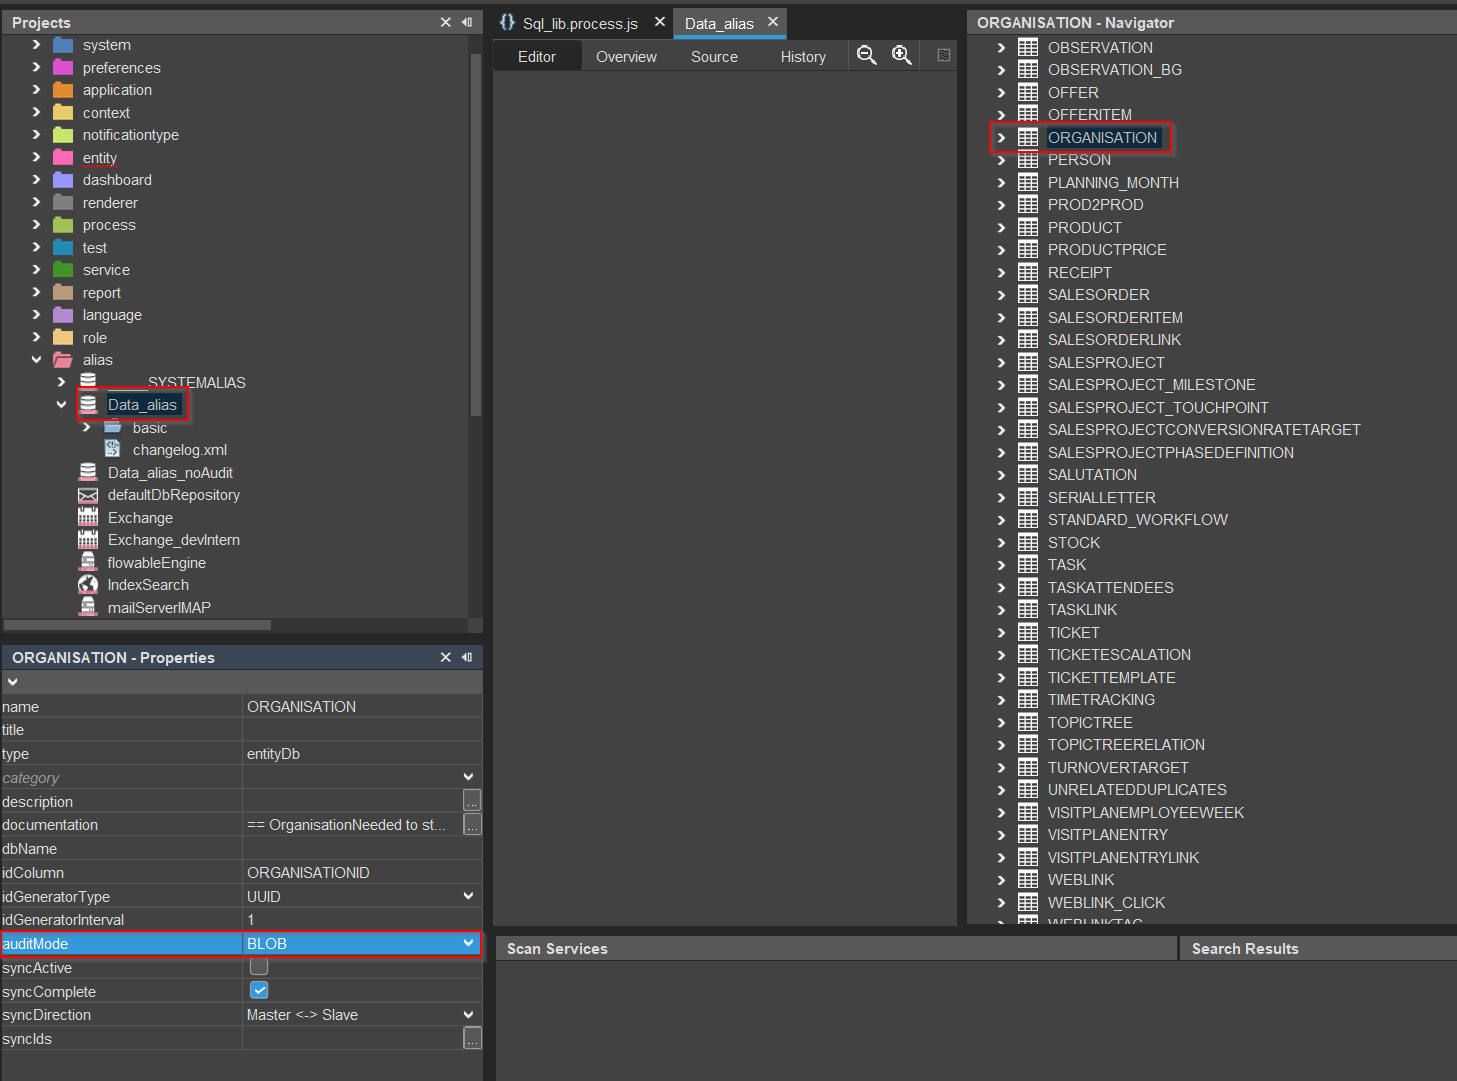
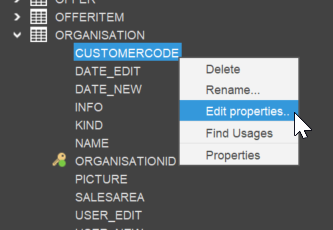
- Logging must be enabled for every database column that is to be logged, e.g., like it is already done for table ORGANISATION's column CUSTOMERCODE. This requires the following steps:
- Right-click on the database column in the Alias Defintion and choose option "Edit properties":
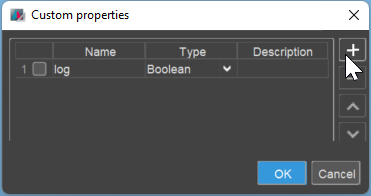
- Add a "custom property" via the "plus" button, name it
log(exactly spelled like this!) and set its type to BOOLEAN:
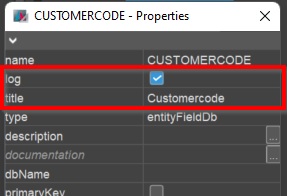
- Then, a new boolean property named
logappears in the property sheet of the column. (If not, simply click on another column and then back again.) Set this property to "true" and set thetitleto be used for the log entries, in order to identify the column:
- Add a "custom property" via the "plus" button, name it
- Right-click on the database column in the Alias Defintion and choose option "Edit properties":
-
Create a Consumer (usually named "LogHistories").
-
Set the new Consumer's properties as follows:
entityName: LogHistory_entityfieldName: LogHistoryProvider
-
Double-click on the new Consumer's Parameter "tablenames_param" and set property
valueProcessaccording to this pattern:MyEntity_entity.LogHistories.tablenames_param.valueProcess.jsvar res = [];
res.push({id: vars.get("$field.MYIDFIELD"), tableNames: ["MYTABLENAME"]});
res = JSON.stringify(res);
result.object(res);(In this pattern, "MYIDFIELD" and "MYTABLENAME" are, of course, placeholders that must be replaced by the actual name of the related database table(s) and by the name of the EntityField related to the respective database table's primary key.)
Here is an example of Person_entity (module contact):
Person_entity.LogHistories.tablenames_param.valueProcess.jsimport { result, vars } from "@aditosoftware/jdito-types";
var res = [];
res.push({ id: vars.get("$field.CONTACTID"), tableNames: ["CONTACT", "COMMUNICATION", "ADDRESS", "AB_ATTRIBUTERELATION", "DSGVODELETEFLAG", "DSGVO", "COMMUNICATIONSETTINGS", "INTERESTLINK"] });
res.push({ id: vars.get("$field.PERSONID"), tableNames: ["PERSON"] });
res = JSON.stringify(res);//currently only strings can be passed as param
result.object(res); -
Properties
exposeandmandatoryof the new Consumer's Parameter "tablenames_param" must both remain in default state "true". -
In the "Projects" window, double-click on the MainView that should get the Logs tab.
-
In the "Navigator" window, right-click on the MainView and choose "Add reference to existing View".
-
In line "EntityField", choose the new Consumer that you had created before (see above).
-
In line "View", choose LogHistoryFilter_view and click OK.
-
Deploy all changes and (with respect to the project/system-wide settings) restart the server: In the SSP, click on button "Restart Web Pods" in Section "Primary System" of your system's PreviewView.
-
Wait until your system is available again and then test your new Logs tab, by changing a value of an EntityField related to one of the database columns that you had given the property
logwith value "true" (see above).
Now, in the Logs tab, you should see a new log entry, after clicking on button "Search for new Entries".
Done!
Language settings
You can set the language of the log entries in LogHistoryExecutor_lib (module loghistory):
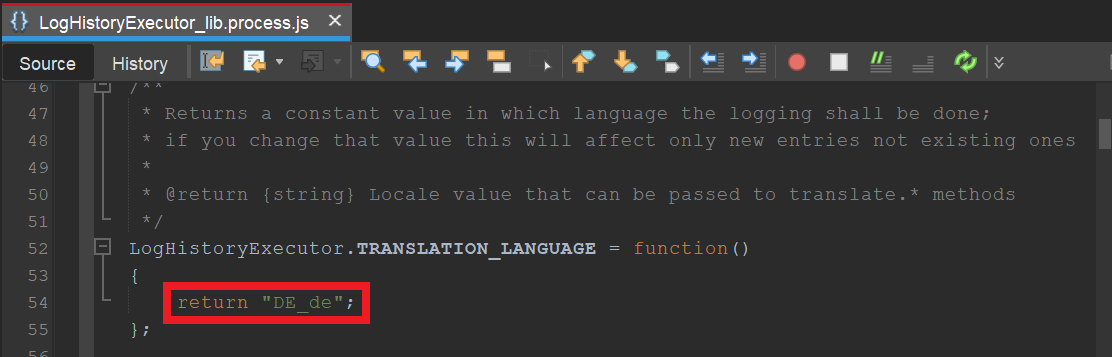
Changing this value will only effect future log entries. Existing log entries will always remain unchanged.
Blueprint
On request, ADITO can provide you with a "Blueprint" that facilitates adding a Logs tab semiautomatically.
Further useful custom properties
Besides the custom property log (see above) there are further custom properties, which need to be set for specific use cases:
-
keyword(Type: String); purpose: resolving keywords. Example: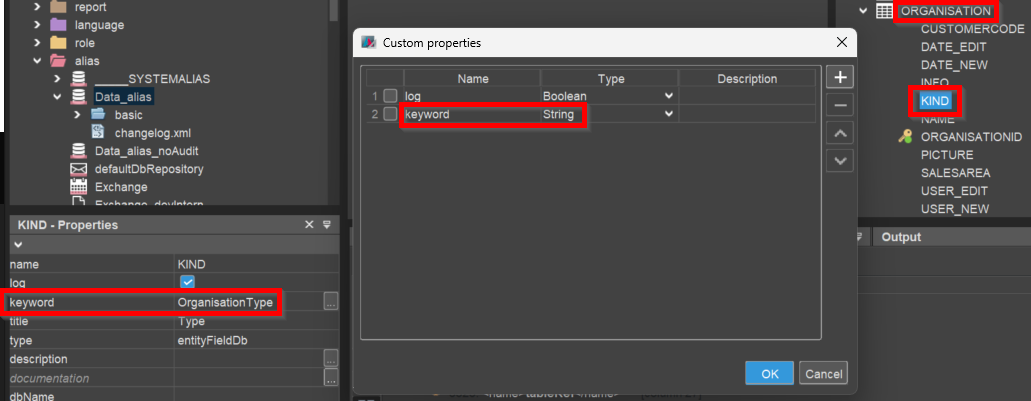
-
translate4Log(Type: JDito); purpose: resolving displayValues. Example: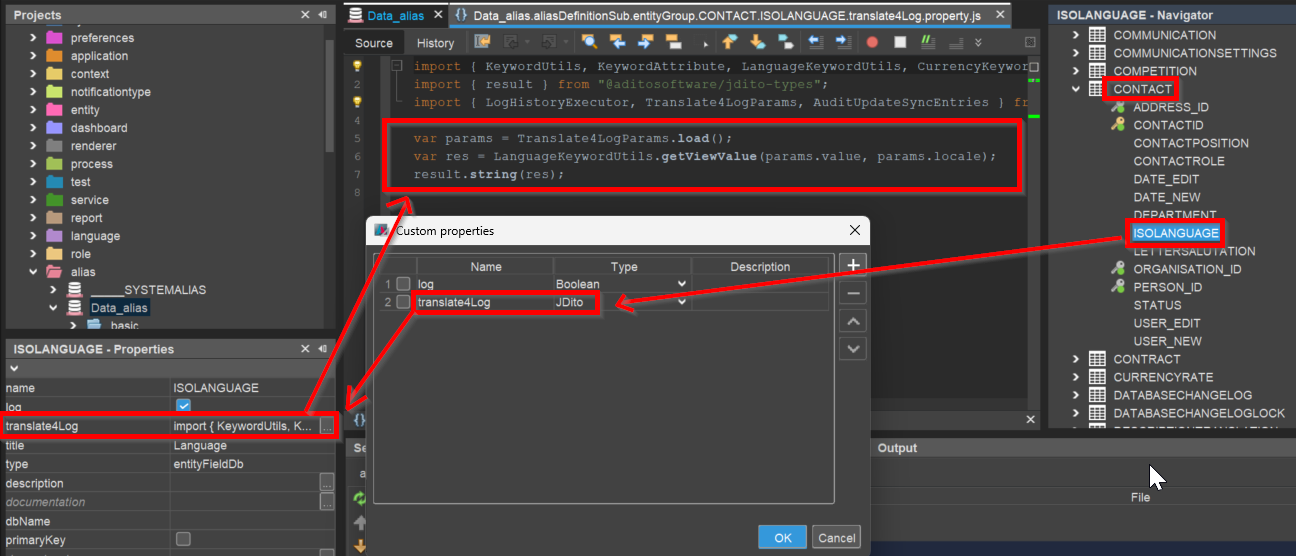
-
autoMapTrueFalse4Log(Type: Boolean); purpose: resolving booleans without having to do this via translate4Log. Example: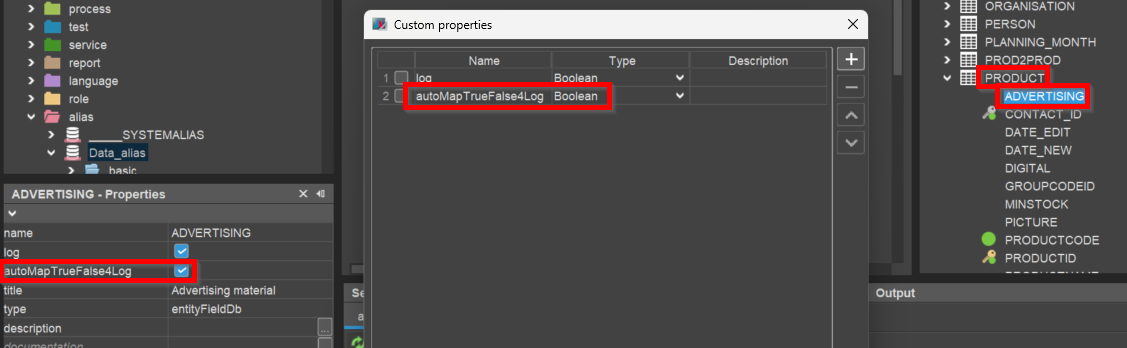
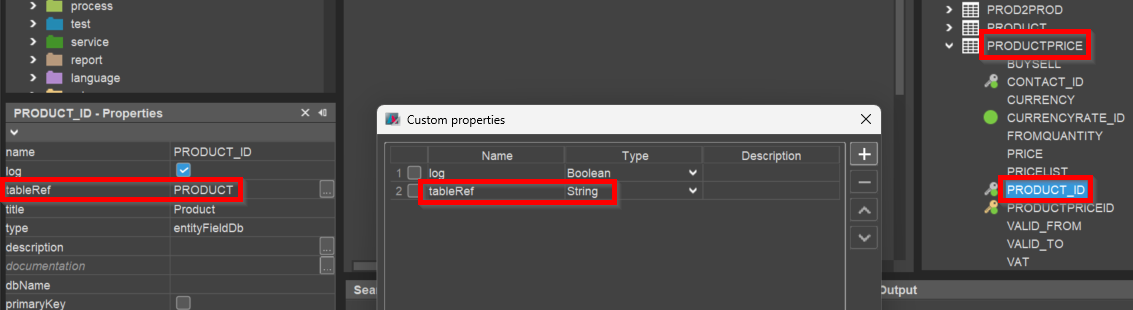
-
tableRef(Type: String); purpose: required in order to log changes in tables to which there is a logging dependency (like, e.g., PRODUCTPRICE -> PRODUCT). Example: