Adding Attributes
Introduction
Several of the ADITO xRM-Project's Contexts have a tab named "Attributes" available in their MainView. Attributes are specific features that can be assigned to certain datasets. The "Attributes" tab enables you to assign one or multiple Attributes to the record shown in the left part ("master") of the MainView.
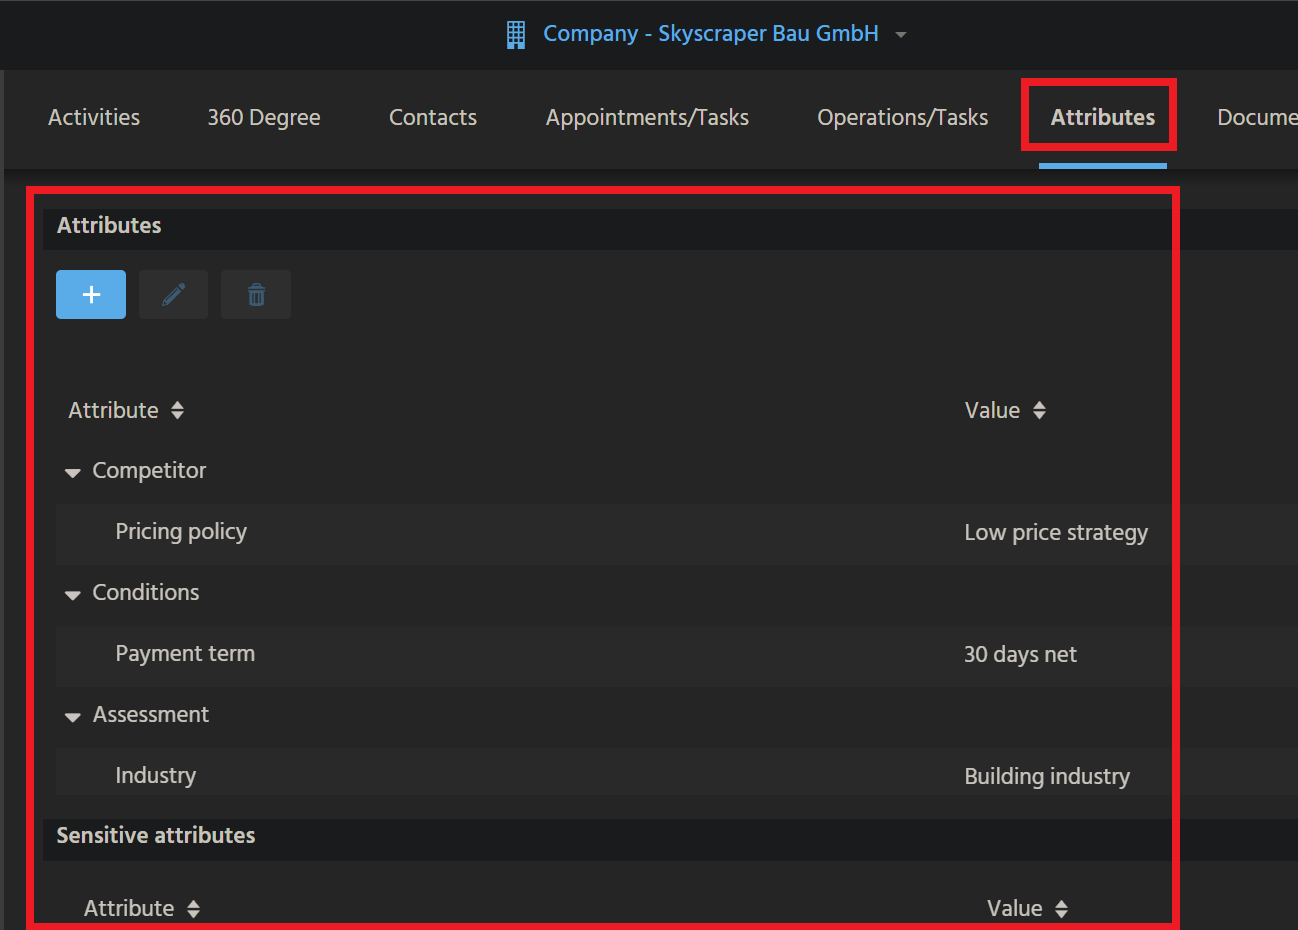
Example of an "Attributes" tab, in OrganisationMain_view
Step by step instructions
These are the steps to add a similar "Attributes" tab to the MainView of another Context:
For training purposes, you may perform these steps using an xRM Entity that has got a MainView, but no Attributes tab yet - e.g., BulkMail (module bulkmail).
Create Consumer of Provider "AttributeRelations"
Create a Consumer named "Attributes", which includes the following property settings:
entityName: AttributeRelation_entityfieldName: AttributeRelationsonValidation: cf. Person_entity (module contact):
import { result, vars } from "@aditosoftware/jdito-types";
import { AttributeRelationUtils } from "AttributeRelationUtils_lib";
import { ContextUtils } from "ContextUtils_lib";

result.string(AttributeRelationUtils.validateAttributeCount(vars.get("$field.CONTACTID"), ContextUtils.getCurrentContextId(), "Attributes", null));
(Replace CONTACTID by the EntityField that is related to your own Context's primary key.)
Fill Parameters ObjectRowId_param and ObjectType_param. You may use Person_entity (module contact) as pattern:
import { result, vars  } from "@aditosoftware/jdito-types";

result.string(vars.get("$field.CONTACTID"));
(Replace CONTACTID by the EntityField that is related to your own Context's primary key.)
import { result } from "@aditosoftware/jdito-types";
import { ContextUtils } from "ContextUtils_lib";

result.string(ContextUtils.getCurrentContextId());
Create Consumer of Provider "TreeProvider"
Create a Consumer named "AttributeTree", which includes the following property settings:
entityName: AttributeRelation_entityfieldName: TreeProvider
Fill Parameters ObjectRowId_param and ObjectType_param. (Code patterns see chapter Create Consumer of Provider "AttributeRelations".)
Assign View references
- EditView: Assign View reference to AttributeRelationMultiEdit_view (via Consumer "Attributes" , see above)
- MainView: Assign View reference to AttributeRelationTree_view (via Consumer "AttributeTree" , see above)
FilterExtensionSet "Attribute_filter"
If the Attributes should be filterable, create a FilterExtensionSet, name it "Attribute_filter", (see chapter FilterExtensionSet), and use, e.g., the code of Person_entity (module contact) as pattern.
afterUiInit
In the Entity's afterUiInit property, place the code required for the automatic presetting of the Attributes when a new dataset is being created - see, e.g., Person_entity (module contact):
import { neon, vars } from "@aditosoftware/jdito-types";
import { AttributeRelationUtils } from "AttributeRelationUtils_lib";
import { ContextUtils } from "ContextUtils_lib";

if(vars.get("$sys.recordstate") == neon.OPERATINGSTATE_NEW)
{
   AttributeRelationUtils.presetMandatoryAttributes(ContextUtils.getCurrentContextId(), "Attributes");
}
Add Context in method getPossibleUsageContexts
Add your Context's name in method AttributeUtil.getPossibleUsageContexts() (in library AttributeUtil_lib (module attribute)):

The above solution is only a shortcut for training purposes. In practice, modularization applies, meaning that the Context's name would be added via a ServiceImplementation.
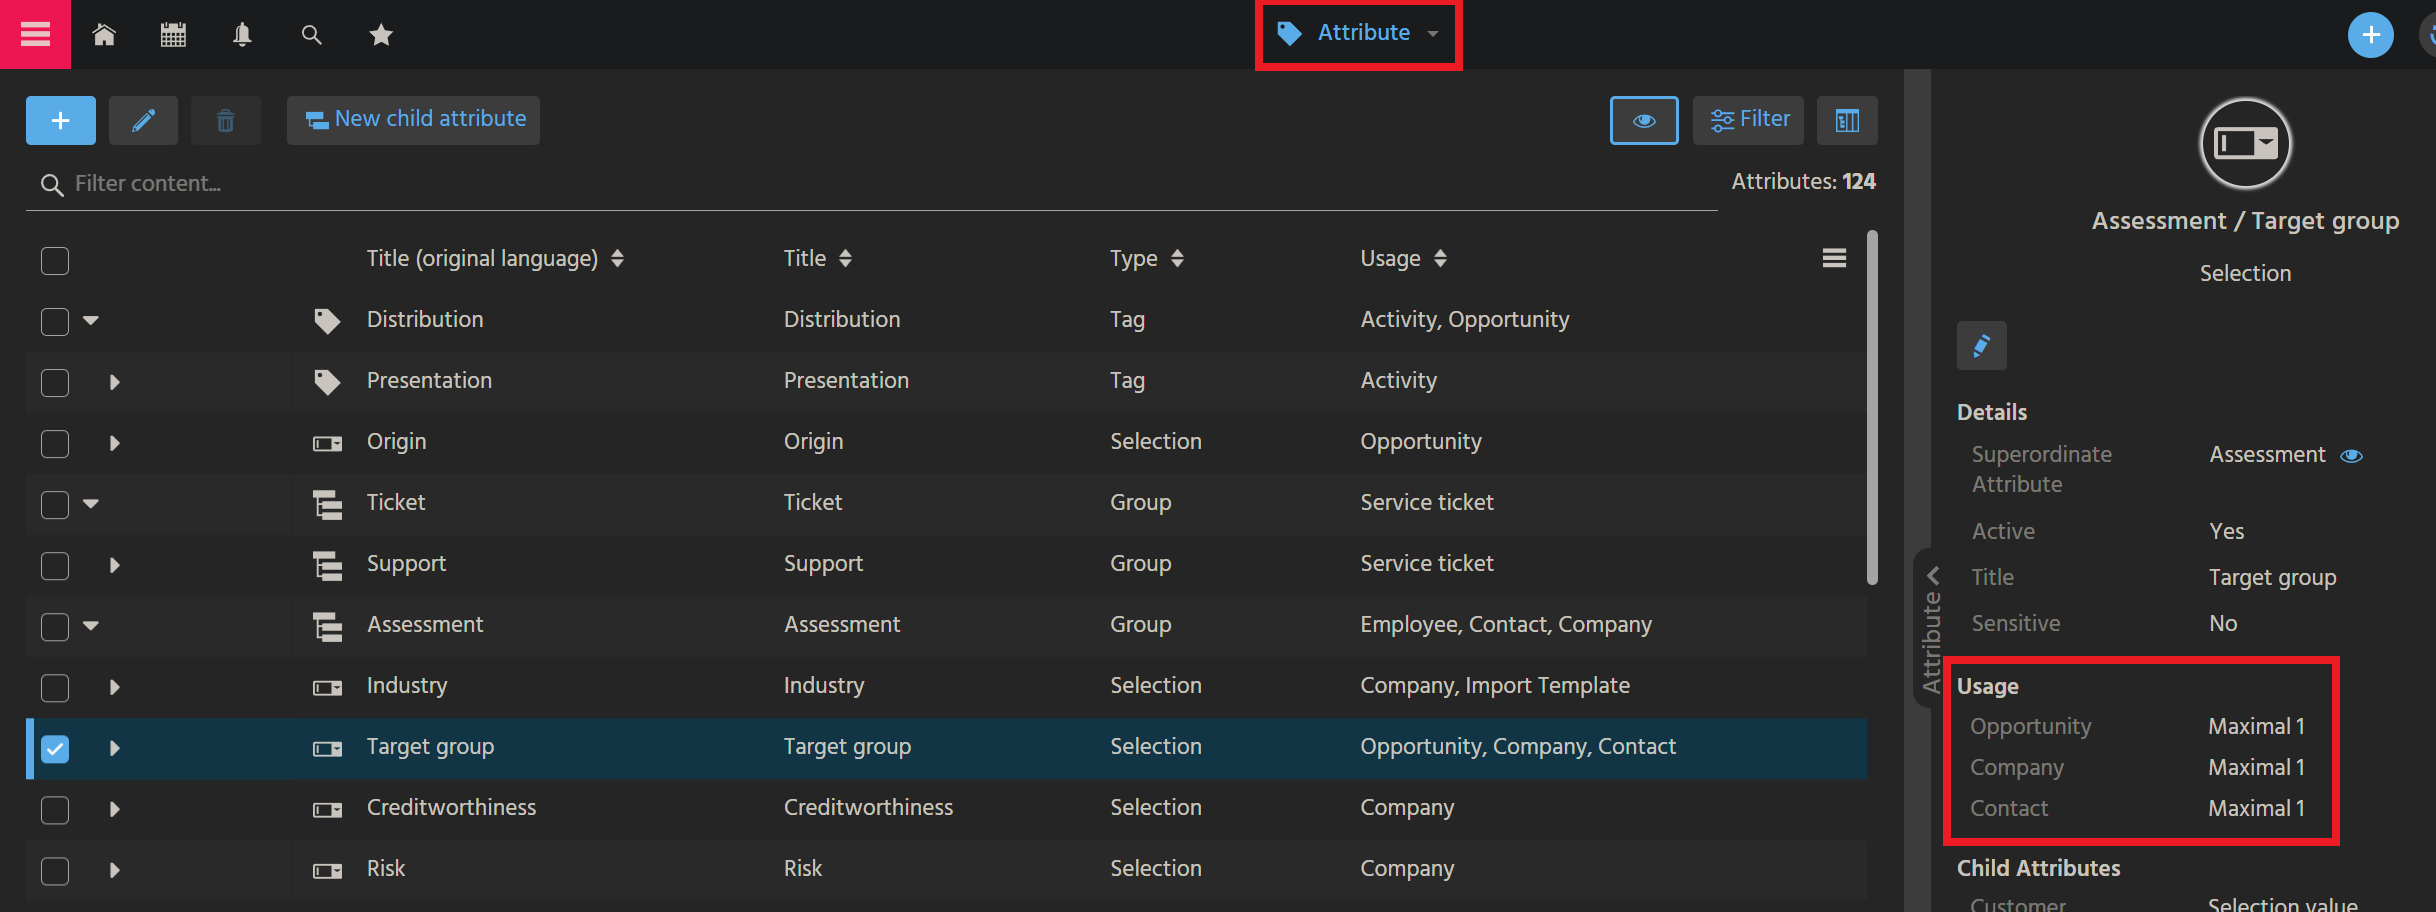
Add Context in Attribute section "Usage"
In the Web Client, navigate to Context "Attributes" (in menu group "Administration") and add the Context to section "Usage" of every Attribute that you want to be available in your Context (or create a new Attribute for your Context first, respectively).
Example:
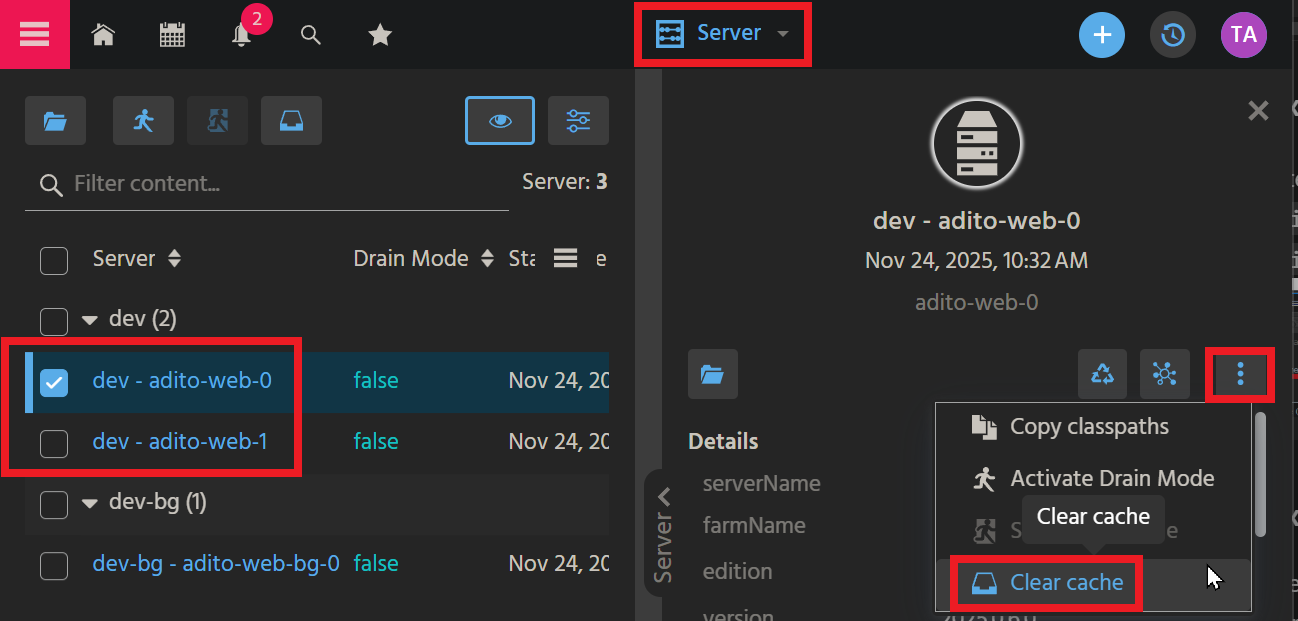
If you still cannot select Attributes in your new Attributes tab, then empty the cache of all web pods, using Context "Server" in menu group "Manager":
Done!
Test
Now, test your new Attributes tab by clicking on it and adding/saving some Attributes.