Task
Once you have created the Entities, you can now define their sub-structure, i.e., create their fields (EntityFields). Strictly keep to the concept.
You can find helpful information in the generic part of the documentation, see chapter The Basics.
Solution
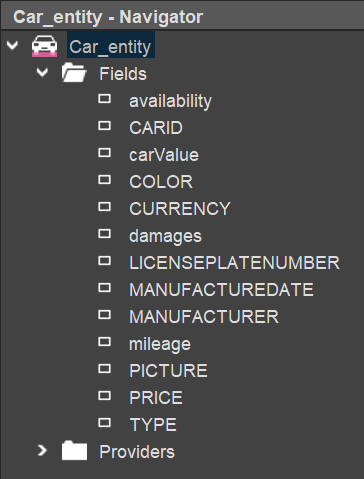
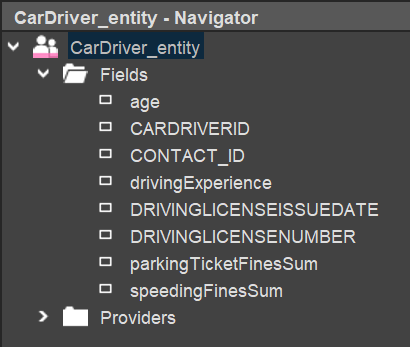
In the project tree, double-click on the Entity, in order to display its sub-structure in the Navigator window. In the Entity's context menu, you can now choose "New Field" and subsequently create name and title for all EntityFields.
Additionaly, you need to set property contentType for some of the fields:
- NUMBER for
- Car: PRICE, mileage, carValue, damages
- CarDriver: age, drivingExperience, parkingTicketFinesSum, speedingFinesSum (- CarReservation will be handled later)
- DATE (resolution: DAY) for
- Car: MANUFACTUREDATE
- CarDriver: DRIVINGLICENSEISSUEDATE (- CarReservation will be handled later)
- IMAGE for Car: PICTURE
The contentType of all other EntityFields can remain in default state (= TEXT).
The logic of the calculated EntityFields will be added later.
The result may look like this:
Now, you need to decide what EntityFields are mandatory. Set their property mandatory to true. Then, datasets can only be saved, if all mandatory EntityFields have a value; otherwise, the "Save" button will be disabled, and the message "Required value is missing" will be displayed.
For all EntityFields acting like "foreign keys", you should set propert linkedContext accordingly:
- CarDriver_entity.CONTACT_ID: Person
- CarReservation_entity.CAR_ID: Car
- CarReservation_entity.CARDRIVER_ID: CarDriver
The effect of property linkedContext is that, in the client, the respective EntityField values will be displayed with a hyperlink, allowing you to open the Car/CarDriver in the MainView of the configured Context.