Using Blueprints provided by the ADITO Designer
The ADITO Designer comes with the five following Blueprints:
Generate Context with Default Views
This Blueprint can be used by creating a new Context in the context menu inside the project window. Go to your project window and right-click on "context" below the "neon" entry. Then choose "New with Blueprint" and "Create Context with Default Views".
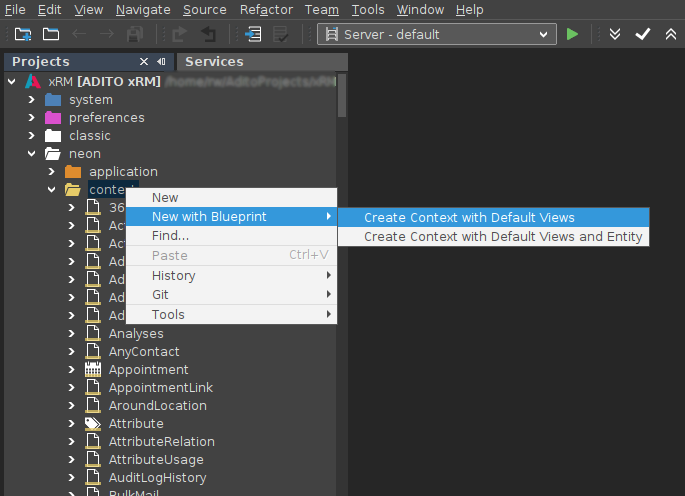
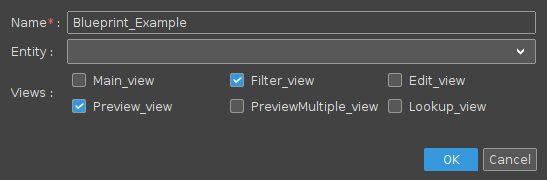
Before the Blueprint is executed a dialog opens and asks for the values of all specified parameters.
Mandatory inputs are marked with a red * (star).
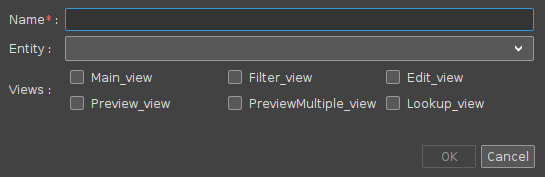
Input all your desired values and click "OK".
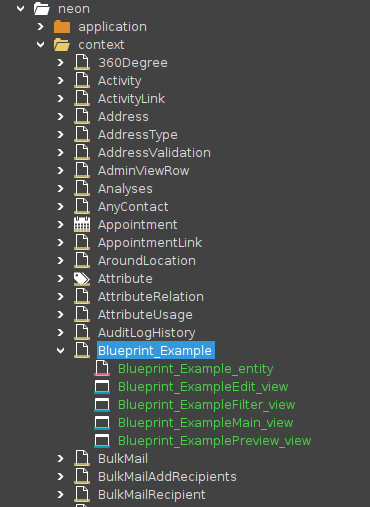
The Blueprint will be executed, and the new Context with all checked views will be created and opened.
If the optional "Entity"-Field is filled, the chosen Entity will be added to the new Context.

Generate Context with Default Views and Entity
This Blueprint can be used by creating a new Context with a new Entity in the context menu inside the project window. Go to your project window and right-click on "context" below the "neon" entry. Then choose "New with Blueprint" and "Create Context with Default Views and Entity".
Before the Blueprint is executed a dialog opens and asks for the values of all specified parameters. The difference here, to the previous Blueprint, is you have to input a name for the Entity that will be created.
After you input all values and start the execution by clicking "OK", the Context, Entity and all chosen Views are created and opened.
The name of the Entity and Context have to be different, according to the CodingGuideline the Entity has to end with "_entity".
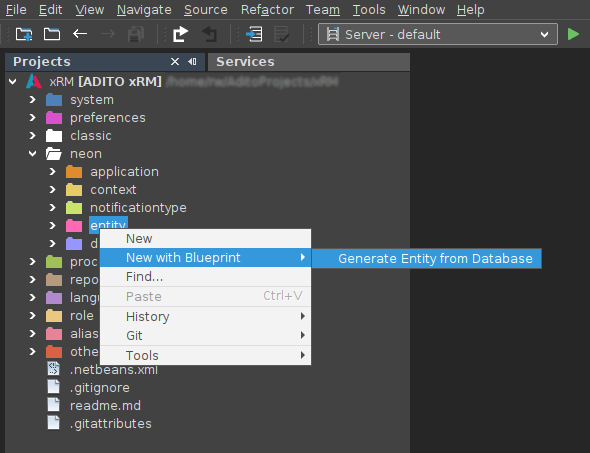
Generate Entity from Database
This Blueprint can be used by creating a new Entity in the context menu inside the project window. Go to your project window and right-click on "entity" below the "neon" entry. Then choose "New with Blueprint" and "Generate Entity from Database".
Before the Blueprint is executed a dialog opens and asks for the values of all specified parameters.
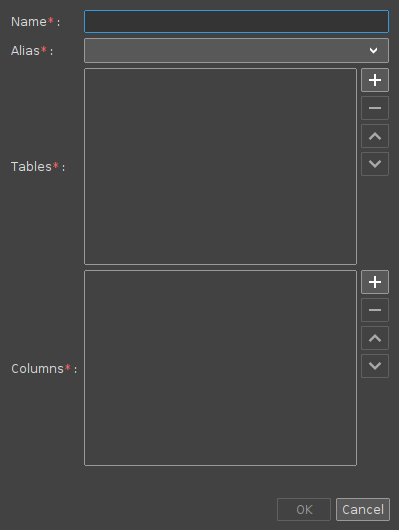
Input all your desired values and click "OK".
The selection inside the "Columns"-field is based on your selection in the "Tables"-field, only columns of the selected tables can be chosen.
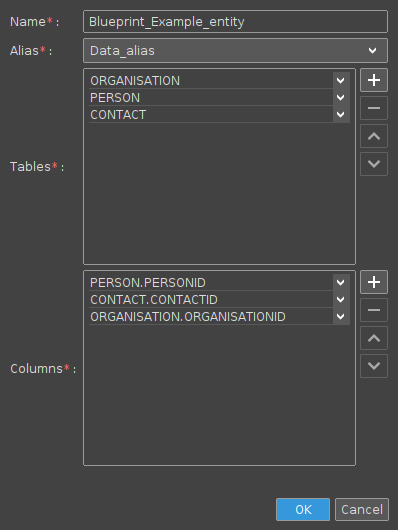
After you filled all fields with your desired values and execute the Blueprint by clicking "OK" the new entity will be created.
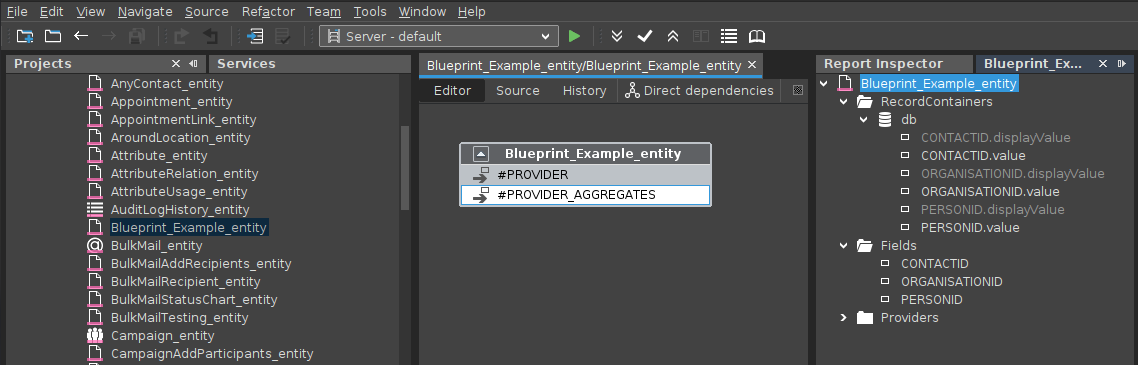
In this new entity there is going to be a recordContainer named "db", all fields you specified in the dialog earlier will be present there. The fields inside the RecordContainer are connected to the correct RecordField and have the "dbRecordFieldMapping" type.
Create empty Changelog
This Blueprint is available in the context menu inside the project window. Go to your project window and right-click on a db-alias below the "alias" entry. Then choose "New with Blueprint" and "Create empty Changelog".
In the following dialog you can alter the author, which is your username by default.
After you close the dialog by clicking "OK", the new Liquibase-script with an empty Changelog opens.
Create Changelog with new DB-Table
This Blueprint is available in the context menu inside the project window. Go to your project window and right-click on a db-alias below the "alias" entry. Then choose "New with Blueprint" and "Create Changelog with new DB-Table".
In the following dialog you can alter the author, which is your username by default. The dialog also asks for a table-name and primary-key-column, the latter is optional. Additionally, you can choose which default columns are going to be inserted in the new Changeset. The new Changelog and Changeset each automatically get a UUID.
After you close the dialog by clicking "OK", the new Liquibase-script with a Changelog and a prefilled Changeset opens.