Creating new Blueprints
Creating Blueprints as xml-File
Blueprints are created and saved as xml-files. With that in mind you start by creating a new empty xml-file and add the following:
    <?xml version="1.0" encoding="UTF-8" ?>
    <blueprint name="AID Example"></blueprint>
The "name"-attribute will be shown inside the context-menu in the Designer.
Inside the "blueprint"-element you start by adding the "type" with the corresponding element, for this example you want to create a Blueprint that adds a new Context.
With Version 2021 the new type "liquibase" can be used.
    <?xml version="1.0" encoding="UTF-8" ?>
    <blueprint name="AID Example">
        <type>neonContext</type>
    </blueprint>
After that you can start adding our parameters, they will be shown in the dialog before the Blueprint is executed and filled by the user that executes the Blueprint. In this example you want 2 parameters:
-
"Name": This parameter you do not have to specify, it is added automatically by the type="neonContext"
-
"Views": This is going to be a selection with 2 possible values: "Main" and "Filter"
    <?xml version="1.0" encoding="UTF-8" ?>
    <blueprint name="AID Example">
        <type>neonContext</type>
        <parameters>
            <selection name="viewNames">
                <displayName>Views</displayName>
                <elements>Main|Filter</elements>
            </selection>
        </parameters>
    </blueprint>
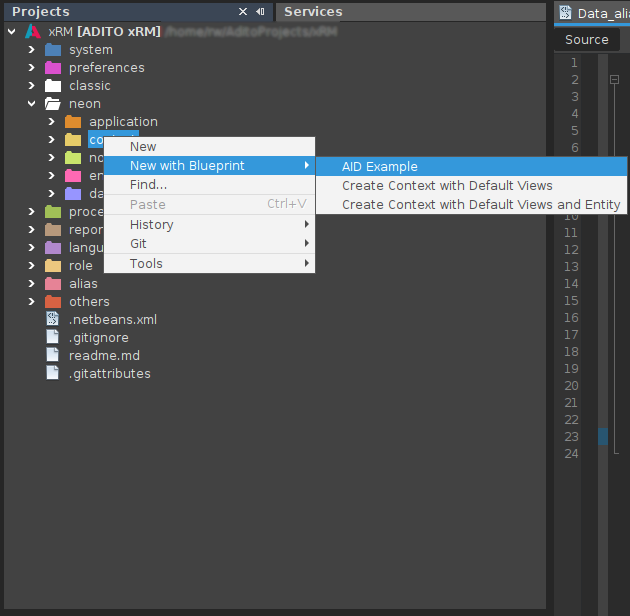
At this point you can save our Blueprint as xml-file in the ".aditoproj/blueprints"-directory and test if everything works this far. To do that, open your ADITO Designer and open the project where you saved your Blueprint. Now you can go into the context-menu in the project-window and select "New with Blueprint" and then the entry with the name of your Blueprint. This example is named "AID Example" and should be displayed as followed:
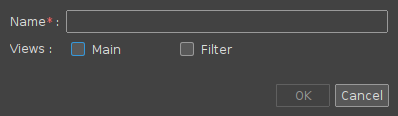
In the dialog that is opened you can check if all your parameters are present and displayed correctly. For this example it should look like this:
After you click "OK" nothing will happen, this is expected because there is no code for the execution yet.
If everything is correct so far, you can start implementing the execution-functionality inside the "data"-element. The first thing that the Blueprint of this example should do is:
-
Create a new Context with the name that the user has to input
-
Create all Views that the user has chosen
First add the code to create a new Context. For this a new "data"-element has to be added below the parameters.
    <?xml version="1.0" encoding="UTF-8" ?>
    <blueprint name="AID Example">
      <type>neonContext</type>
      <parameters>
        <selection name="viewNames">
          <displayName>Views</displayName>
          <elements>Main|Filter</elements>
        </selection>
      </parameters>
      <data>
        <documentData name="context">
            <contentType>MODEL</contentType>
            <document><![CDATA[
              <neonContext VERSION="1.1.1"></neonContext>
            ]]></document>
        </documentData>
      </data>
    </blueprint>
At this state the Blueprint will create a new Context with a name that is chosen in the dialog before it is executed. After the dialog is closed with "OK" the new Context is created and opened.
The checkbox-field "Views" will do nothing at this point.
Now that it is possible to create a new Context with any name, you can add the functionality for creating the views for this Context.
    <?xml version="1.0" encoding="UTF-8" ?>
    <blueprint name="AID Example">
      <type>neonContext</type>
      <parameters>
        <selection name="viewNames">
          <displayName>Views</displayName>
          <elements>Main|Filter</elements>
        </selection>
      </parameters>
      <data>
        <documentData name="context">
          <contentType>MODEL</contentType>
          <document><![CDATA[
              <neonContext VERSION="1.1.1">
    <!-- Add mainView and filterView if they were checked in the dialog -->
                <mainView if="${viewNames.Main_view}">${name}Main_view</mainView>
                <filterView if="${viewNames.Filter_view}">${name}Filter_view</filterView>
    <!-- Add reference "forEach" chosen view -->
                <references>
                  <neonViewReference forEach="${viewNames}">
                    <name>${gen.uuid}</name>
                    <view>${name}${forEach.current}</view>
                  </neonViewReference>
                </references>
              </neonContext>
            ]]></document>
        </documentData>
        <documentData name="views">
          <contentType>MODEL</contentType>
          <document><![CDATA[
    <!-- Create all Views -->
              <neonView VERSION="1.1.6" forEach="${viewNames}">
                <name>${name}${forEach.current}</name>
              </neonView>
            ]]></document>
        </documentData>
      </data>
    </blueprint>
Saving Blueprints in your project
All Blueprints you create can be saved in the ".aditoproj/blueprints/" directory inside your project. The name of the document is not important, but it has to end with ".xml". These files will be added to your projects GIT repository and therefore be versioned and shared with everybody working on this project.