Technical details
The Flowable modeler is the tool to create Workflows.
Running on a server or local container you can access it via a given host address (locally most common: localhost:8082/flowable-modeler). You can create Workflows with all the information put in your canvas (edit surface). There are different things you can select and drag in your canvas.
The credentials for the Flowable modeler are admin/test (for local use). If you are using a SSP system you have to copy the password of the flowable admin within your desired system.
You can access the data of the Workflows via the database that is used in your system (this is not the same as the ADITO Databases!). This can be used to identify and debug problems when creating Workflows that do not behave as intended.
Designer Properties
If you are using a ADITO SSP system all settings are set for you. If you are using workflows for onPremise systems you have to configure it.
Go to your system in the ADITO Designer and open the "Instance Configuration". Navigate via the navigator to "Modules" and configure the "Business process management"-properties:
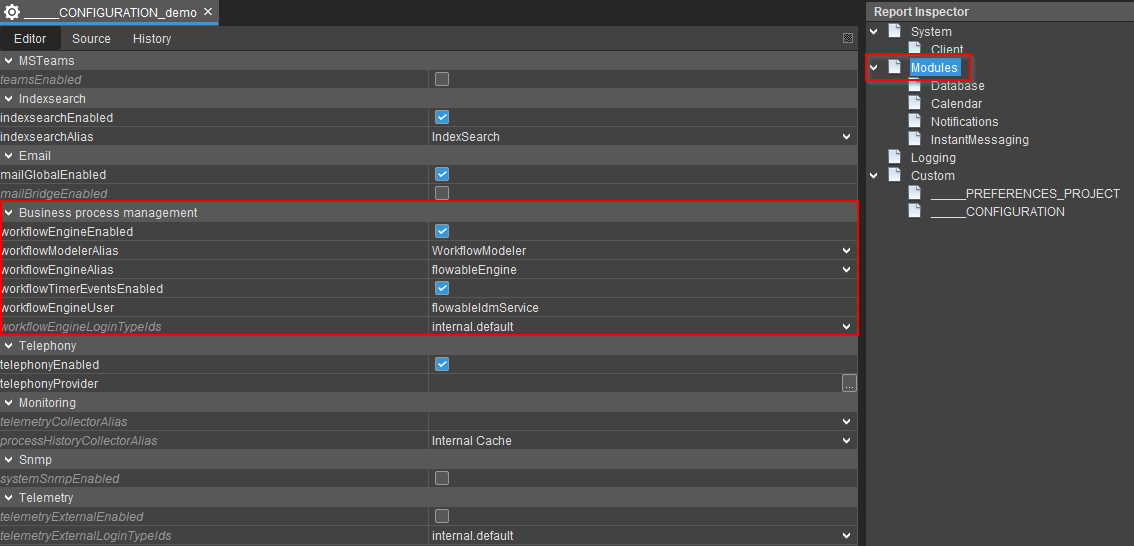
You also have to enter the correct addresses to the defined aliases in your system!
Workflow properties
A Workflow can have different properties filled. For every component below the most common properties will be mentioned with a short explaination.
-
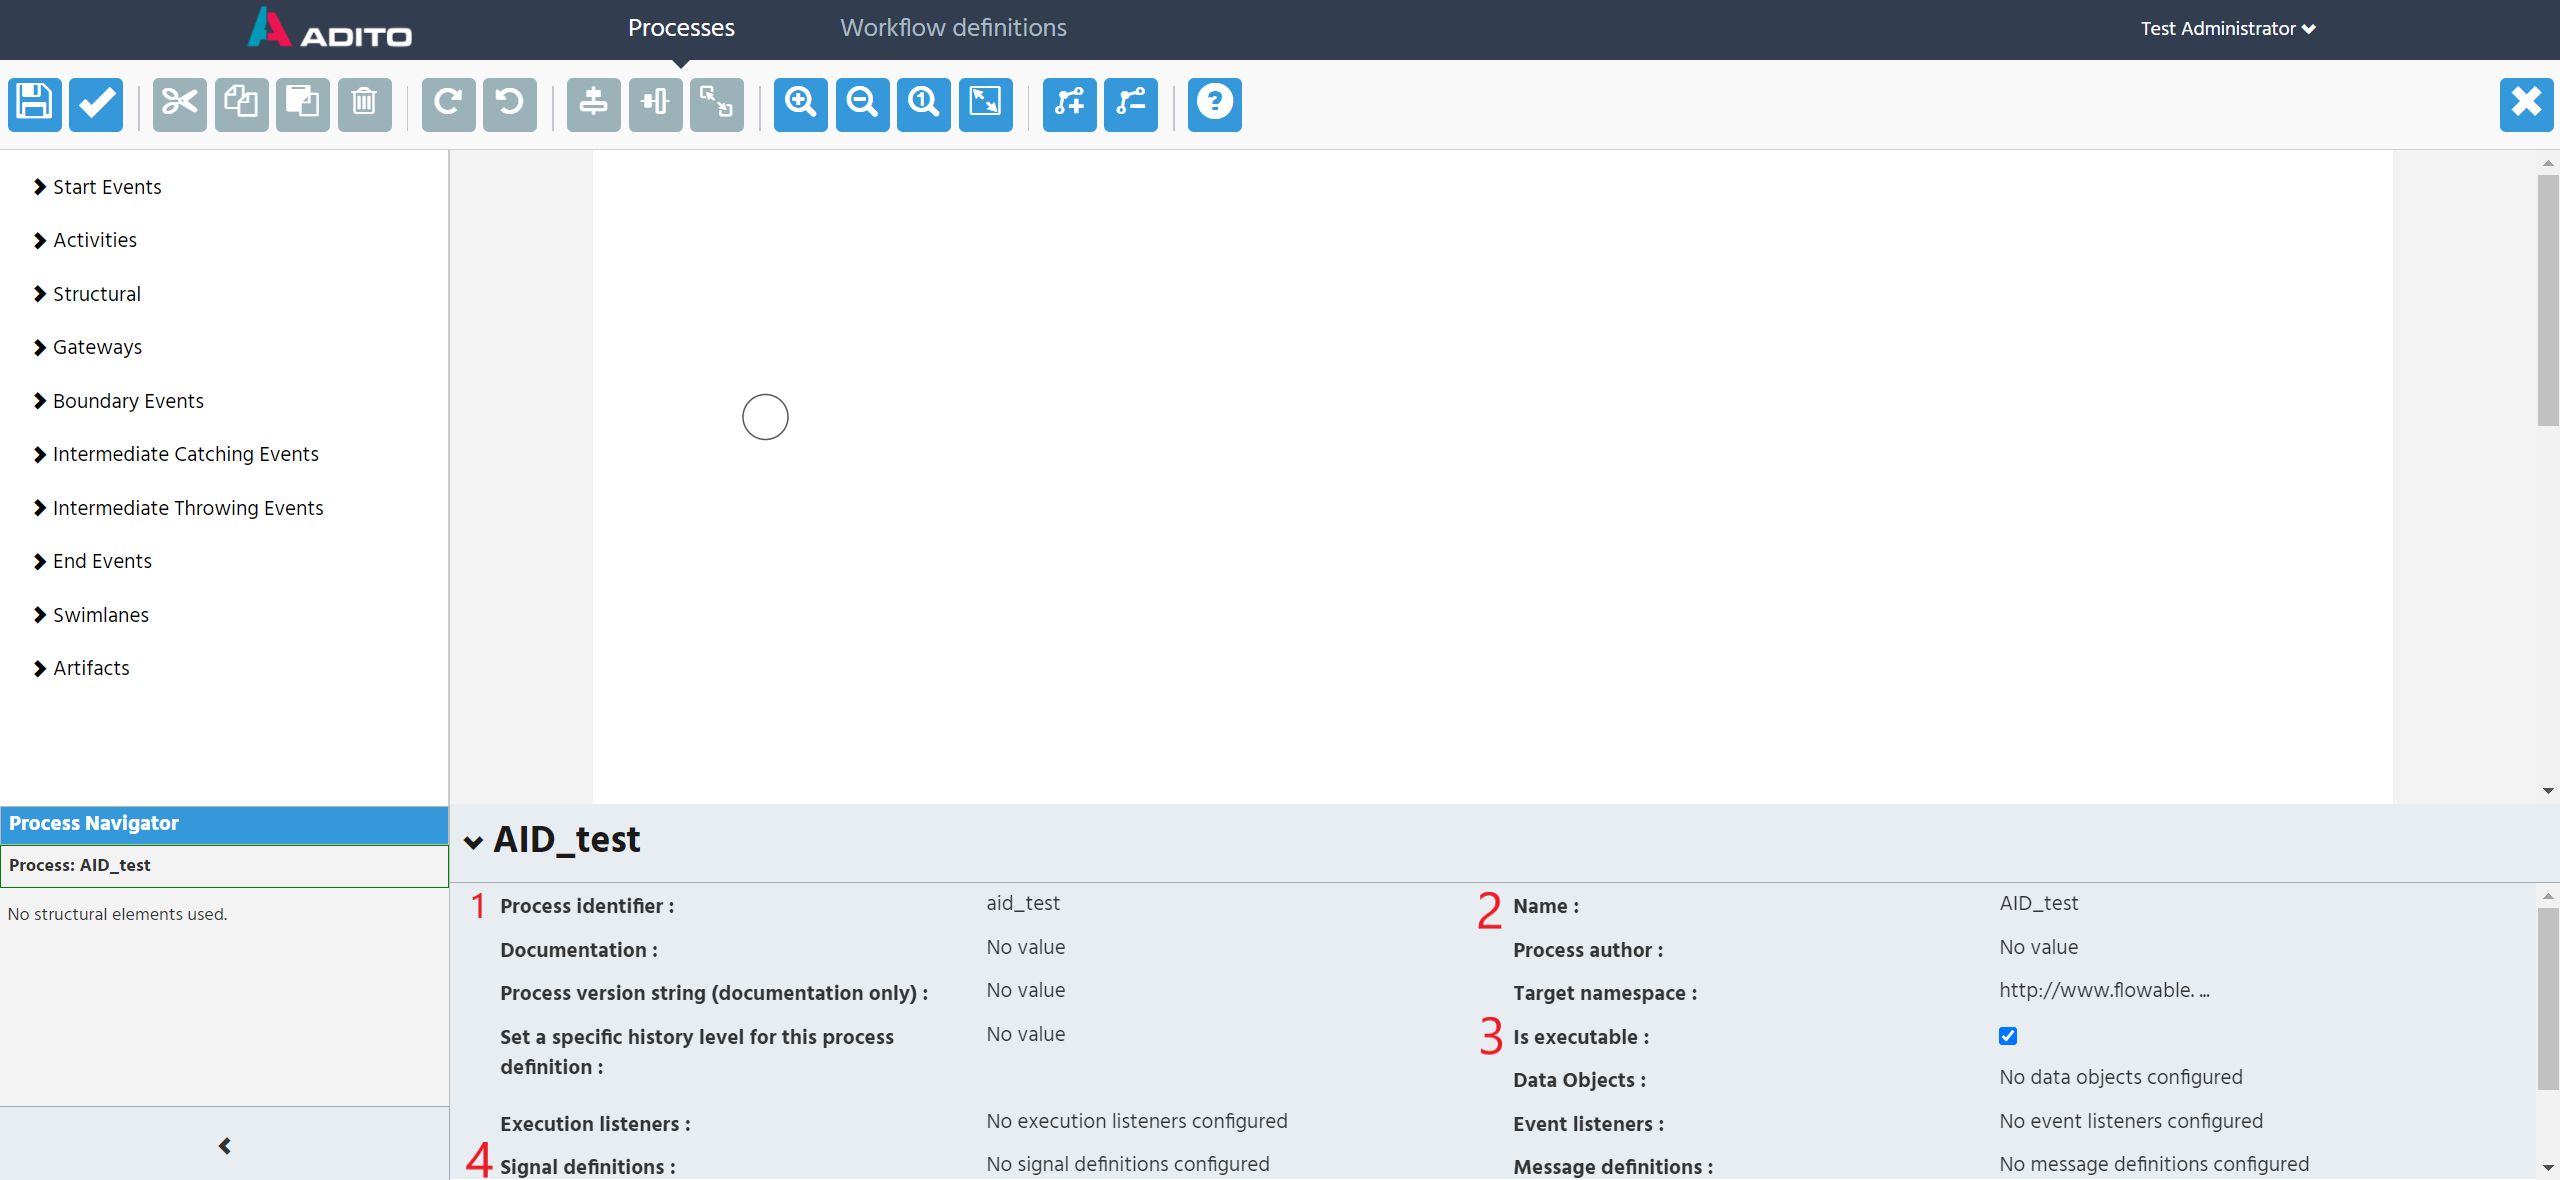
Process identifier = the ID of the Workflow
-
Name = this is the name that will be shown in the ADITO client
-
is executable = defines if this Workflow can be executed
-
Signal definitions = optional if you use signals to trigger your Workflow (see Example 3)
Start Event
Every workflow needs a Start Event and an End Event. When you create a Workflow, a normal 'Start Event' is already set. You can choose from different Start Events if needed. It is recommended to start either with the basic 'Start Event' or 'Signal Start Event'
Sequence Flows
The Sequence Flow is used to show the order of Flow Elements in a process or a choreography. Each Sequence Flow has only one source and only one target.
- Flow condition = optional but needed for 'Exclusive Gateways'. You have to enter the condition when this flow path will be taken. Needs to return a boolean value. It is recommended to use values you defined either in ADITO or entered in an 'User Task'.
Activities
Activities are the essential elements of a Workflow. These define what process/task is executed. There are three main tasks you need:
User Task
A User Task is a typical Workflow Task where a human performer performs the task with the assistance of a preview/dialog in the client.
-
Name = This will be the name of the task for a user in the ADITO client
-
Assignments = the user or group that will receive this task
-
Form properties = fields that can be filled in the ADITO client. These fields are available in the jDito-Code later.
Service Task
A Service Task is a Task that uses the processes from the ADITO project. These processes have the variaty "workflow" (project tree in ADITO Designer) and communicate via rest-webservices.
-
Id = unique ID for the task
-
Name = name to differantiate the tasks
-
Class (should already be filled)
-
jDito process = the process from ADITO which will be processed when the task begins. The parameters are also written in the jDito-Code (see example 6.1)
Script Task
A Script Task is executed by a business process engine. The modeler or implementer defines a script in a language that the engine can interpret. When the task is ready to start, the engine will execute the script. When the script is completed, the task will also be completed.
-
Script format = should be "javascript"
-
Script = the script content
-
Name = the name to differantiate the different scripts
Gateways
Gateways are used to split or combine different routes of the Workflow. Normally there are flow conditions that decide which path will be taken for the flow.
-
Exclusive Gateway = a diverging Exclusive Gateway (Decision) is used to create alternative paths within a process flow. This is basically the "diversion point in the road" for a process. For a given instance of the process, only one of the paths can be taken.
-
Parallel Gateway = a Parallel Gateway is used to create parallel flows. This is useful to have multiple tasks at the same time.
End Event
End Events will consequently end the Workflow and the running instance.
For further Information you can read the flowable documentation https://documentation.flowable.com/design-user-guide/3.5.0/10-introduction.html
Creating Workflows
In your client you should see the context "Workflowdefinition" while browsing through the "Administration" global context search. When you open this tab you can see, if already exists, Workflows. In your filter_view you can either open the Flowable Modeler or create a new model. Both of these buttons will transfer you to the Flowable Modeler after you filled the fields, if requiered. By creating a Workflow Model you have to enter a name for your Workflow, a key and optionally a description. After you saved your fields, you get directly redirected to the editing canvas of the Flowable Modeler.
Now you can fill your Workflow and if you are finished you can save the process and deploy your changes to ADITO.
This document uses an example to illustrate the function and procedure of Workflows.