How to Set Up
Creation of your own ADITO App
To enable communication between the ADITO system and MST, a central point must enable this functionality. For this you need the following.
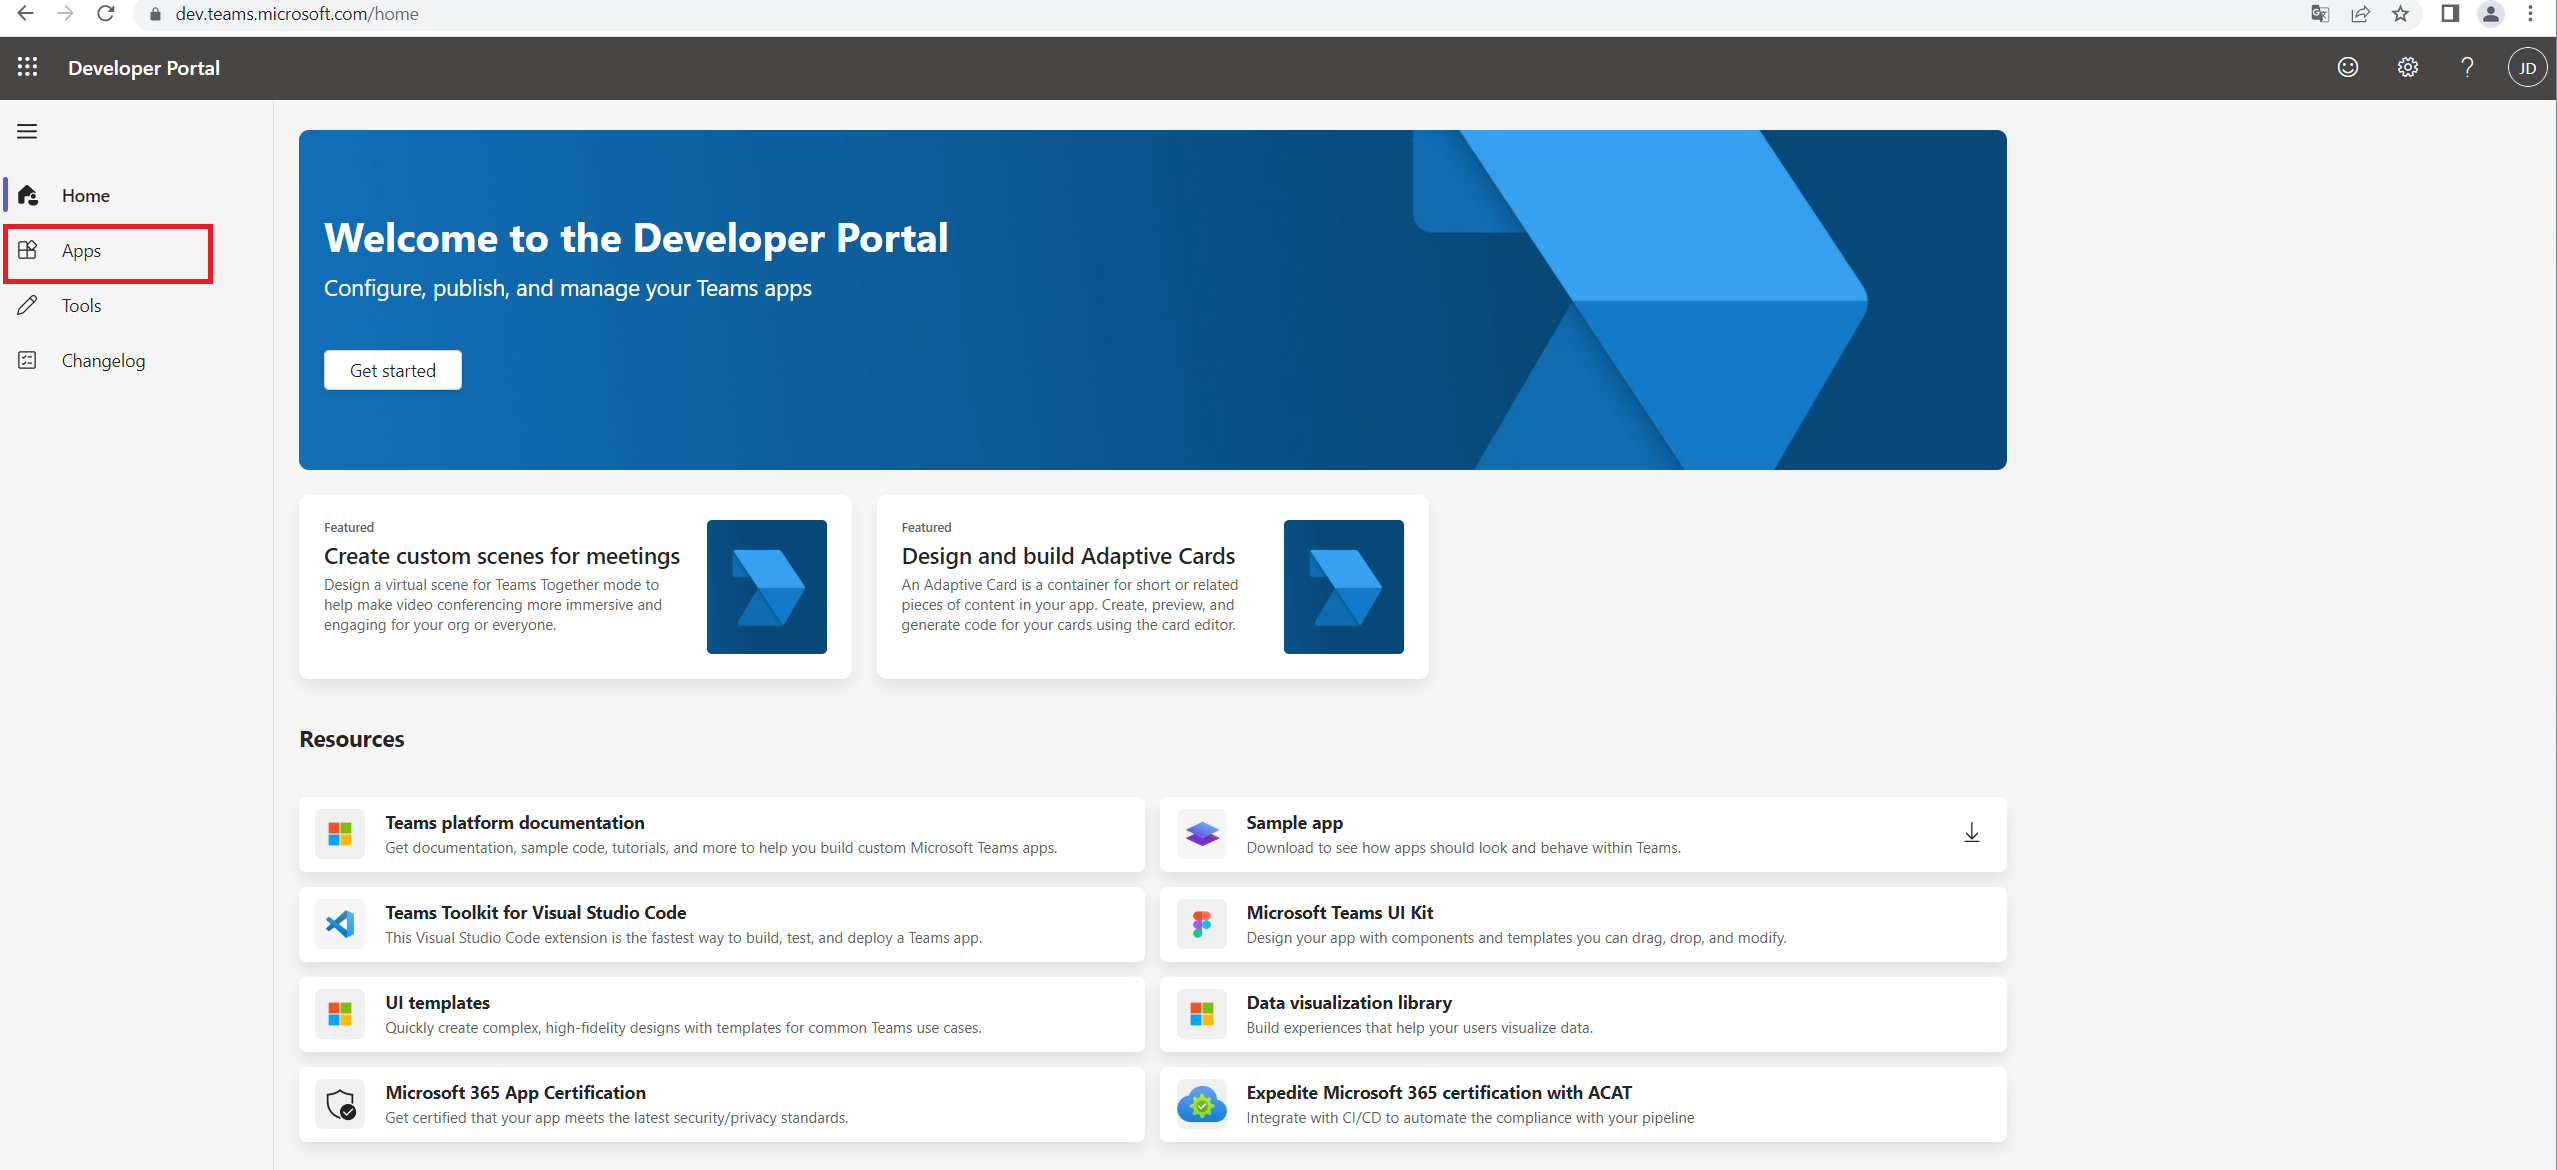
Developer Portal
To create your own MST application, you need to register with the Developer Portal (https://dev.teams.microsoft.com/home).

The Developer Portal is also available on the App Store in Teams.
To create an app, you must click on the Apps icon on the left hand side of the website, under the menu options.
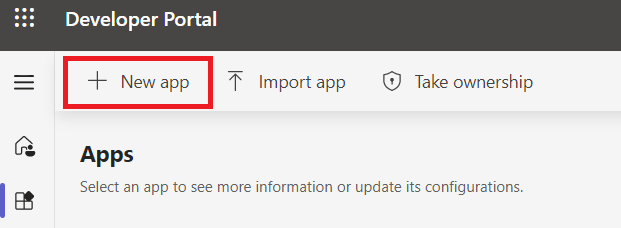
Then simply click on the "+ New App" button in the top bar.
Creation of the MST App
After clicking on the "+ New App" button, a dialogue box will open where you can enter a name for your app and then click Add.

You’ve now successfully created a brand new app and can see all the basic information about your new app.
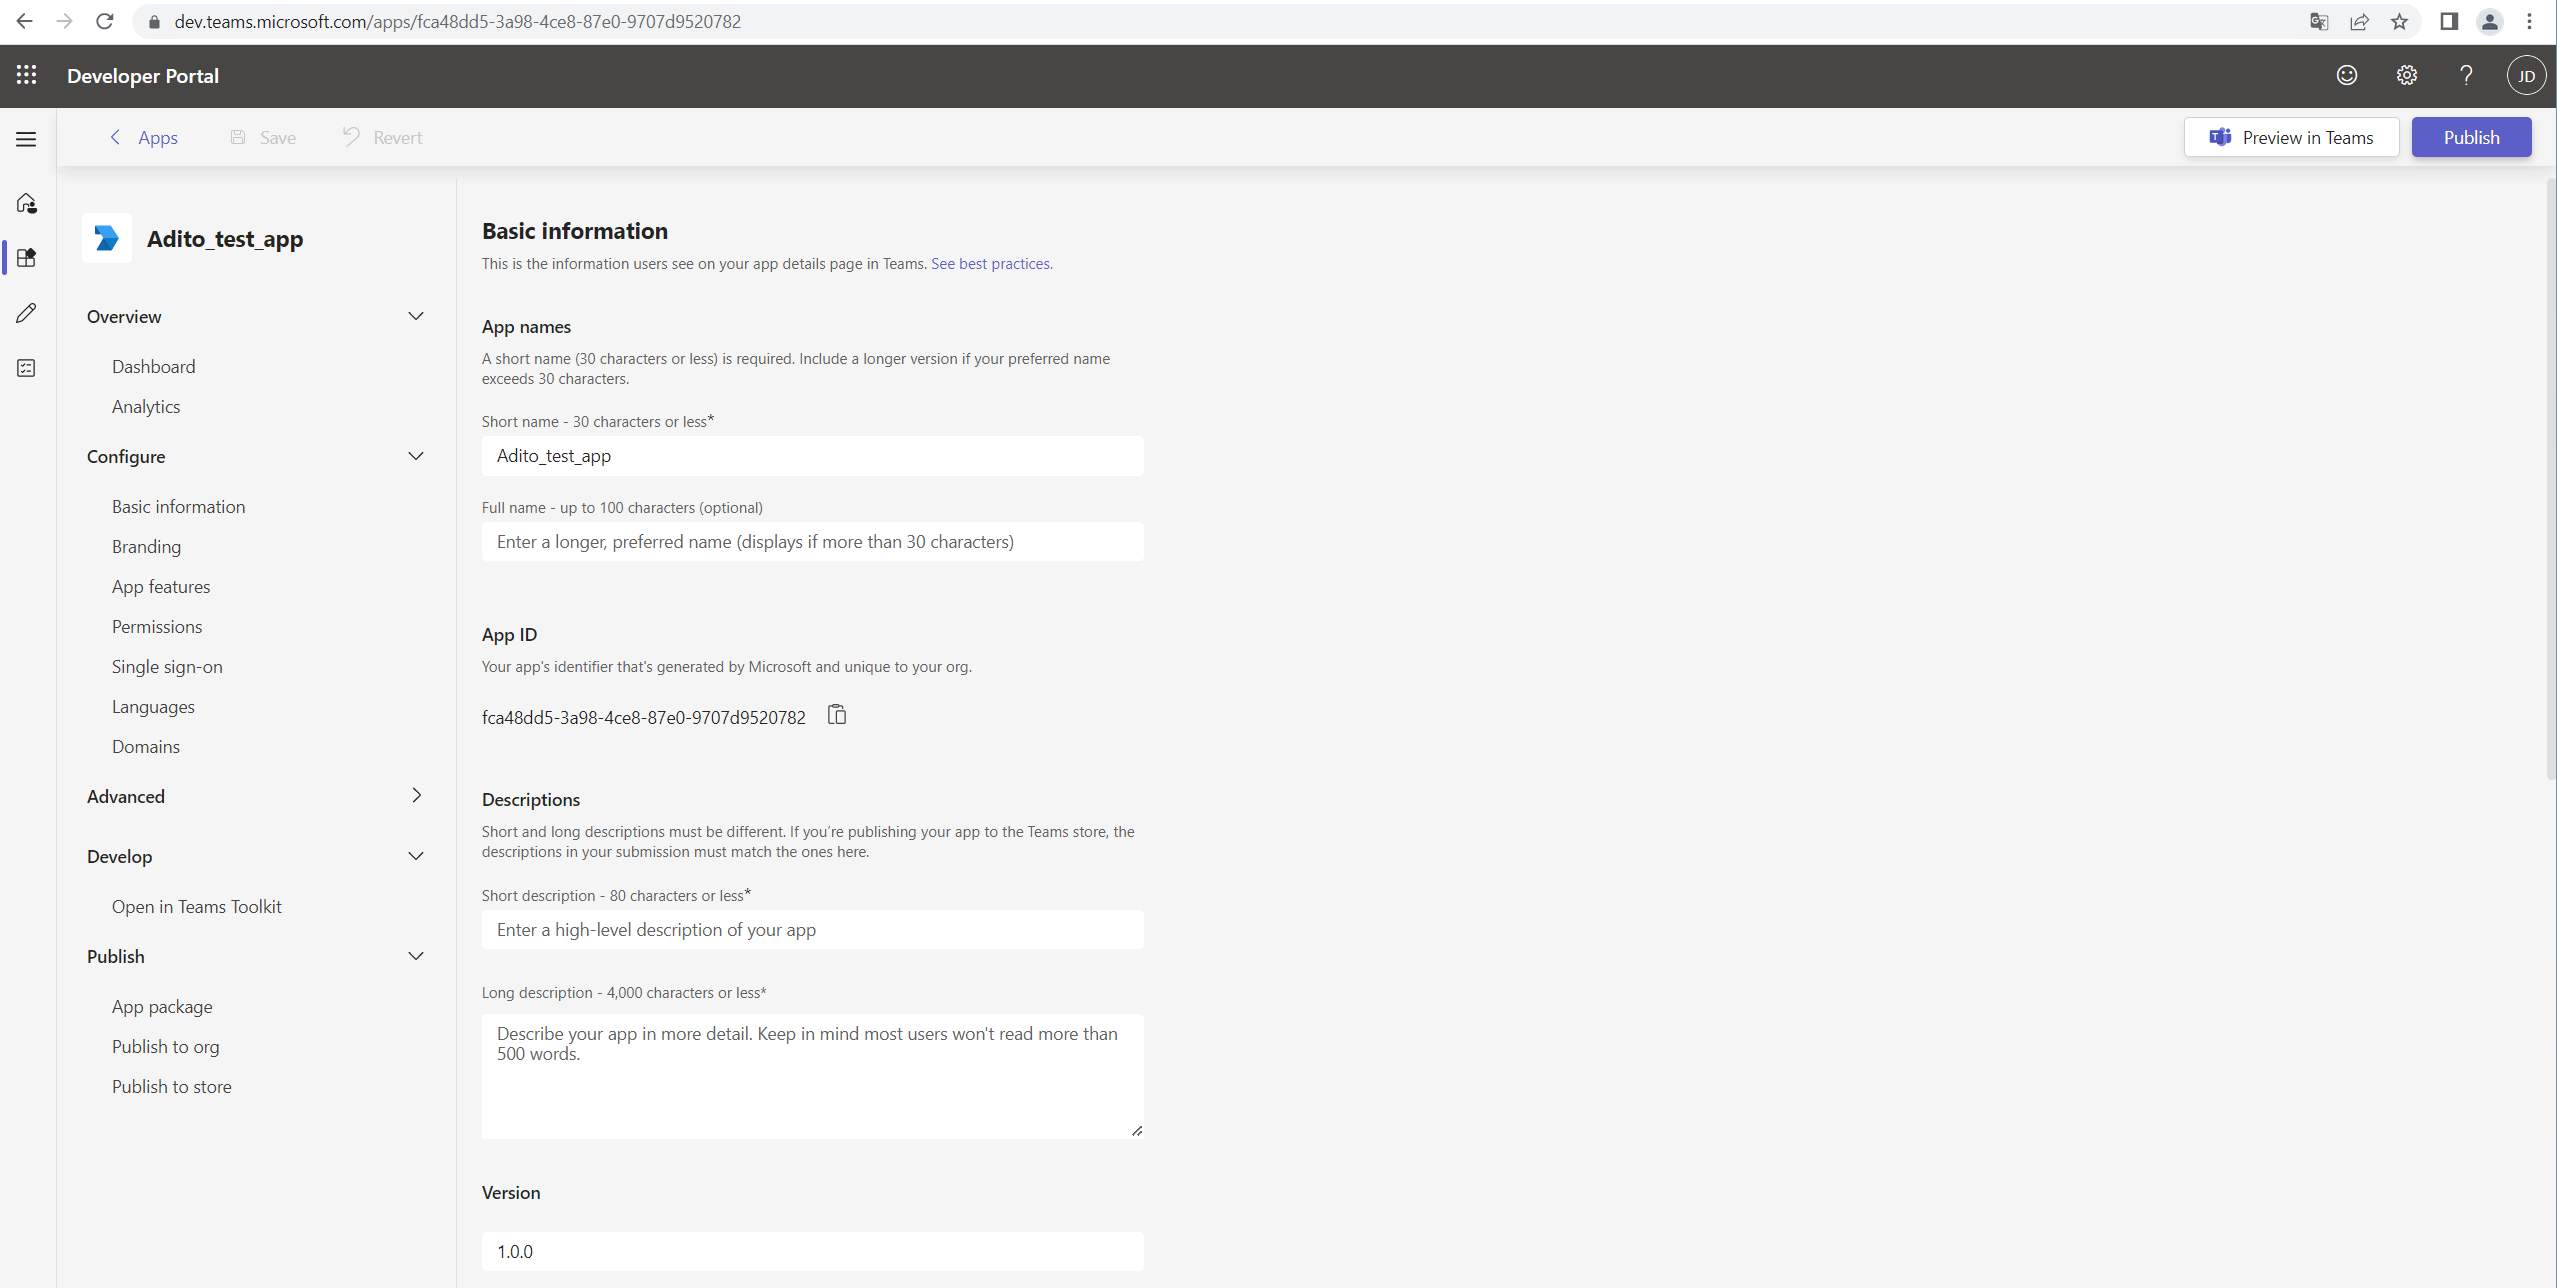
You will need to fill in the following fields:
-
Descriptions
-
Short description
-
Long description
-
-
Developer information
-
Developer or company name
-
Website
-
-
App URLs
-
Privacy policy
-
Terms of use
-
-
Application (client) ID
The Application (Client) ID is generated when you register your application with Microsoft Azure, which is discussed later in this document.
Creation of a new Bot
To create a new bot, simply click on the "Tools" option in the menu and select the "Bot Management" option.
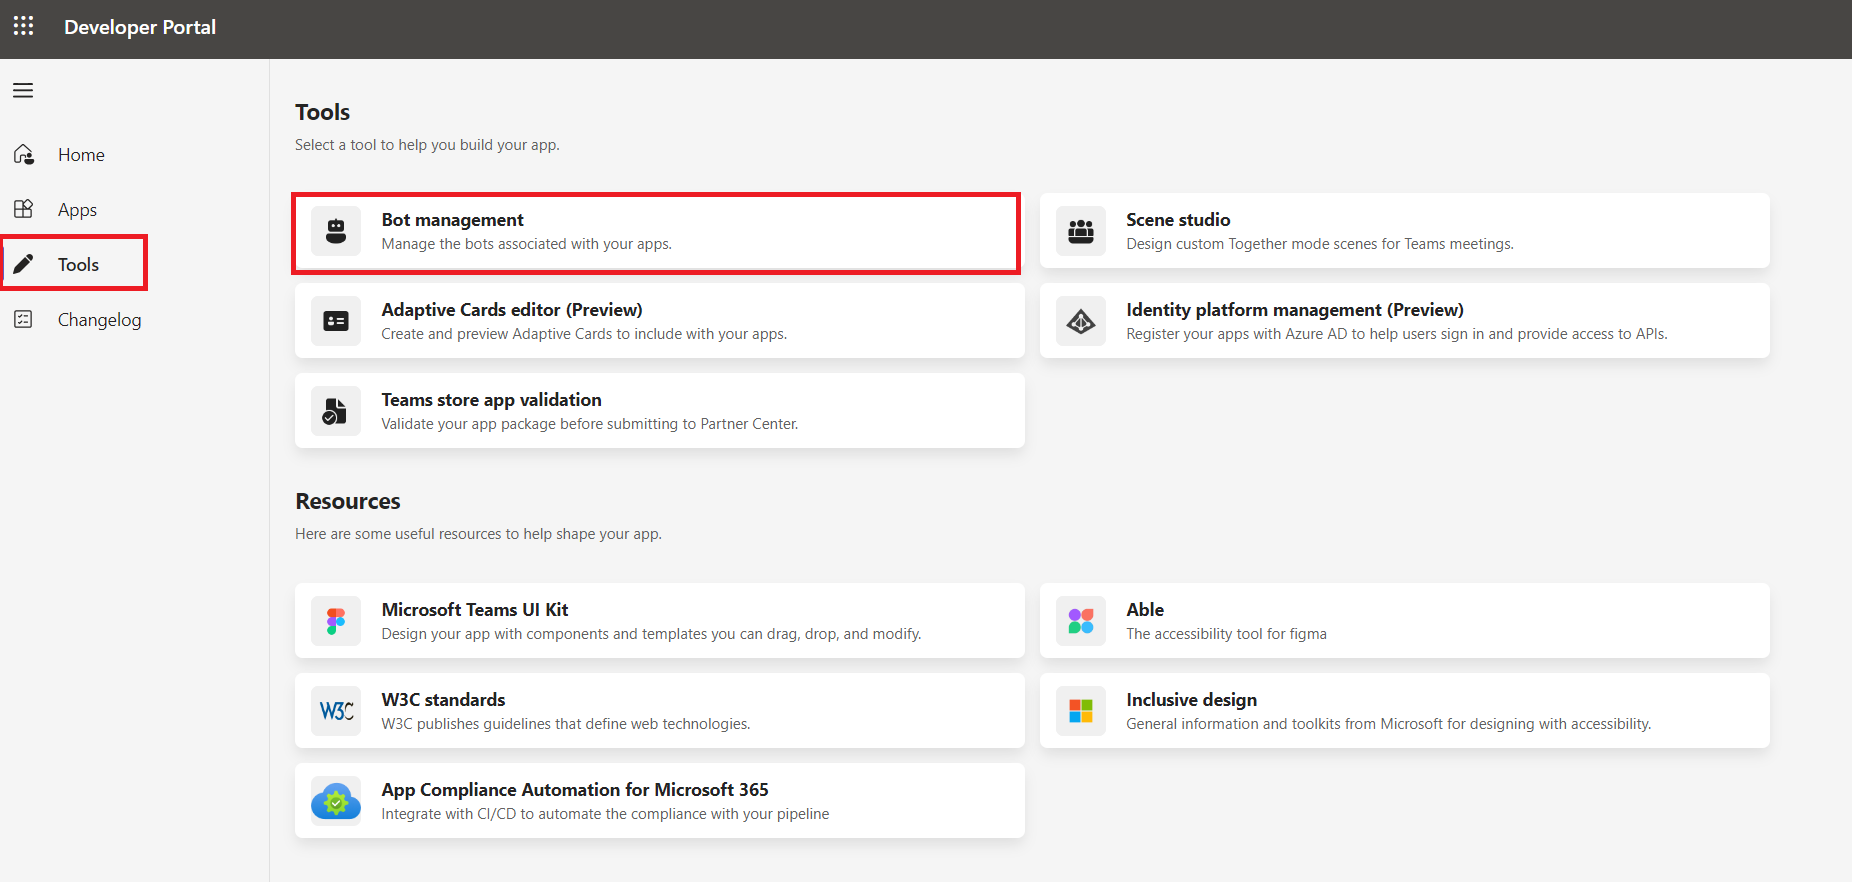
From there, simply press "+ New Bot" and enter the name of your bot.
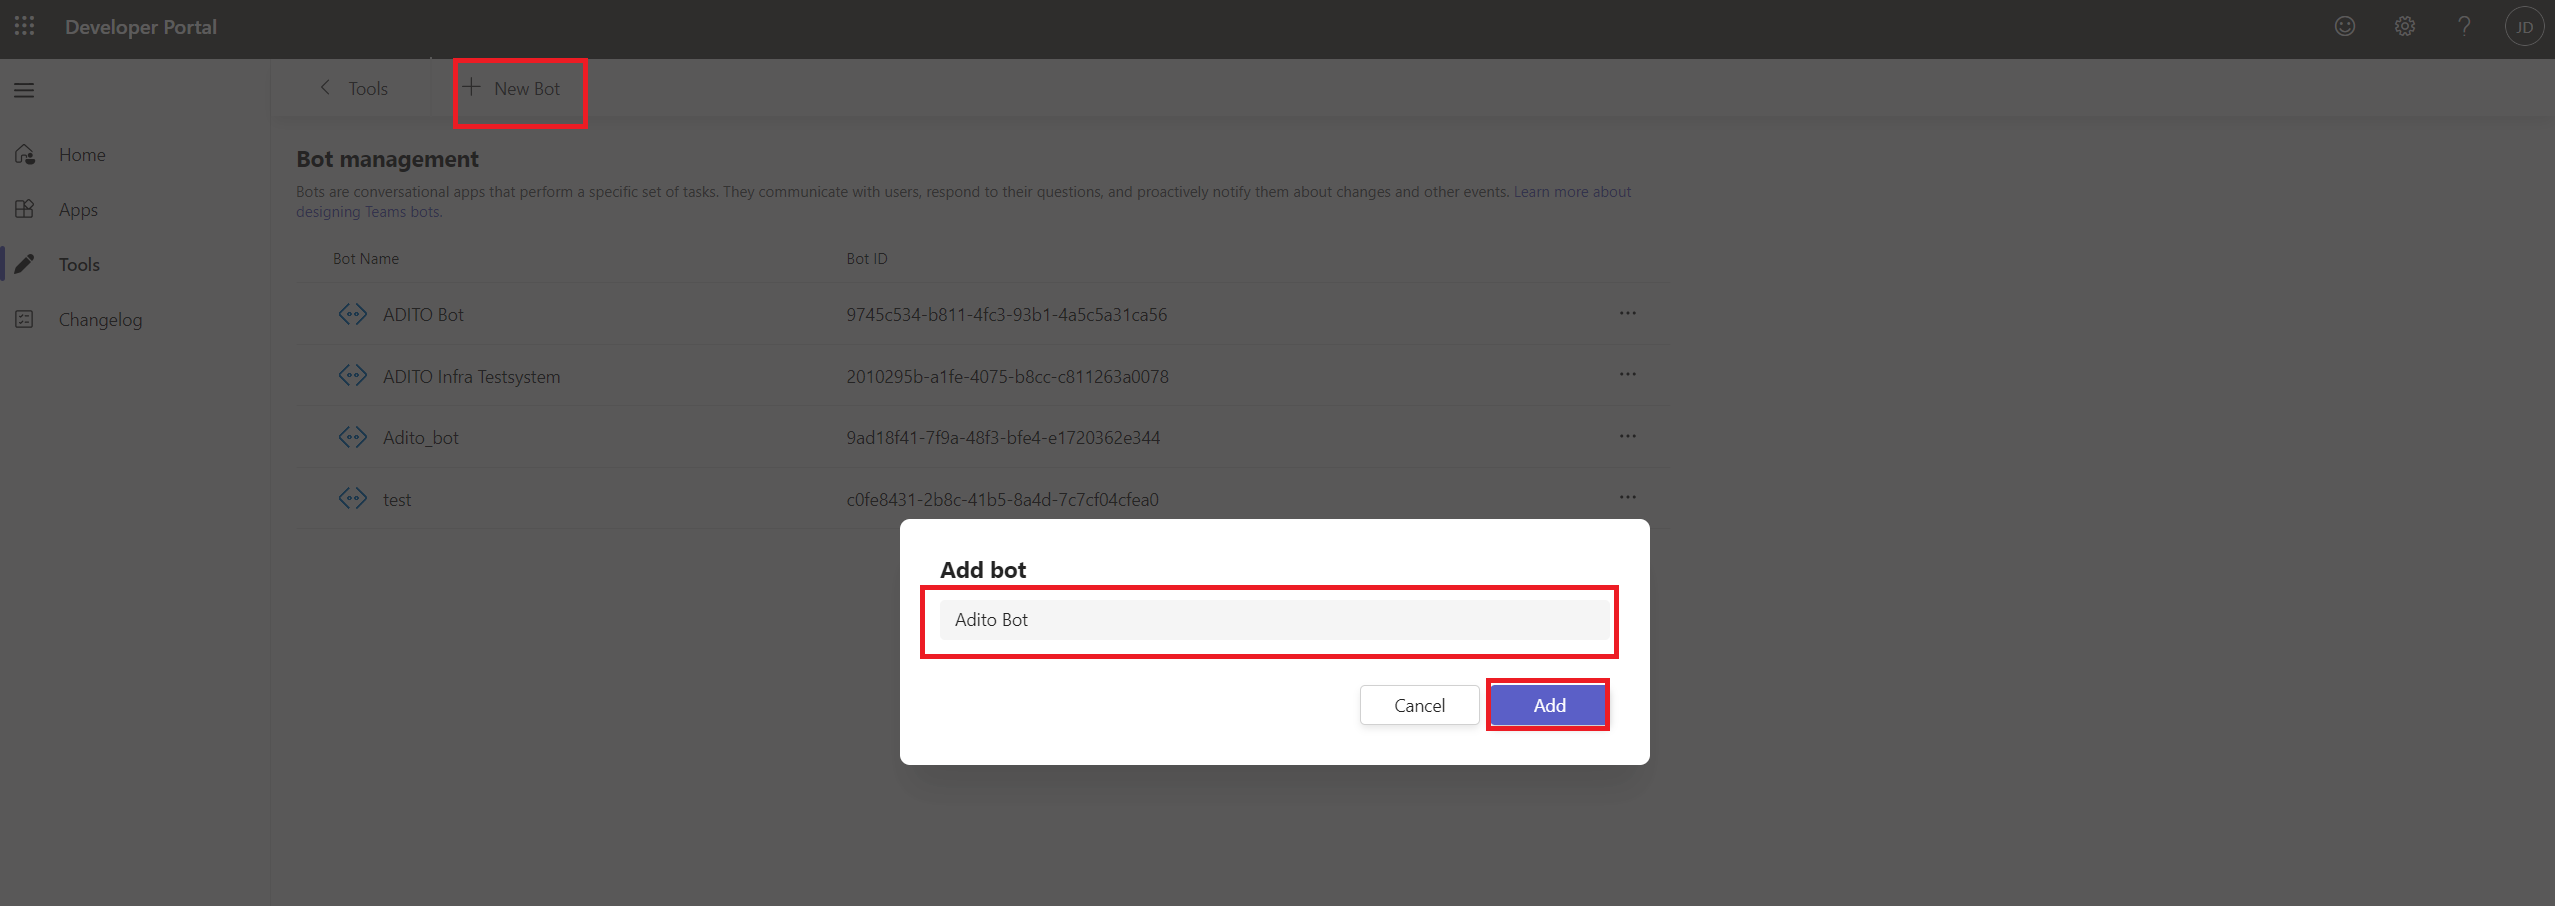
The bot must be called "ADITO Bot"!
The bot is created in the organisation of the current user who created the bot. This person should be responsible for managing Microsoft BotFrameWork and Azure Portal / Azure AD. An application is later added to the organisation in Azure Portal.
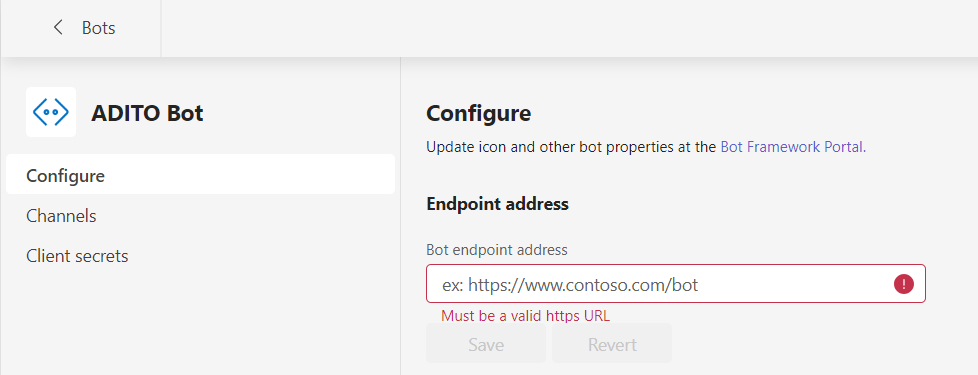
You need to create a messaging endpoint for the bot. To do this, enter your address in the "Bot endpoint address" field.
If you are trying to test this functionality locally, you will need to
create an ngrok address. Microsoft doesn’t accept localhost addresses.
Ngrok will redirect an address to your local address. You won’t need
this for productive systems. You have to enter the following web service
(with your ADITO System URL), which handles all requests. E.g.
https://{aditosystem-url}/services/rest/mstBot_rest
The process name must be "mstBot_rest"! This process is provided by the ADITO basic project and is responsible for handling incoming requests.
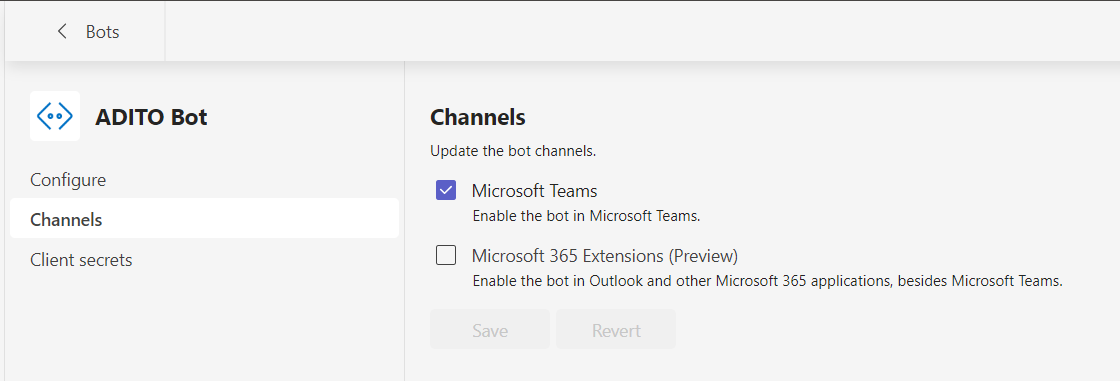
Then simply select "Microsoft Teams" from the Channels option.
The client secrets option is not important here because it is handled later in Microsoft Azure, but you can do it here as well.
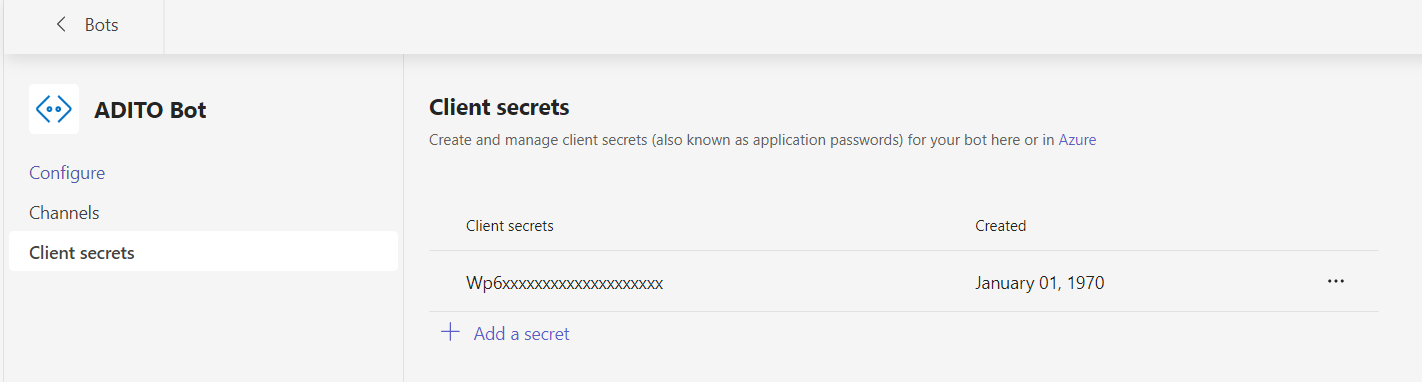
The key created in this step must be carefully saved. If you close the configuration, you will not be able to retrieve this key!
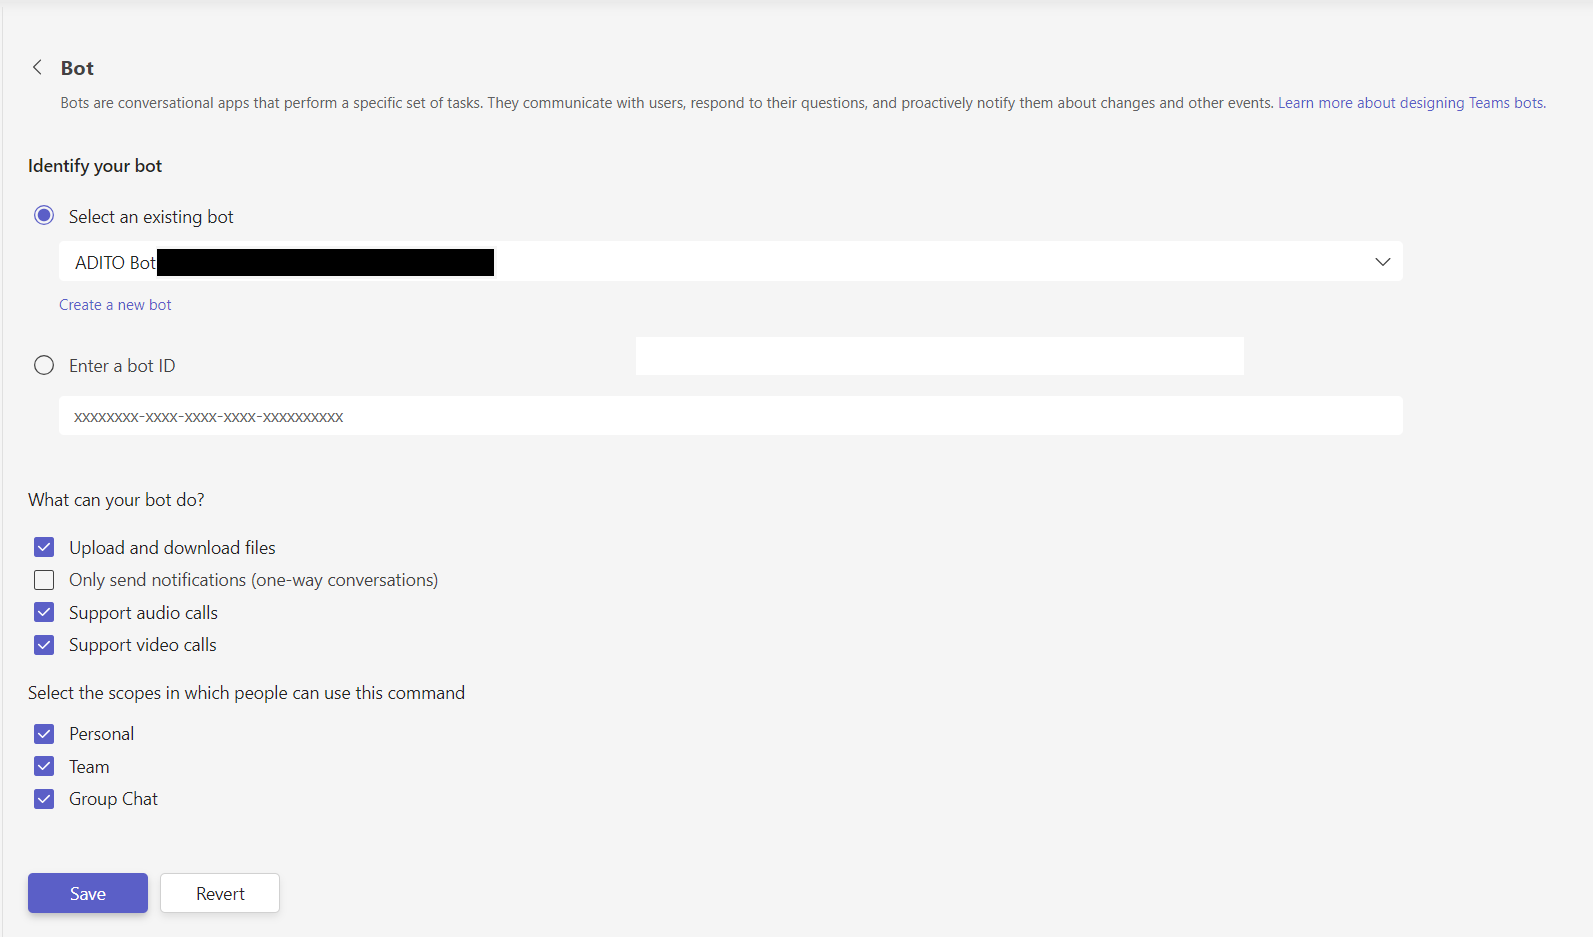
linking the Bot to your App
Now you can return to your application and go to the App Features option in the menu on the left.

From there you can select the Bot options.
Create a Messaging Extension
This is a work in progress. This feature will be available in a future version! ADITO will provide a list of compatible commands that your organisation can implement.
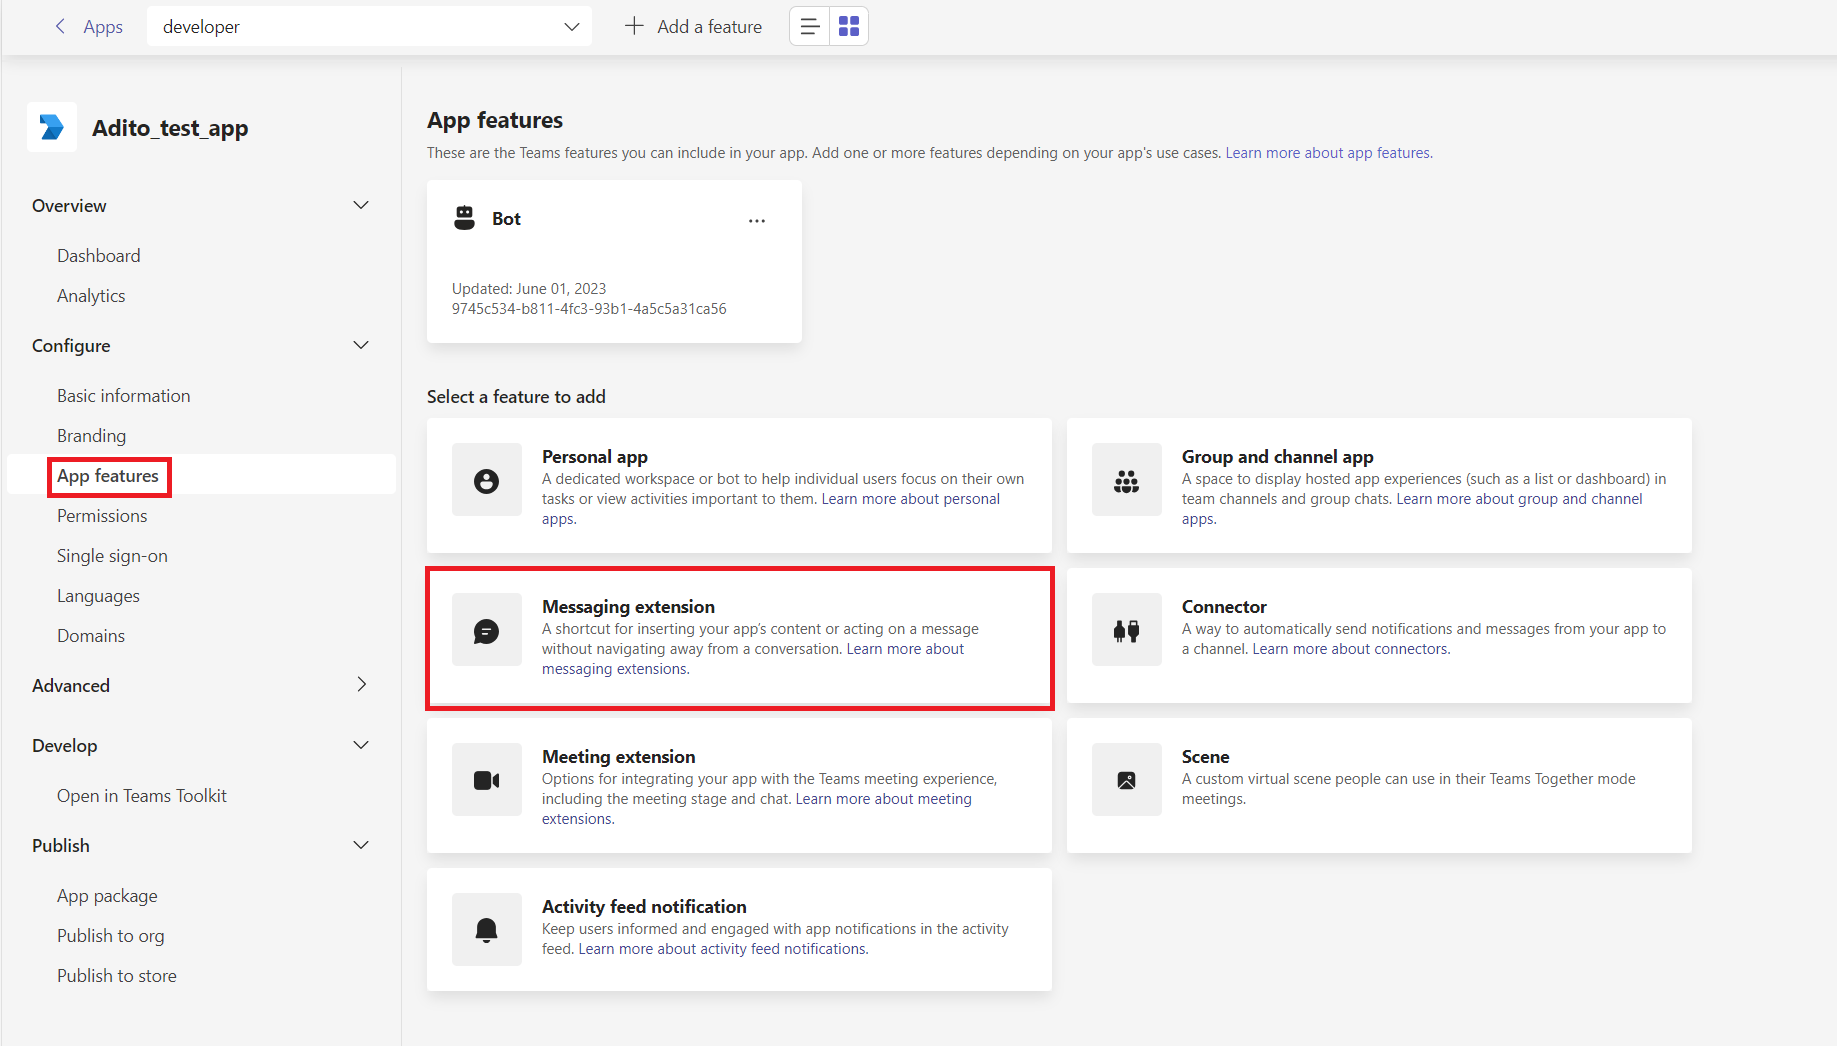
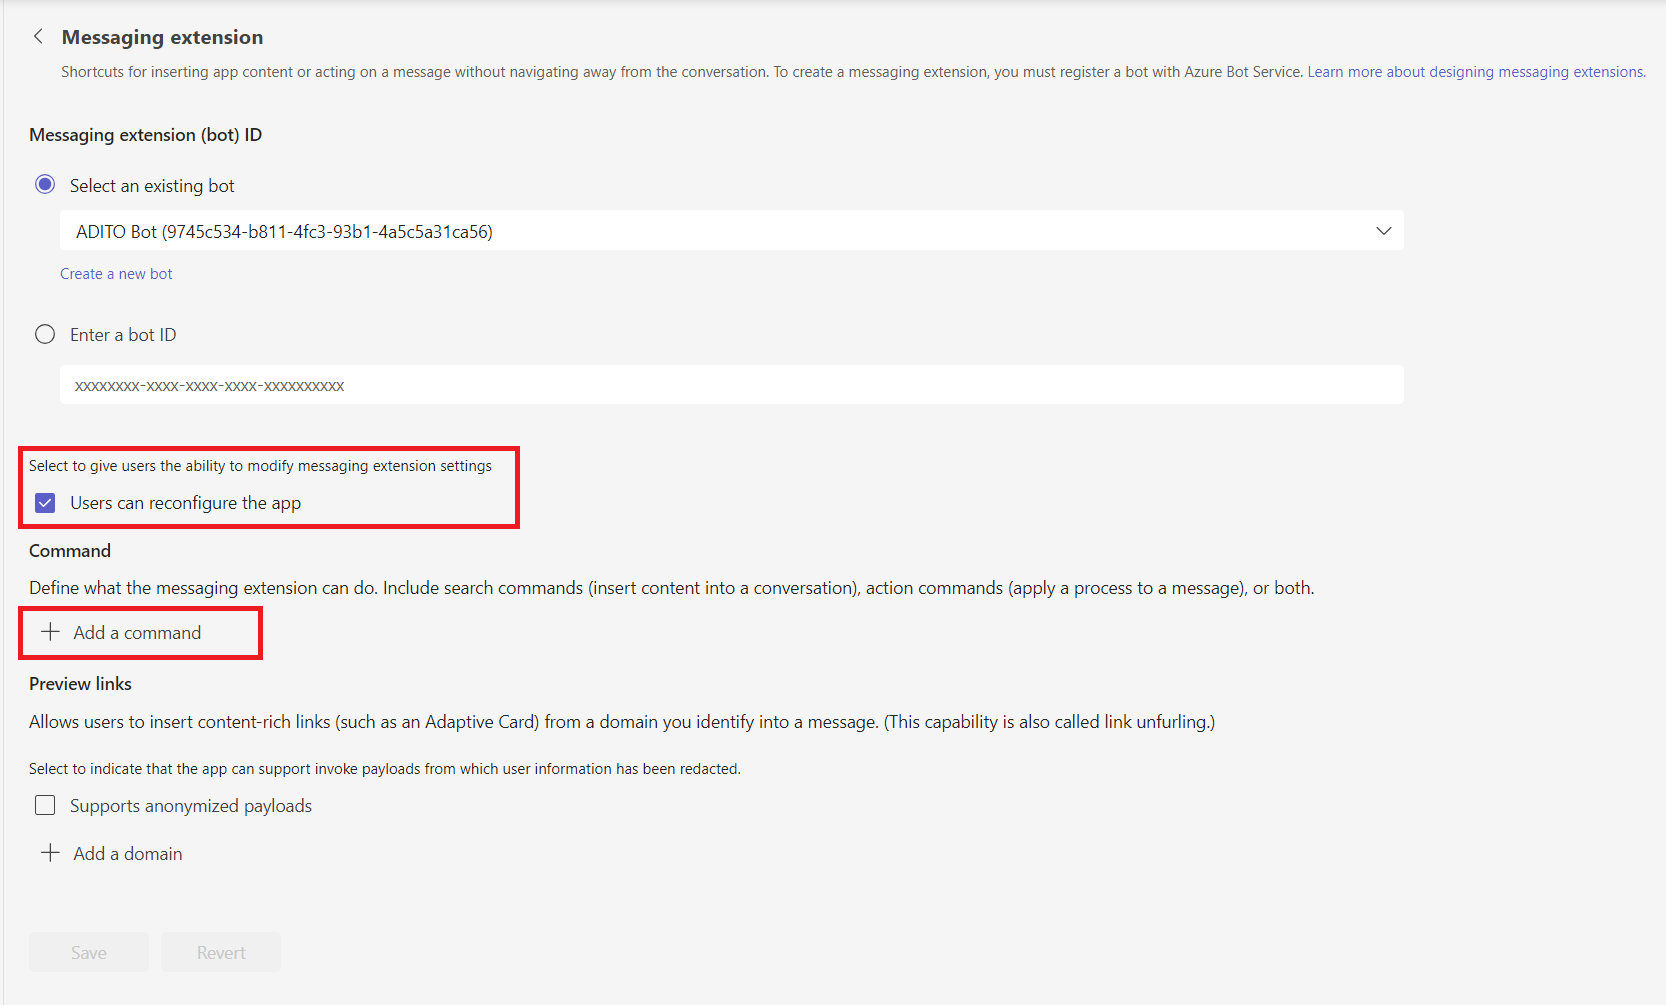
The next step is to add a messaging extension. Click on the "App Features" menu item and click on the "Messaging Extension" button. A new dialogue will open and you will need to select the 'Use existing bot' tab and select your own bot.

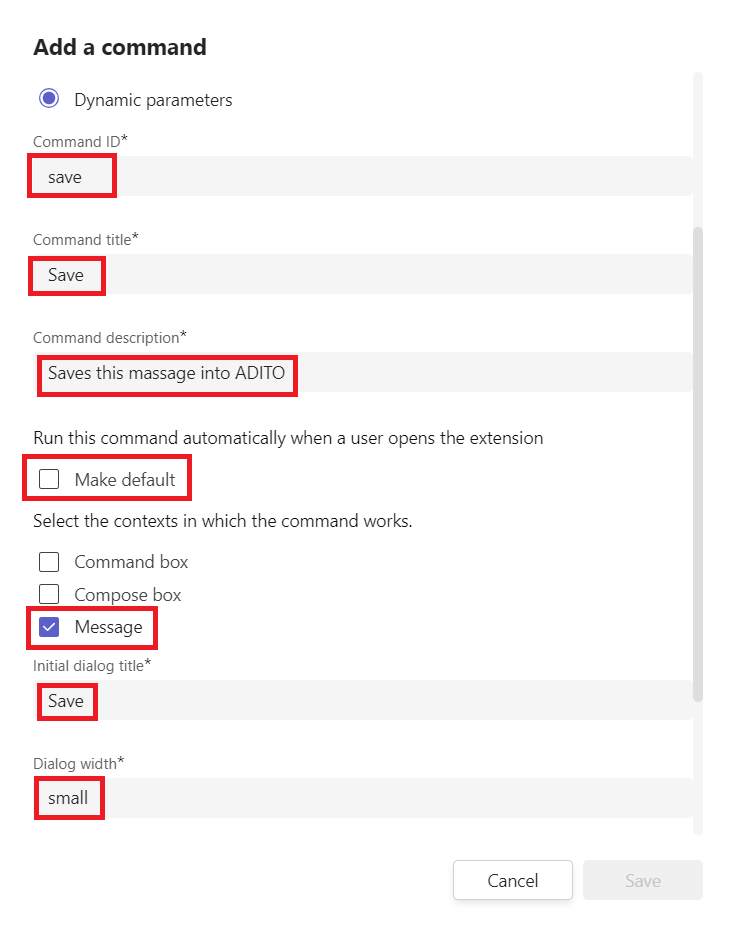
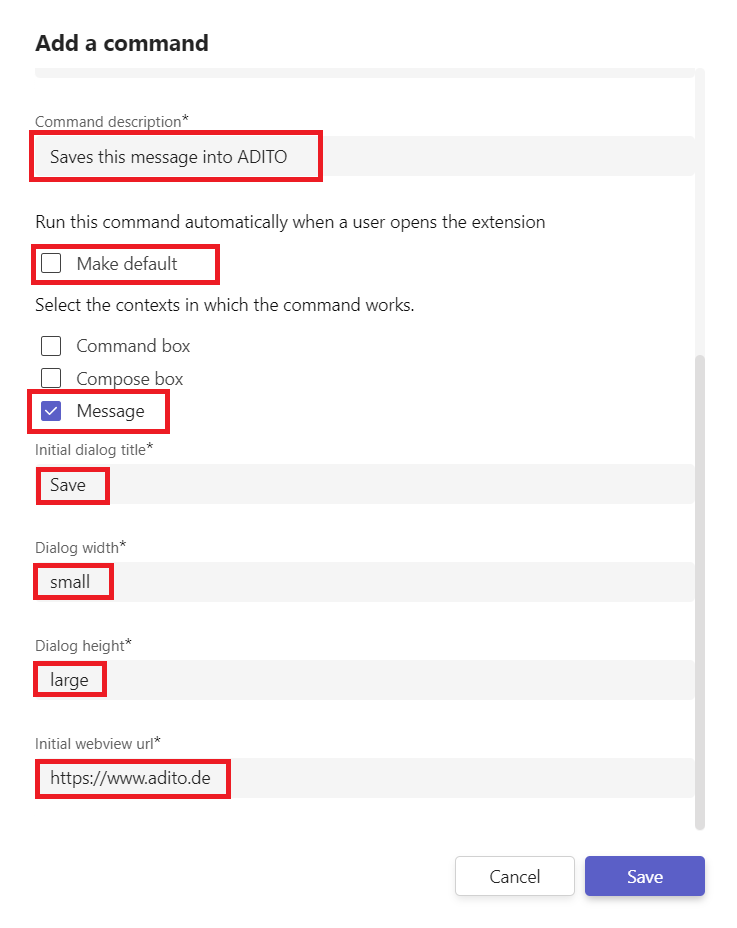
Then simply select "+ Add a command" to add a new command.
A new dialogue will open and you can choose what type of command it is, if you choose an action command you will be asked what type of parameter you want, in this example just choose Dynamic.
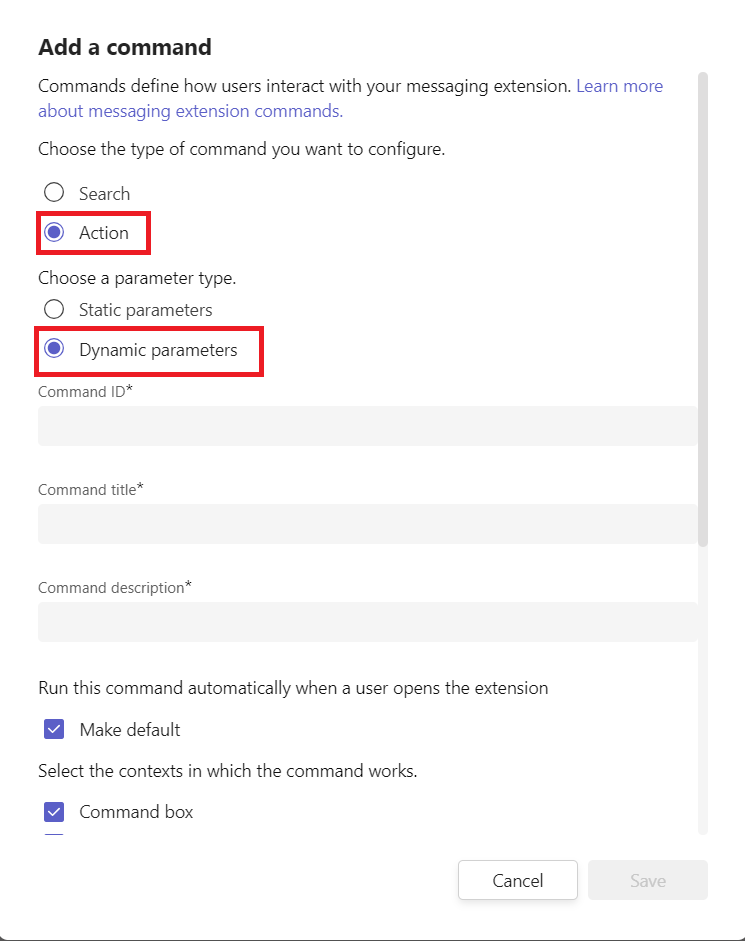
Now you need to describe what your role will do. You must fill in all the required fields to continue.
Permissions
Permissions are important because they allow you to choose what your bot can and cannot do.
You can access permissions from the menu on the left under Permissions.
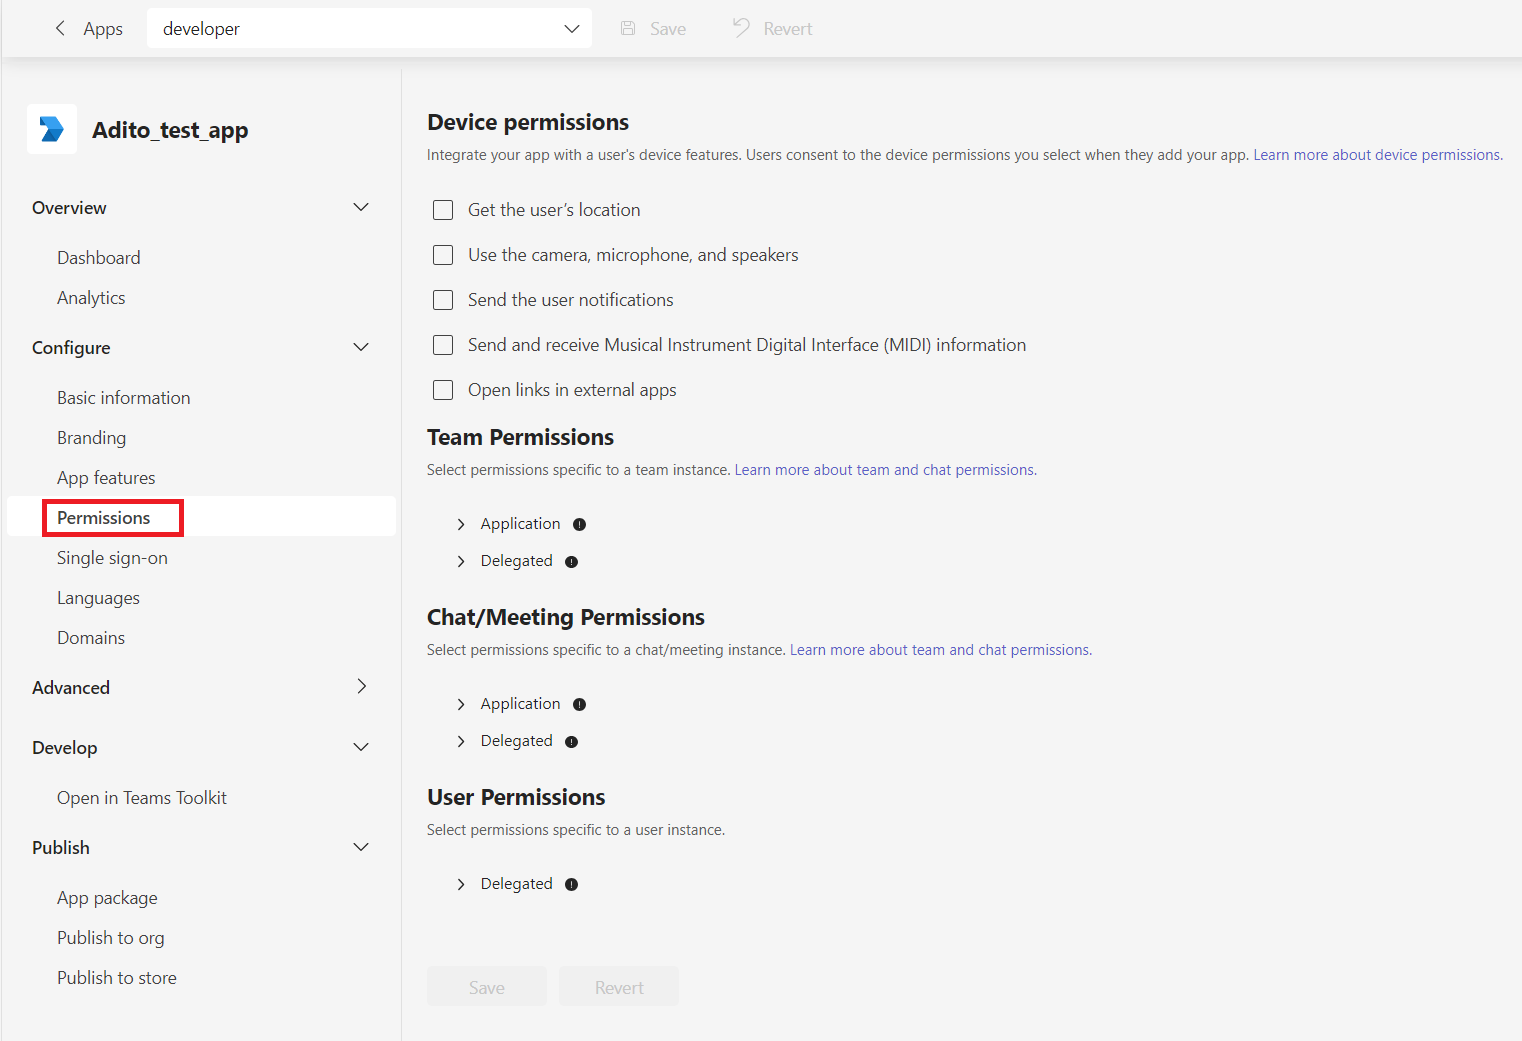
Permissions are divided into four parts, as shown on the right:
-
Device Permissions (Integrate your application with a user’s device capabilities. Users agree to the device permissions you select when they add your app).
-
Team Permissions (Select permissions specific to a team instance.)
-
Chat/Meeting Permissions (Select permissions specific to a Chat/Meeting instance.)
-
User Permissions (select permissions specific to a user instance)
You cannot select more than 16 permissions, if you select more you will get an error. (you can see the error in the dashboard)
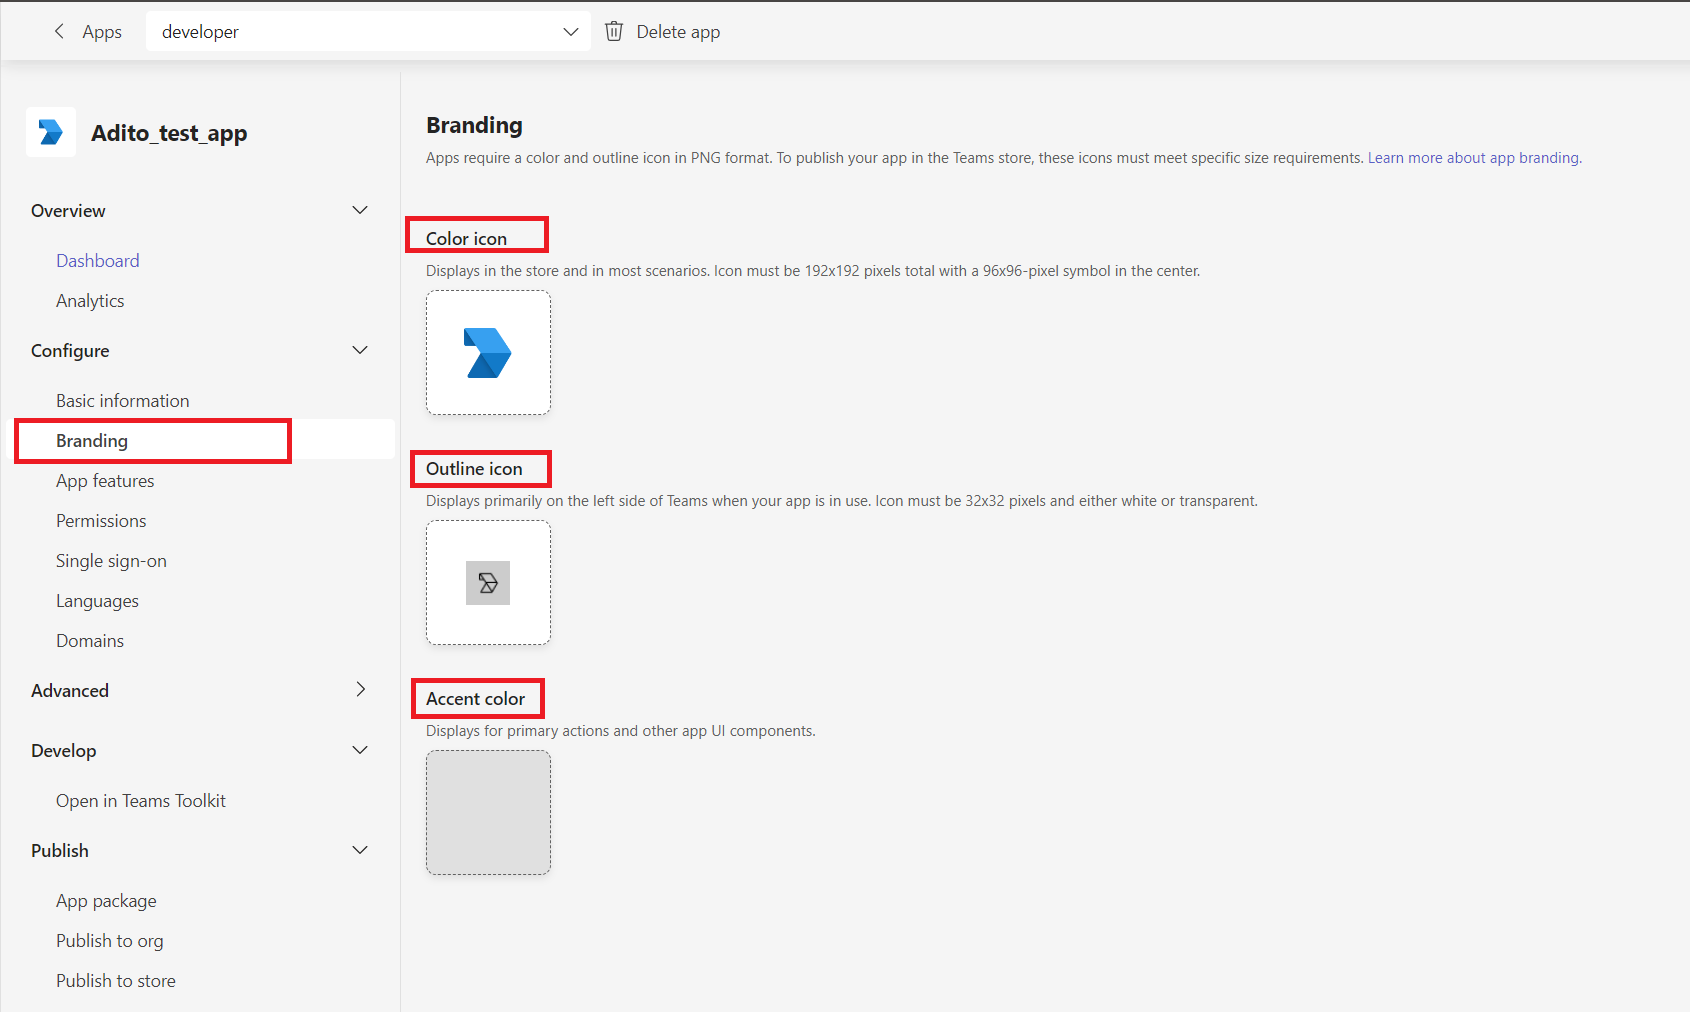
Design
There isn’t much to design with the Developer Portal, but you can still go to "Branding"to change the colour icon, outline icon and accent colour.
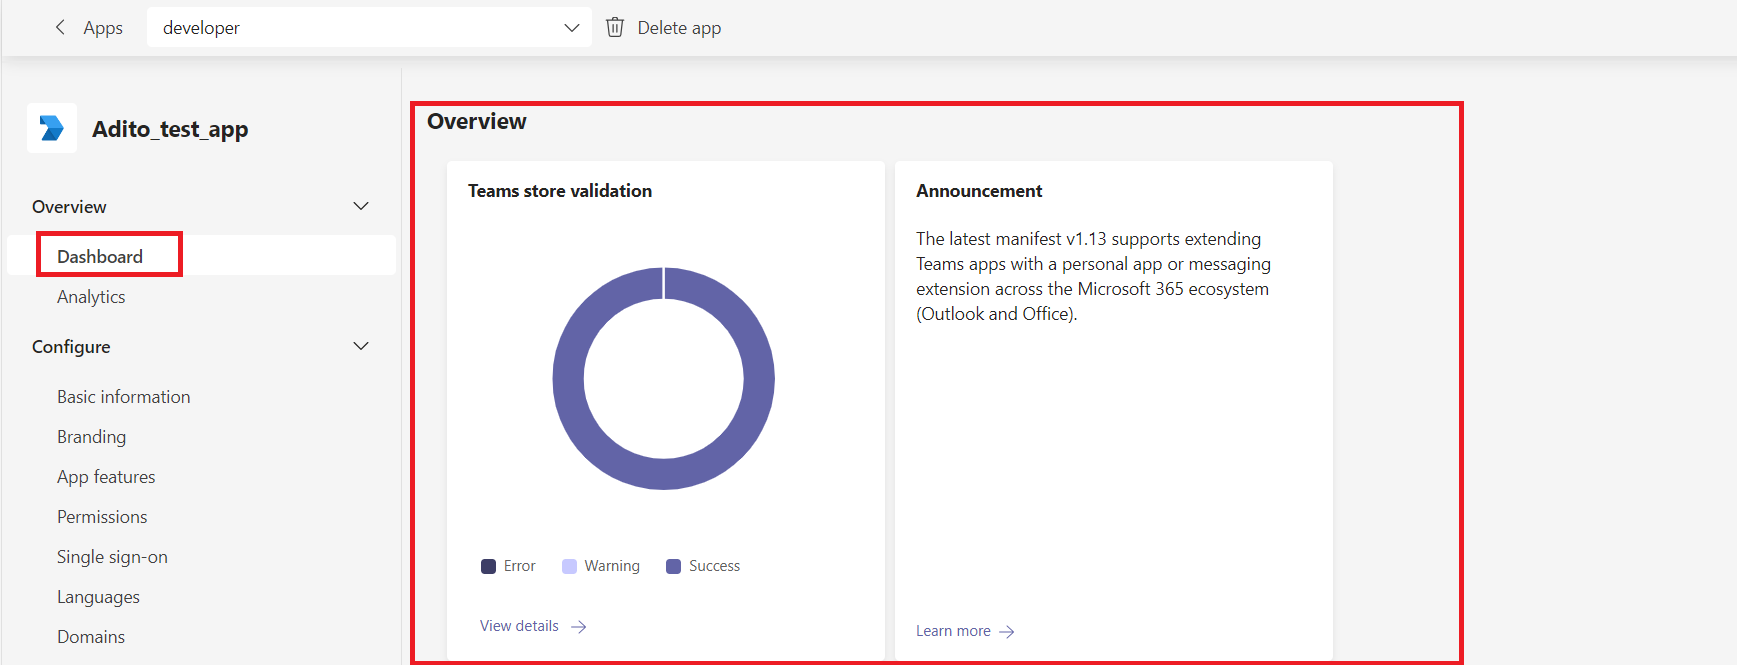
Validate
To check that everything is OK and that you have not made any mistakes when creating, you should just check the dashboard.
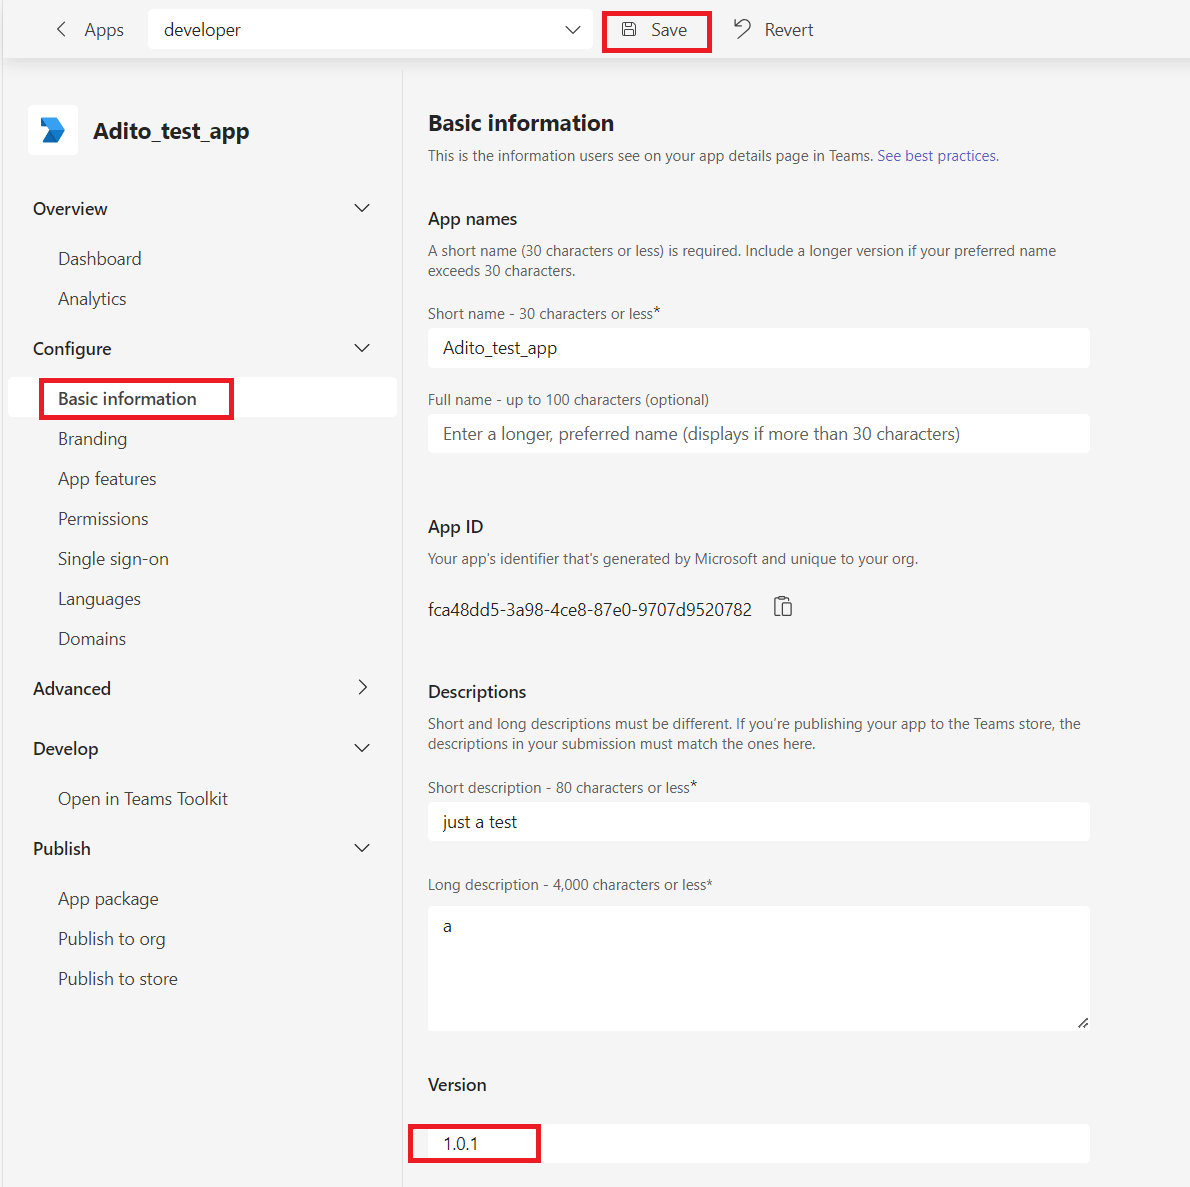
Finishing the Bot
The last step to set up the basic bot for ADITO is to go to "Basic infromation" and then change the version (this is optional, but it keeps track of your progress), then click save.
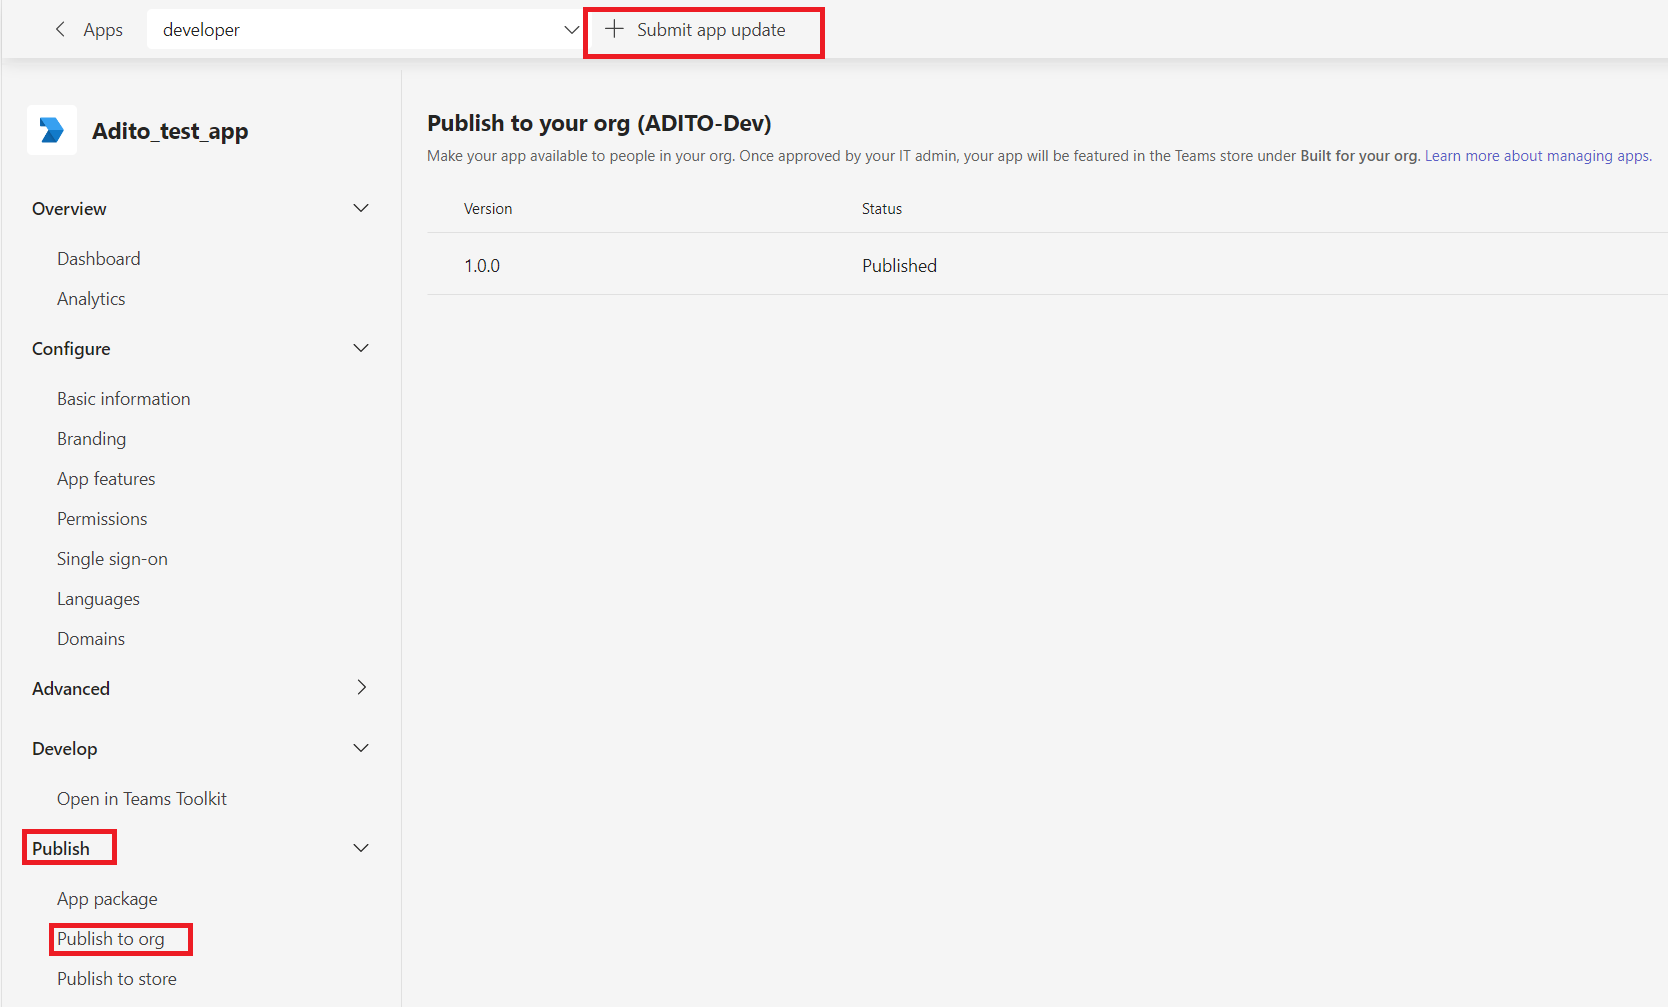
Then go to Publish ⇒ "Publish to org" and click on "+ Submit app update".
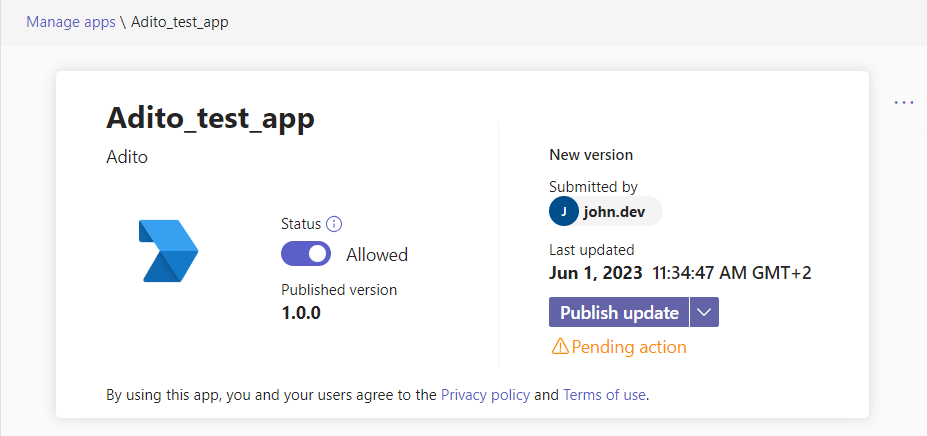
You will then need to ask your Admin to publish the latest version, if you are the Admin then follow these steps:
1 Go to the Microsoft Teams Admin Center 2 Click on the "Teams apps"
option =⇒ "Manage apps". 3 Browse by name, then type in {your bot name} and just click on it
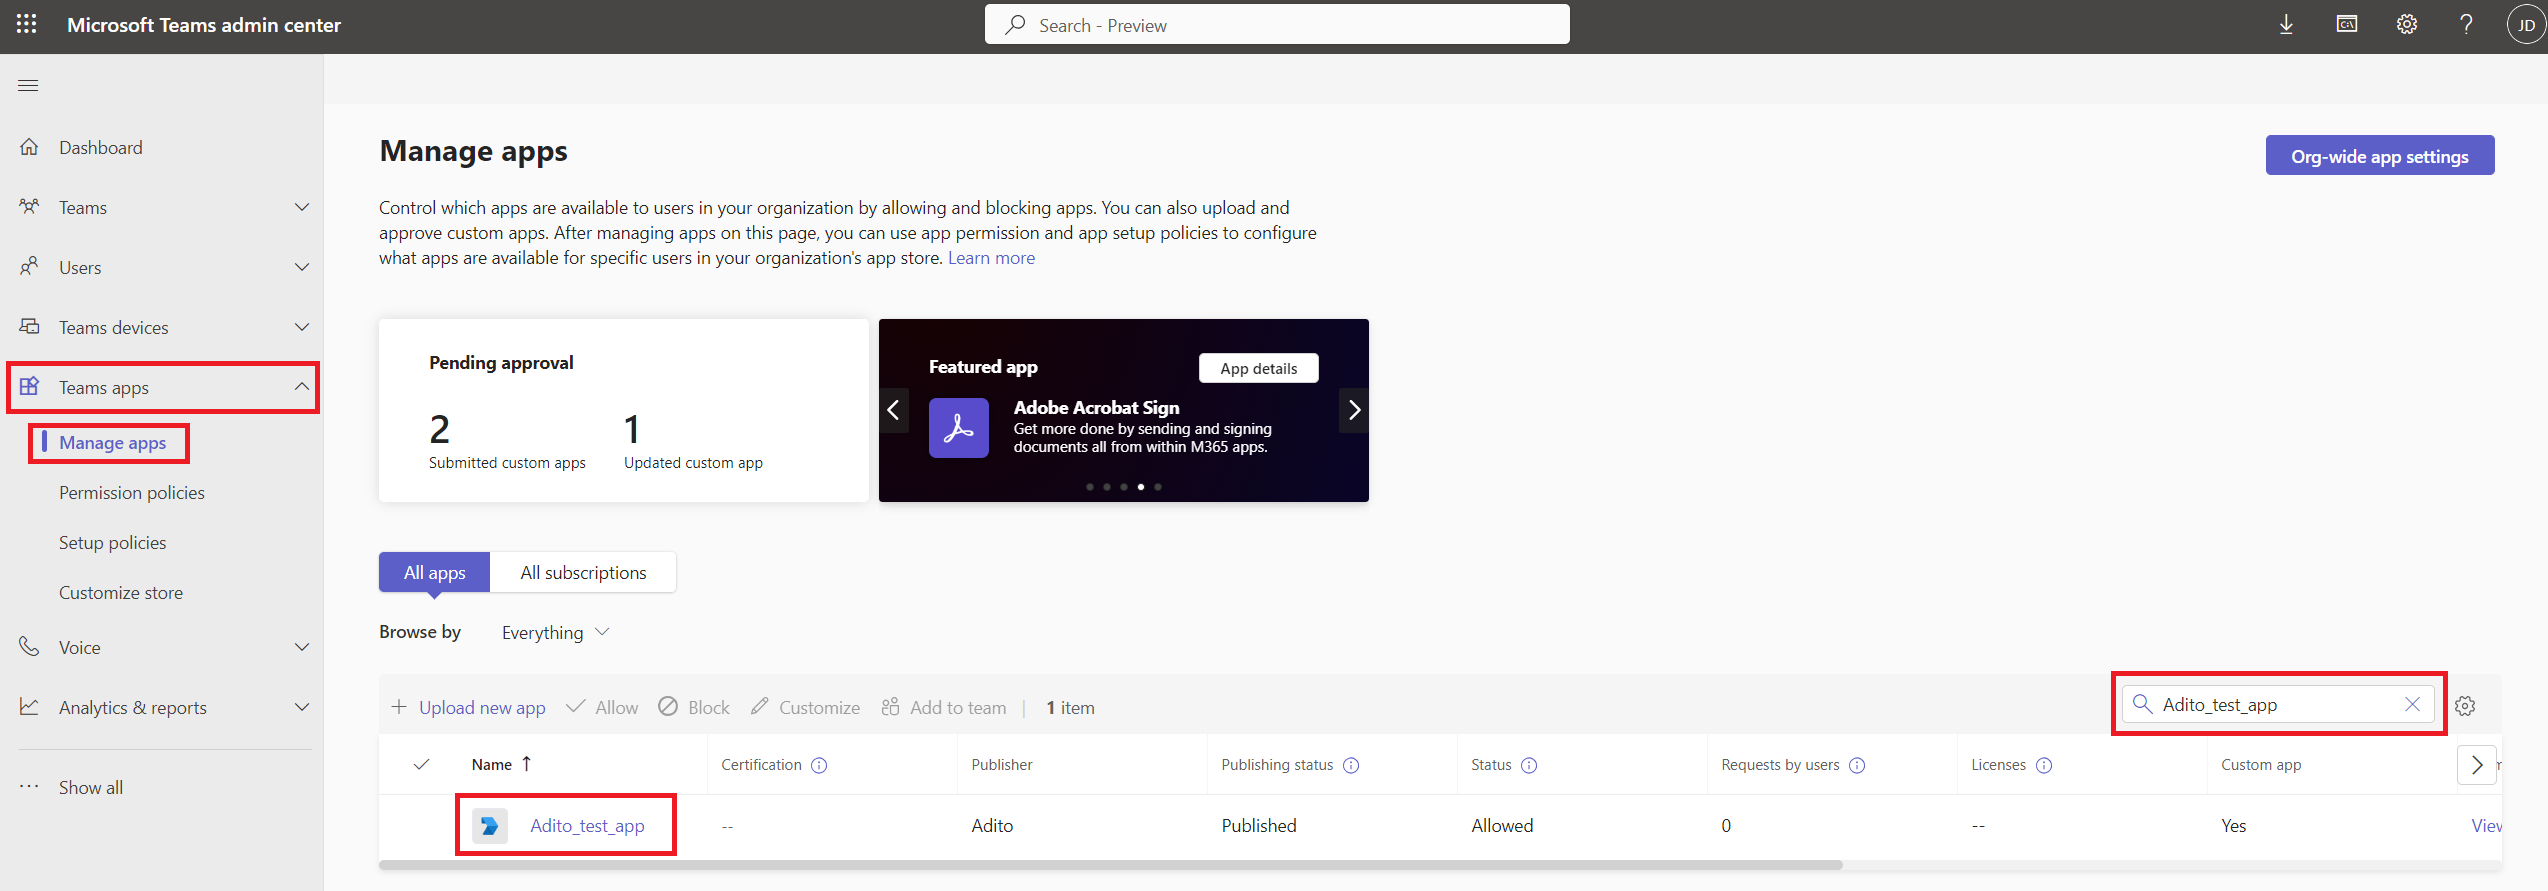
4 Publish update
You will then need to go into your Teams app and uninstall the app if it is installed on some teams, and then reinstall it so that they all have the new update. You can do this as follows:
Step 1: go to your teams and then in the menu click on apps =⇒ manage your apps
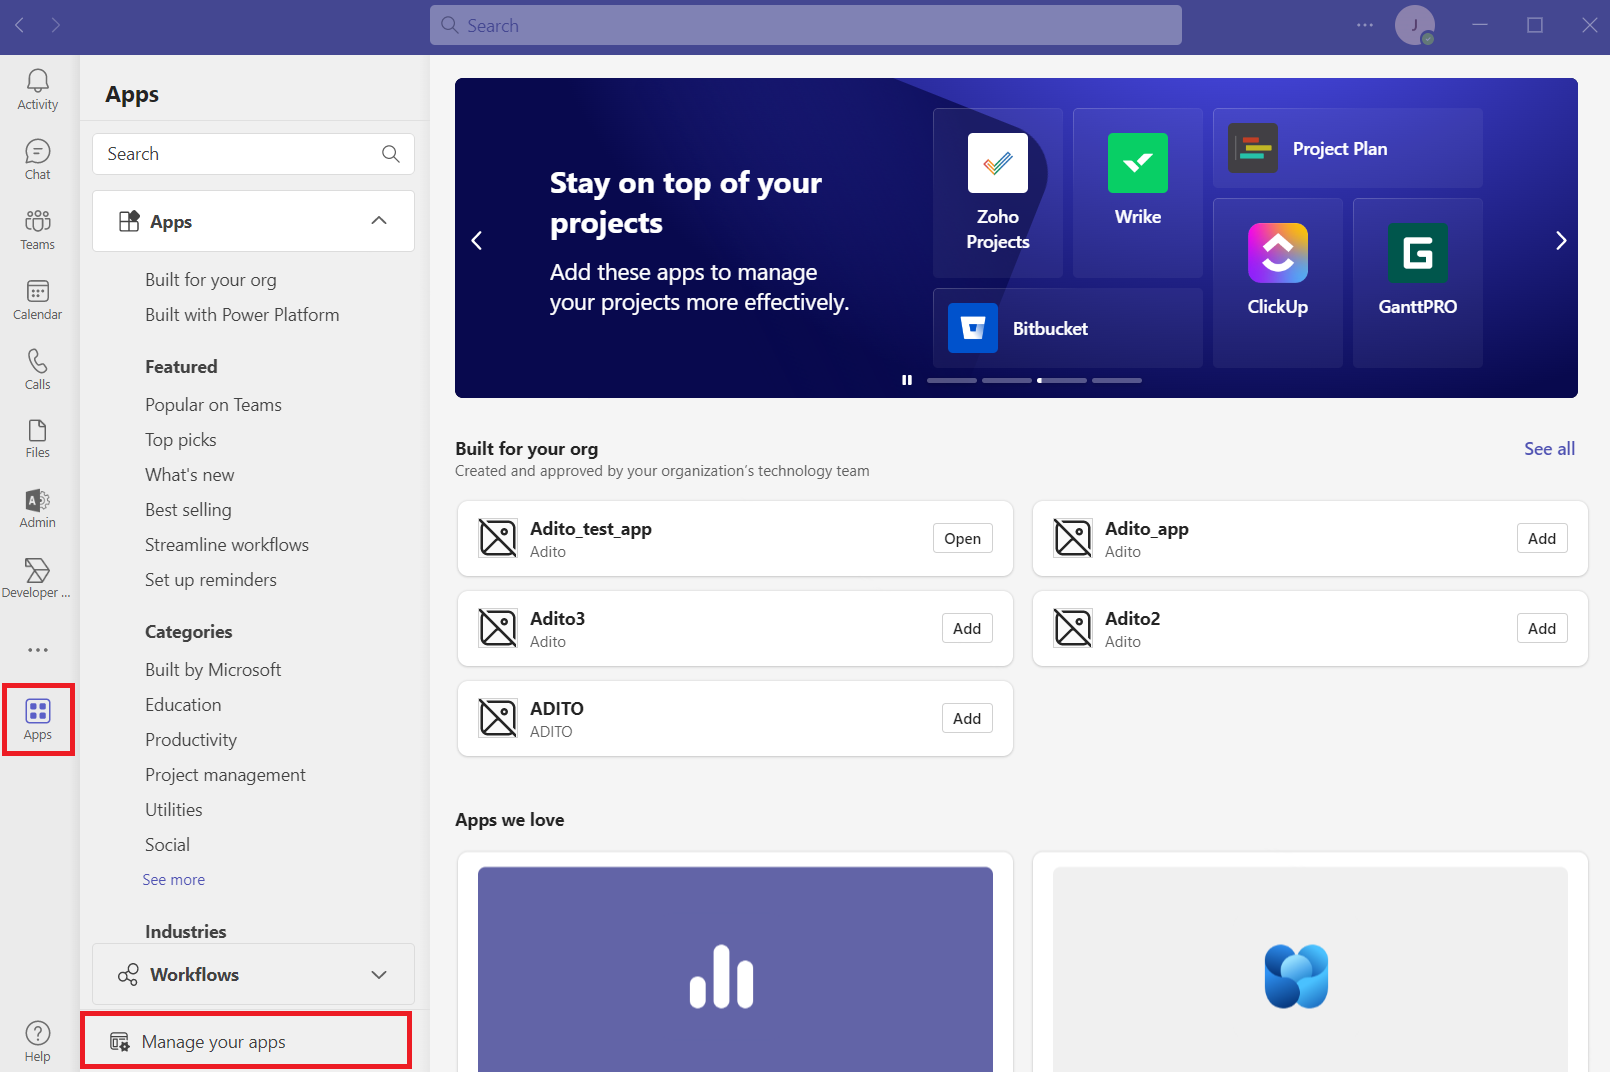
Step 2: Find your app and then delete it from all the teams and chats it joined.

Step 3: Go back to All Apps at the top of the menu and then open your app.
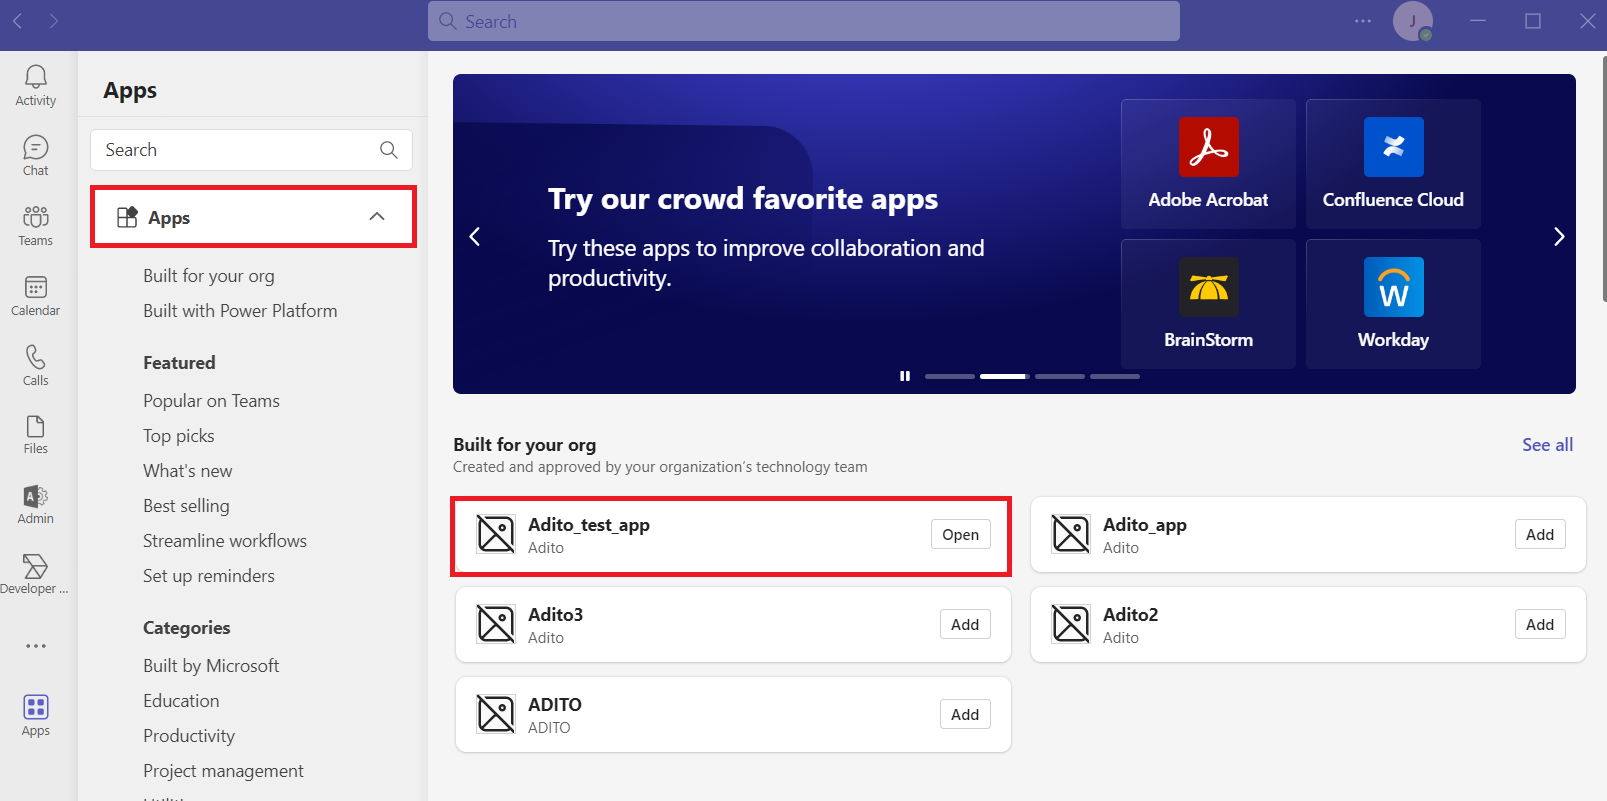
Step 4: You have to re-add your app to all the teams you need it to join.

Creation of the App in Azure
To use the application, you need to connect to an Azure application (https://portal.azure.com/#home), otherwise your bot will not work.
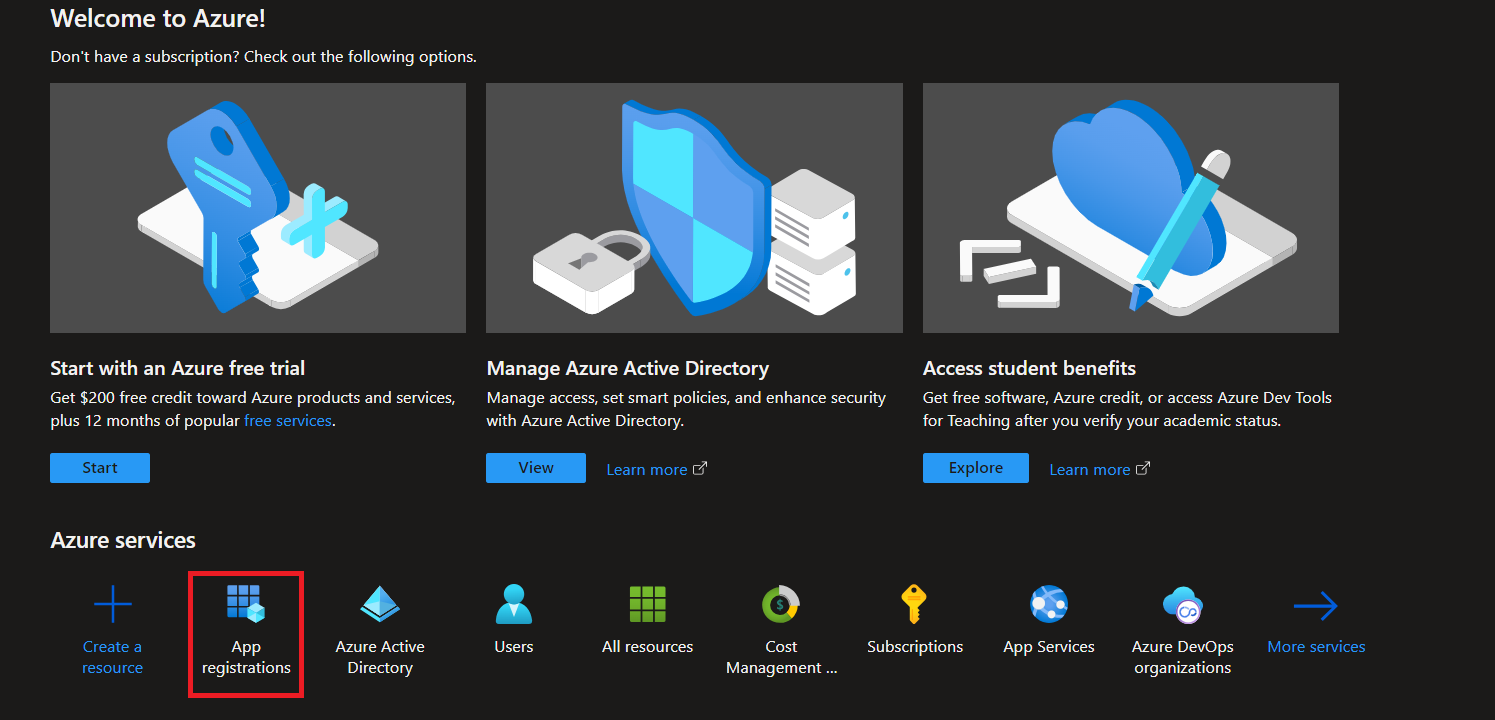
App registration
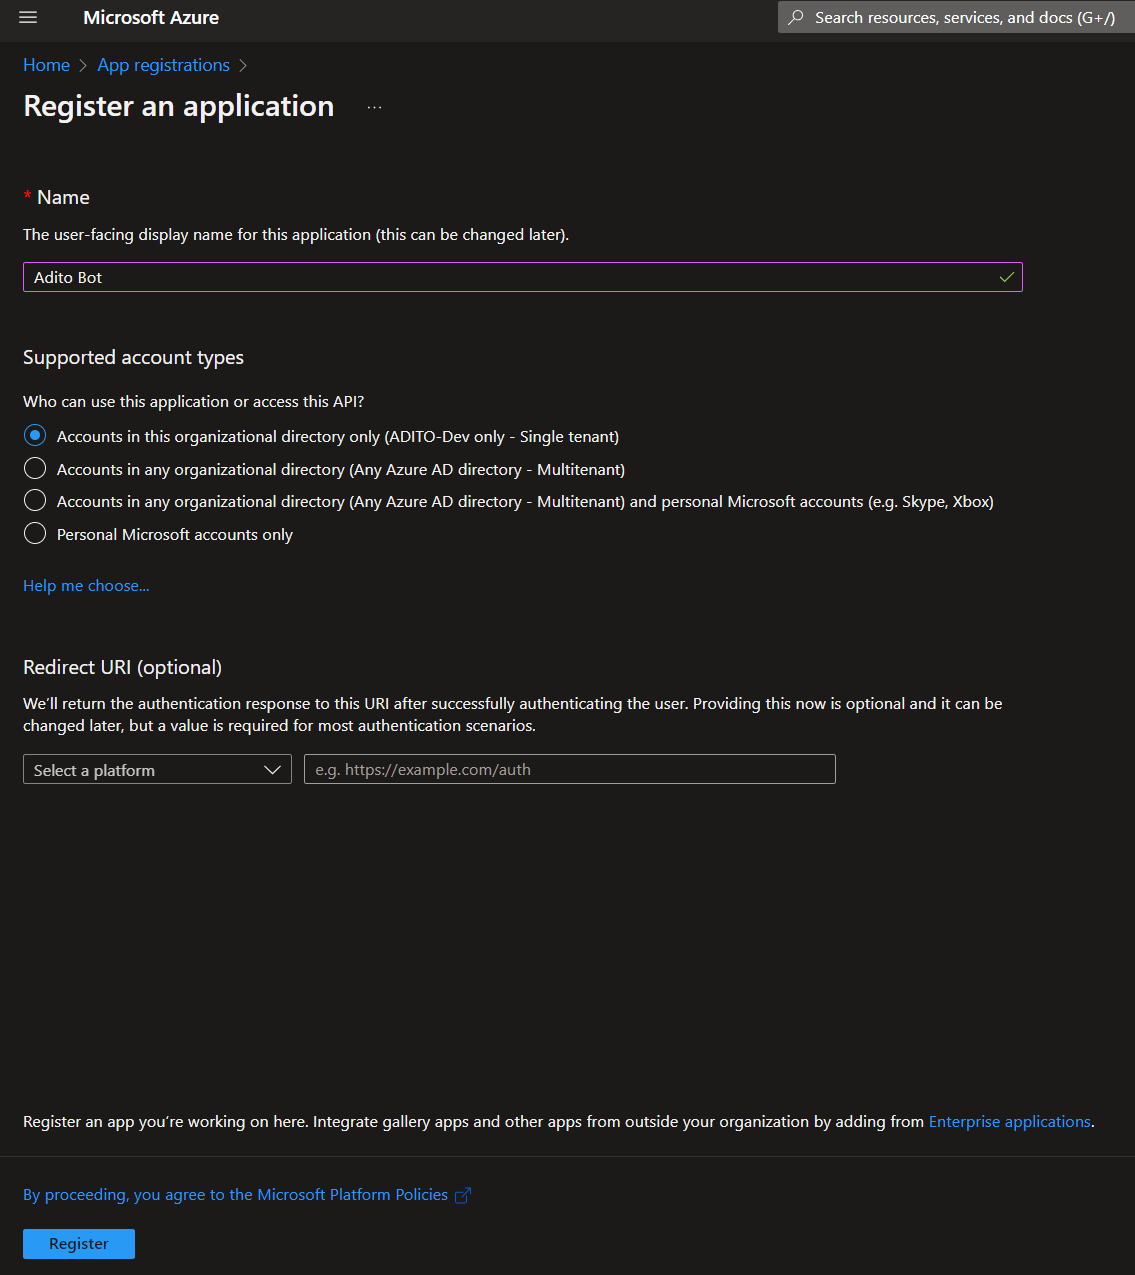
To get started, click the App Registration option under Azure Services on your Start page.
From there you can click on "+ New registration", and then you enter your bot name, in this case it will be "Adito Bot"

To connect this application to your application in the Developer Portal, you will need to copy and paste the "Application (Client) ID" into the Developer Portal, to do this go to the Developer Portal and select your application, then Configure ⇒ Basic Information ⇒ Application (Client) ID.
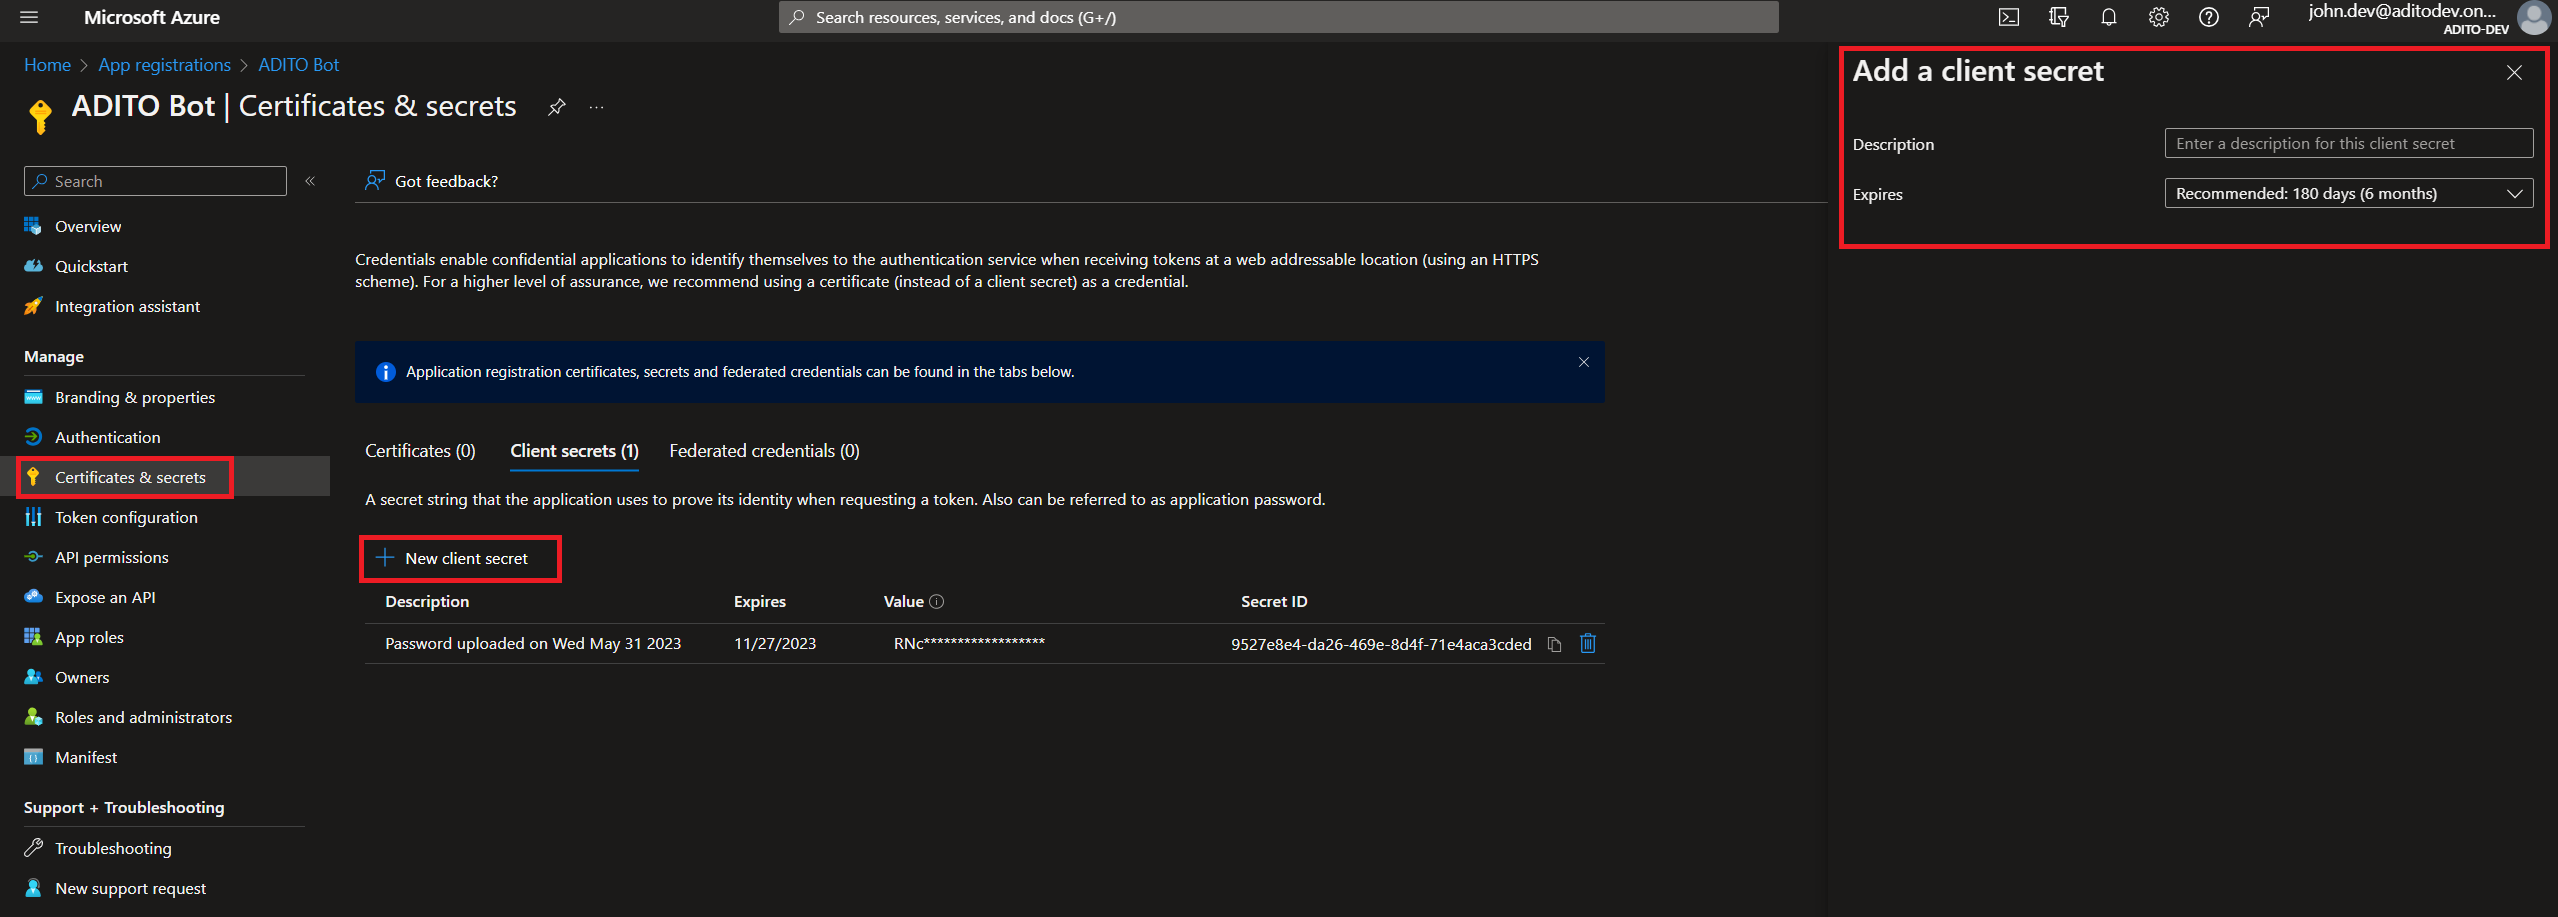
Clientsecret / Botsecret
The key created in this step must be carefully saved. If you close the configuration, you will not be able to retrieve this key!
The next step is to go to "_Certificates & Secrets". Use the "+" button to add a new secret client key and give it a name and expiry date.
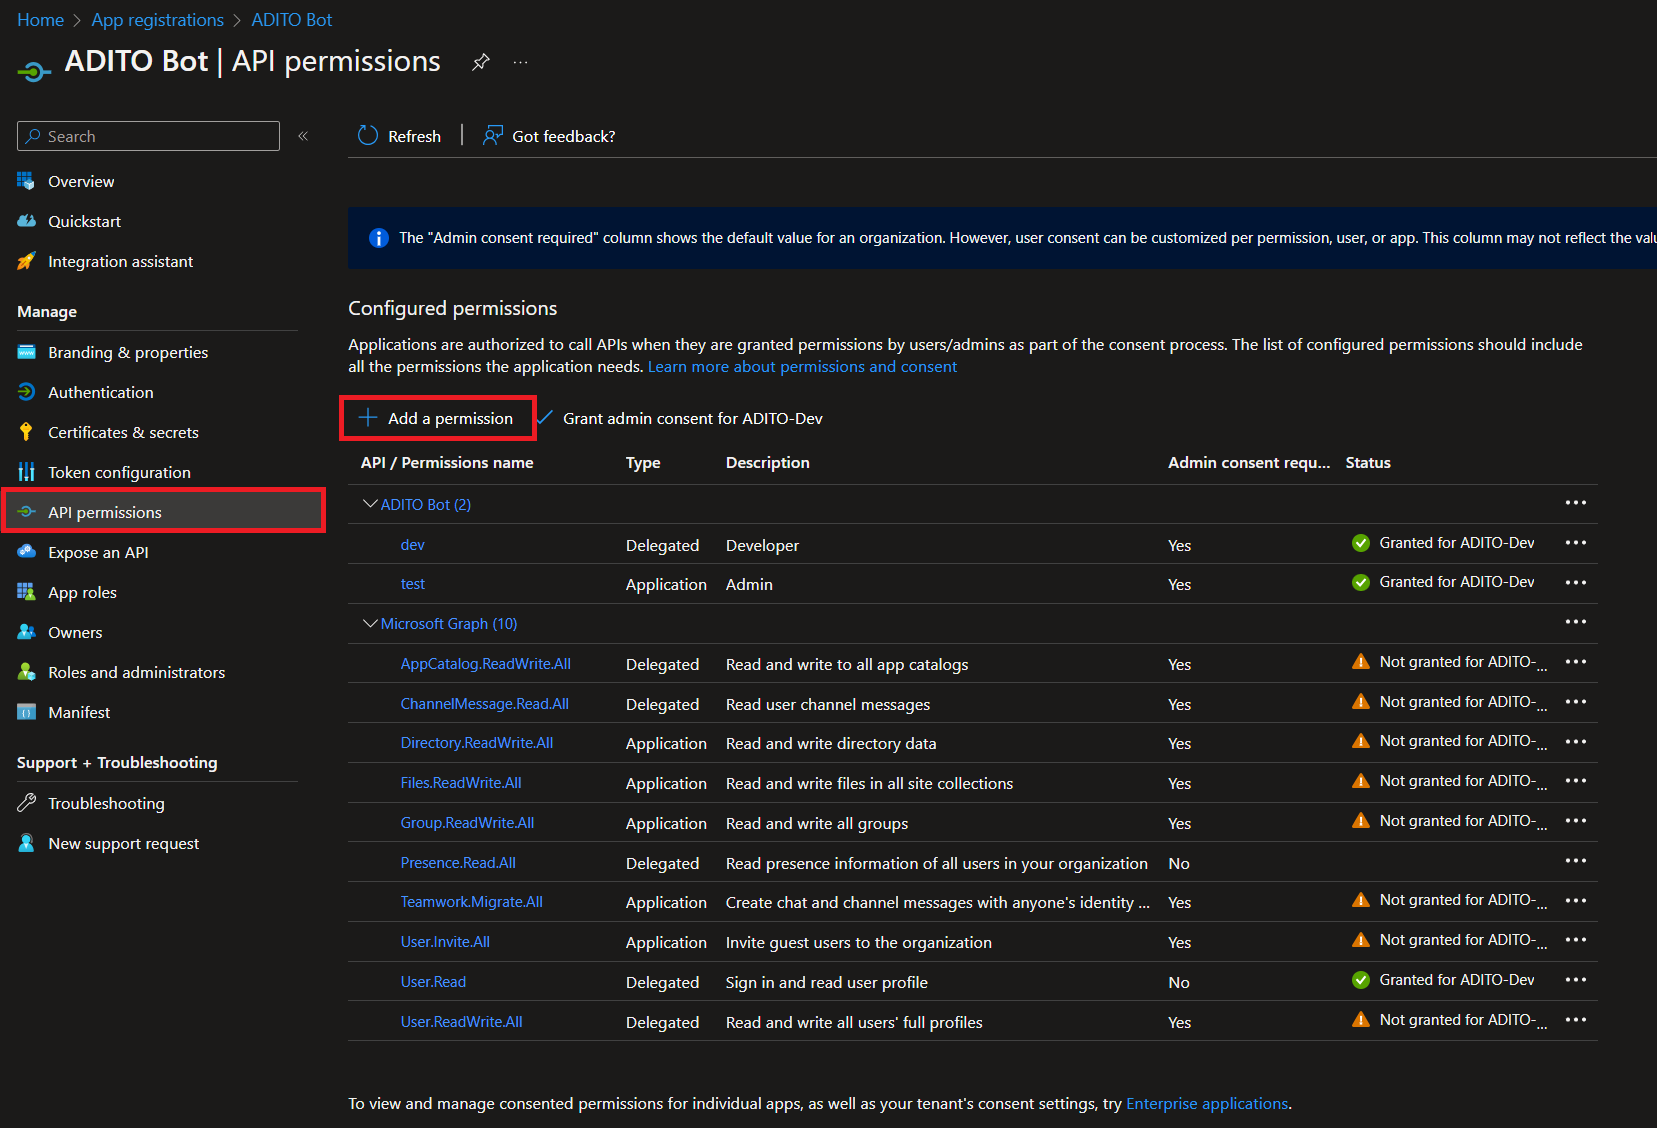
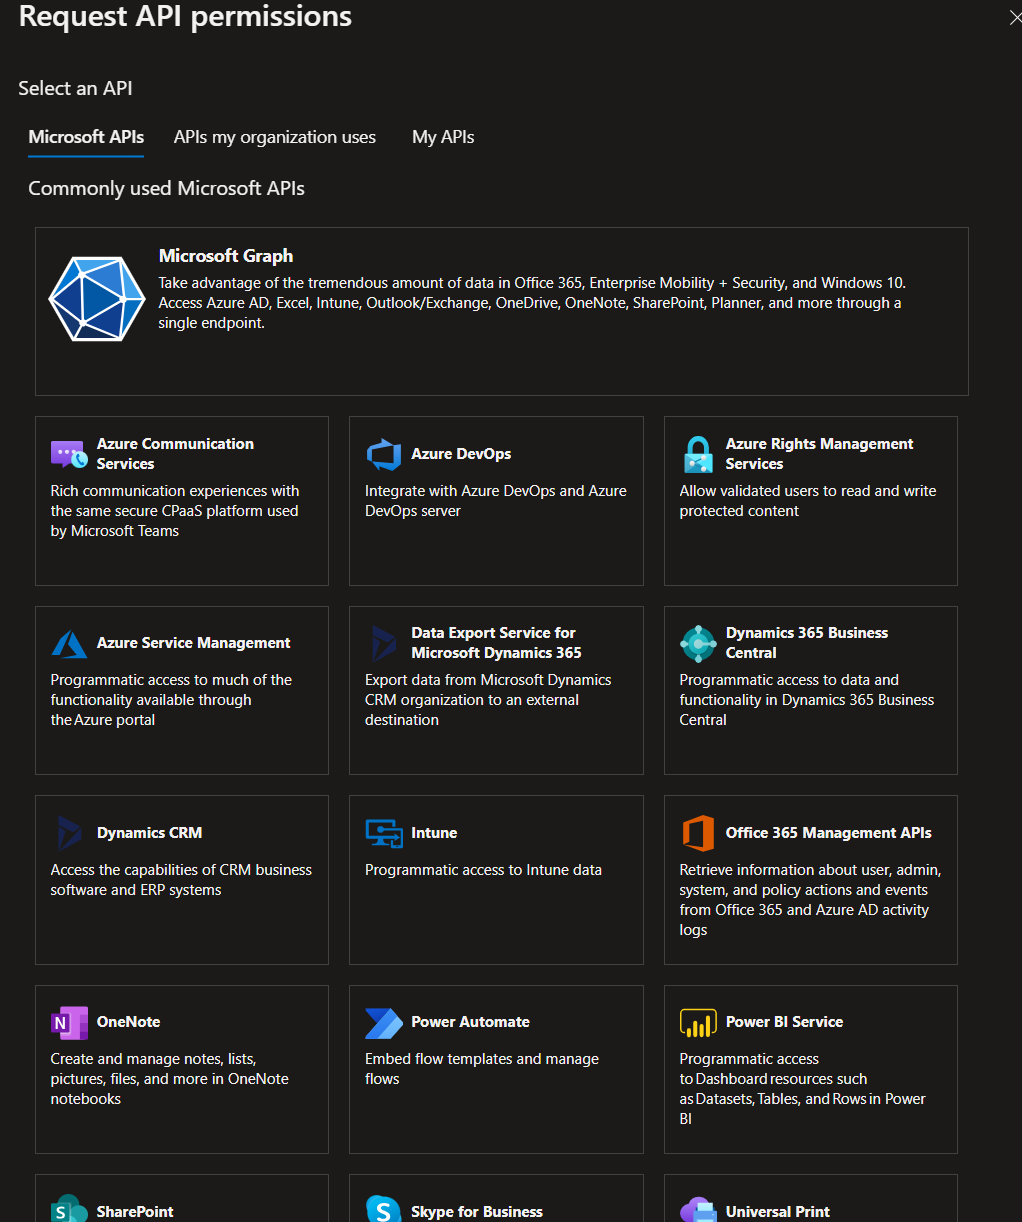
Permissions
To make this application work in your MST, you have to give it some permissions to work as intended, so go to the menu option "API permissions" and choose what permissions your bot should have, in this case we choose many options of "Microsoft Graph".
If an application from ADITO is already stored in the Azure portal, for example because OAuth2 authentication for Exchange is already installed, you can decide which application you want to grant rights to. Either you use the saved application that was automatically created when you registered a new bot, in which case you will need to grant permissions to that application. In this case, the ClientId is identical to the BotId and the ClientSecret is identical to the BotSecret, or you use the already existing application. Then you need to grant permissions to that application. Make sure that the correct data is entered in the appropriate fields in the Designer and that the appropriate permissions have been granted.
Expose an API
To enable the Teams desktop and mobile applications, including the web browser application, you must add a scope and authorise that scope’s client application.
You can do this by following these steps:
First, you add a new scope
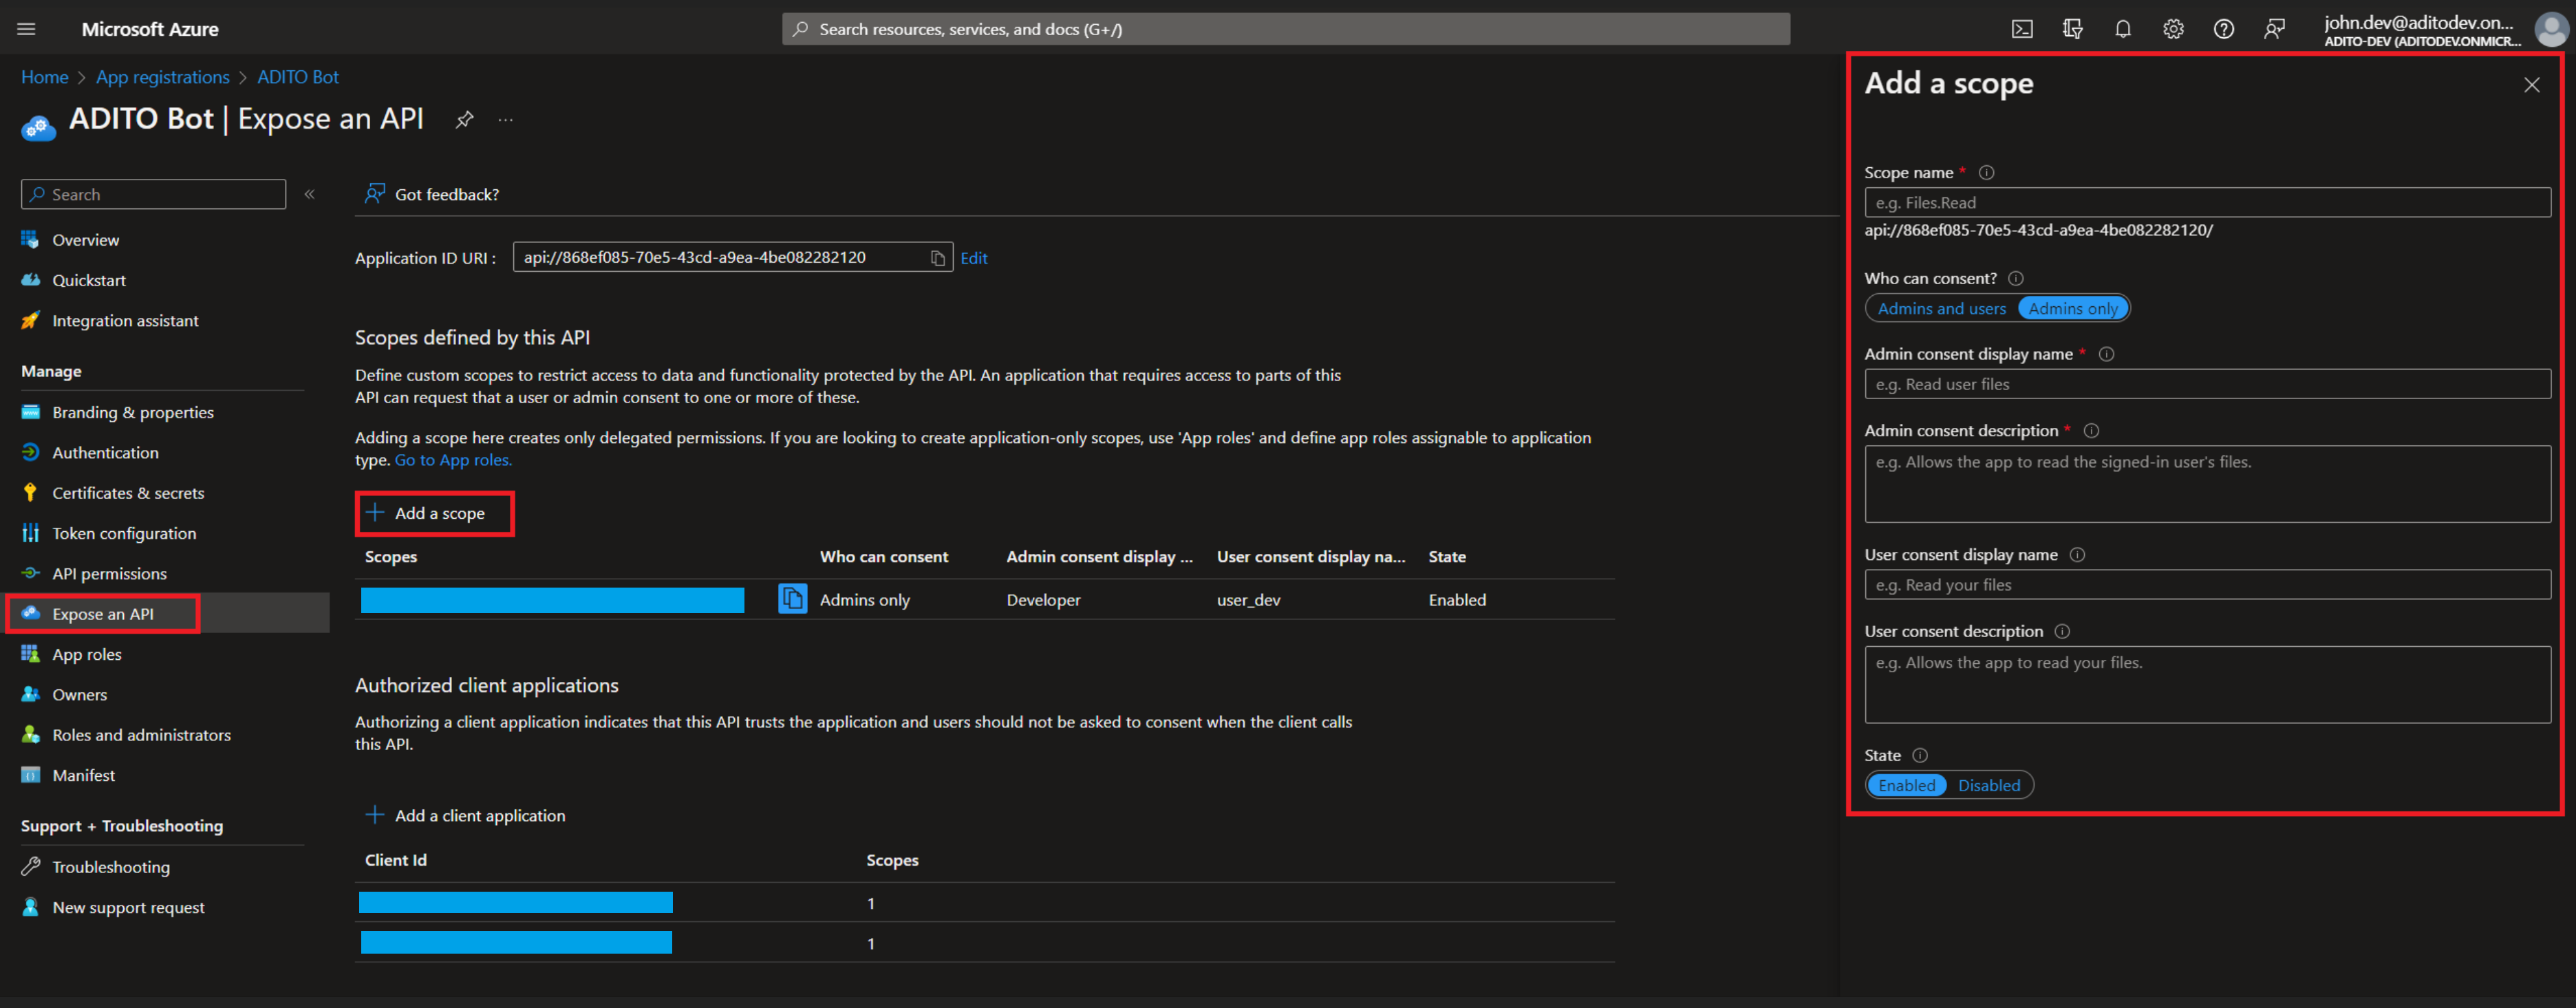
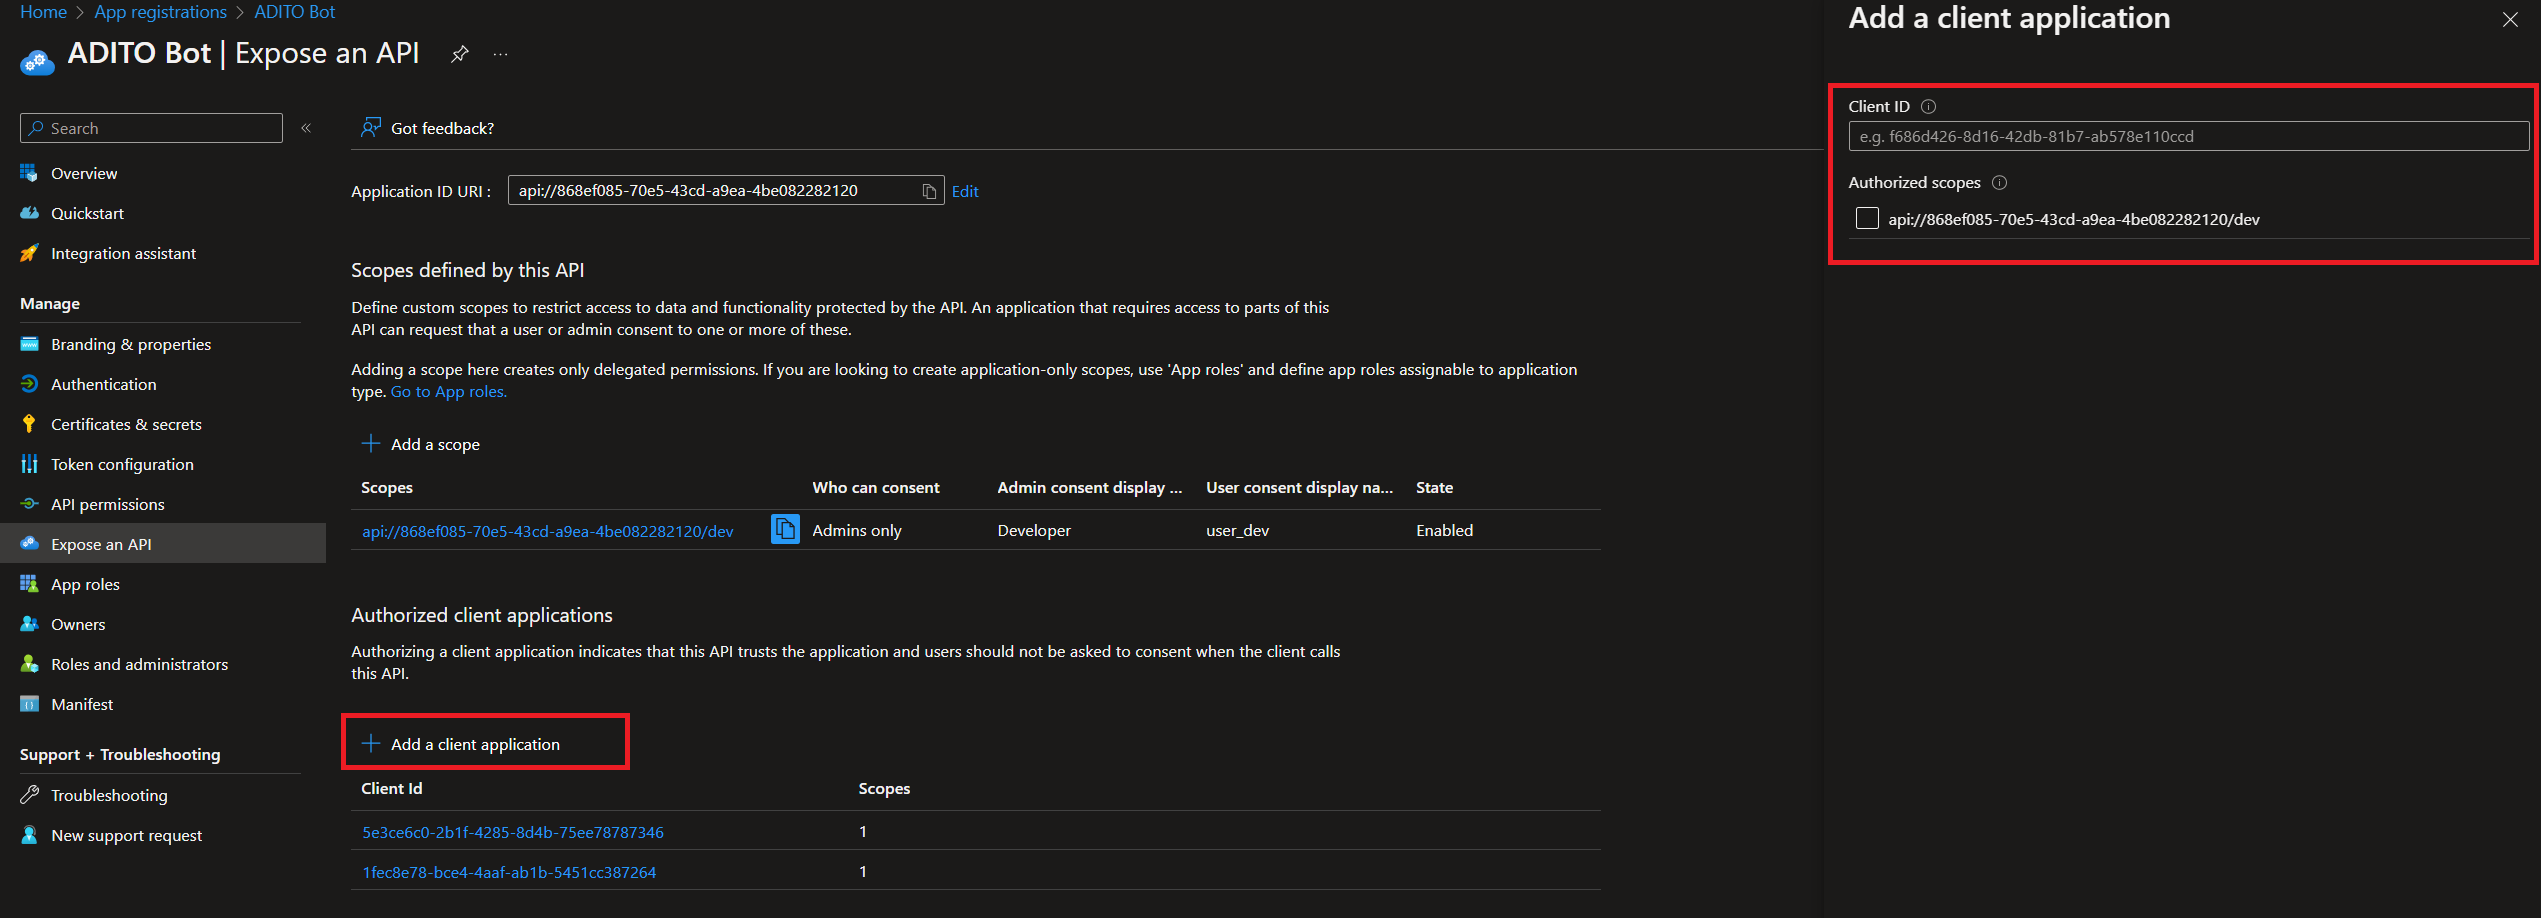
Second, you authorise the Teams desktop and mobile applications, as well as the web browser client IDs.
The following table lists all the API addresses for Microsoft applications.
| Use Client ID | To authorise… |
|---|---|
| 1fec8e78-bce4-4aaf-ab1b-5451cc387264 | Teams mobile or desktop application |
| 5e3ce6c0-2b1f-4285-8d4b-75ee78787346 | Teams web application |
| 4765445b-32c6-49b0-83e6-1d93765276ca | Microsoft 365 web application |
| 0ec893e0-5785-4de6-99da-4ed124e5296c | Microsoft 365 desktop application |
| d3590ed6-52b3-4102-aeff-aad2292ab01c | Outlook desktop application |
| bc59ab01-8403-45c6-8796-ac3ef710b3e3 | Outlook Web App |
| 27922004-5251-4030-b22d-91ecd9a37ea4 | Outlook Mobile Application |
UserAzureUPNs and UserAzureIds
For each active user in the ADITO system 2 new fields have to be filled via the ADITO Designer "azureId" and "azurUpn". Both properties have to be filled with the information from the Azure Portal. Go back to the "Users" menu and select each user. An overview will show all UPNs and IDs of the selected users.
teamsImpersoUser
The ADITO Imperso User is a user that has to be created in your Azure Portal. This user is allowed to read the chat history. The chat histories themselves are not stored in the ADITO system, they are communicated via this user. Only the text you select can be stored in the ADITO database. This user is only available in your company. ADITO decided to implement this Imperso user so that you don’t have to provide any employee data to access the chat histories. If you don’t create this Imperso user, you will not be able to read these chat histories.
Register the aditoImpersoUser in your organisation. To do this, go to your Microsoft Admin Centre, create a new user and provide a licence.
Designerproperties
You must also add this information to the ADITO Designer. The following table explains each property that you can fill. You can find these properties in the instance configuration of your system.
| Property | Explanation |
|---|---|
| teamsEnabled | Enable MST. After enabling this feature, all other properties will be displayed! |
| teamsClientId | Azure Portal ClientId |
| teamsTenantId | TenantId from Azure Portal |
| teamsClientSecret | ClientSecret from the Certificates & Secrets as you created/saved it earlier |
| teamsImpersoUPN | UPN of the Imperso user created for your organisation |
| teamsImpersoPassword | password of the Imperso user created for your organisation |
| teamsImpersoAzureId | AzureId of the Imperso user created for your organisation |
| teamsAppId | AppId from the created application. You can find this Id in your MSTeams Admin Centre → "Manage Apps". |
| teamsEmailInvitationMessage | Default message you receive by email when an external user is added to a new team. |
| teamsRedirectInvitationUrl | URL that redirects the invited user to a website. (Your own website is recommended) |
| teamsBotClientId/teamsClientId | ClientId of the (bot) application you |
| teamsBotSecret/teamsClientSecret | BotSecret from the (bot) application you created (in Azure) |